
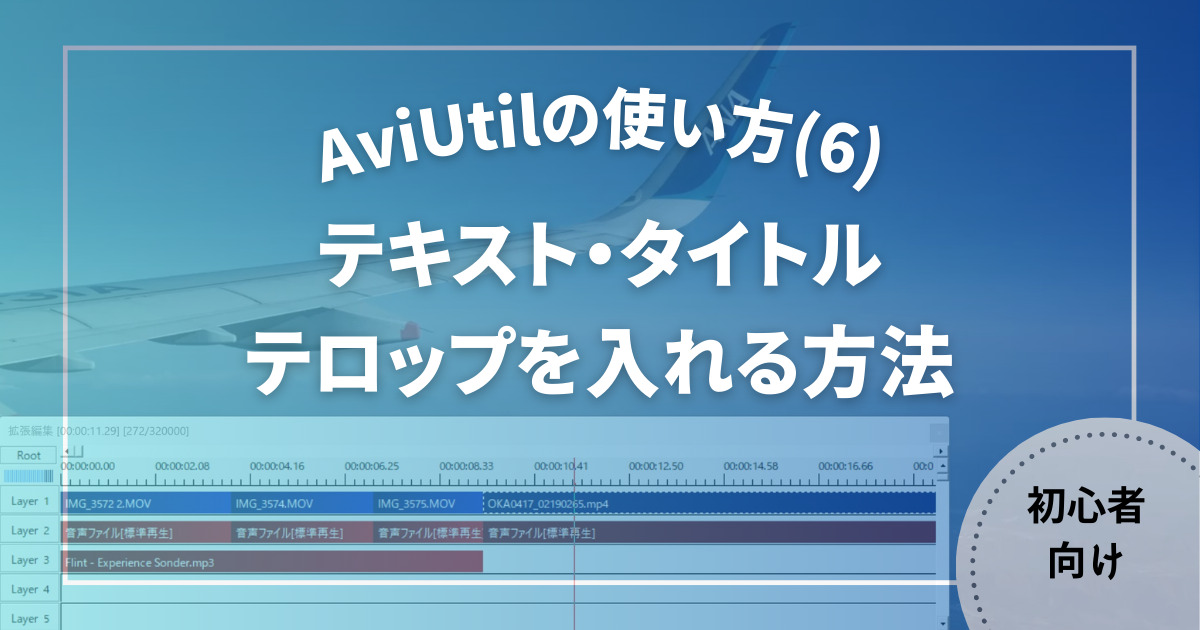

AviUtilでテキストを入れるにはどうしたらいい?
 Hideki
メディアオブジェクトを追加します!
Hideki Kobayashi。小さな会社の経営者。2021年より大川優介さんの動画講座OneSe Personalを受講。シネマティックVlogの撮影と編集を習得。2023年「日本で最も美しい村 動画コンテスト2022」でグランプリを受賞。動画編集ソフトはPremiereProとDavinci Resolveを主に使用。詳細はプロフィールをご覧下さい。
→ Macで使う旅Vlog動画編集ソフトおすすめ6選!初心者から上級者まで
→ Windowsで使う旅Vlog動画編集ソフトおすすめ5選!
テキスト・タイトル・テロップを入れる方法
AviUtilには、タイトルやテロップといったプリセットはありません。
ですので、テキストを入れて大きさや場所や装飾を変えて使います。
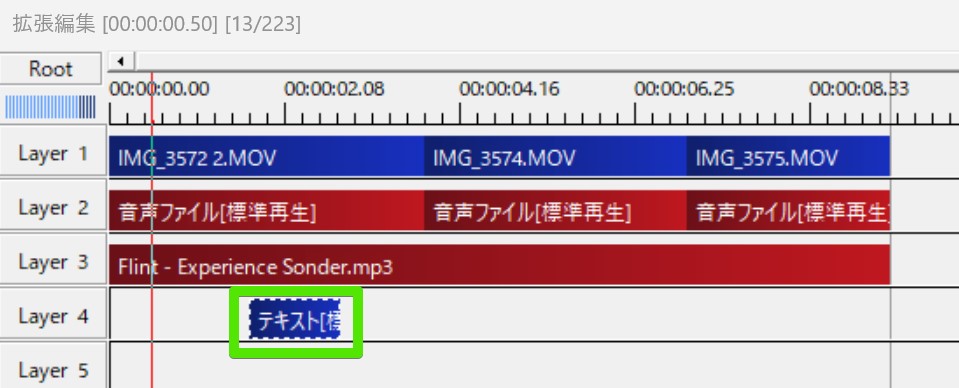
前回の記事でLayer3にはBGM音楽クリップが入っています。
Layer4にテキストクリップを入れましょう!
Layer4上のテキストを入れたい場所で、右クリックし「メディアオブジェクトの追加」ー「テキスト」をクリックします。
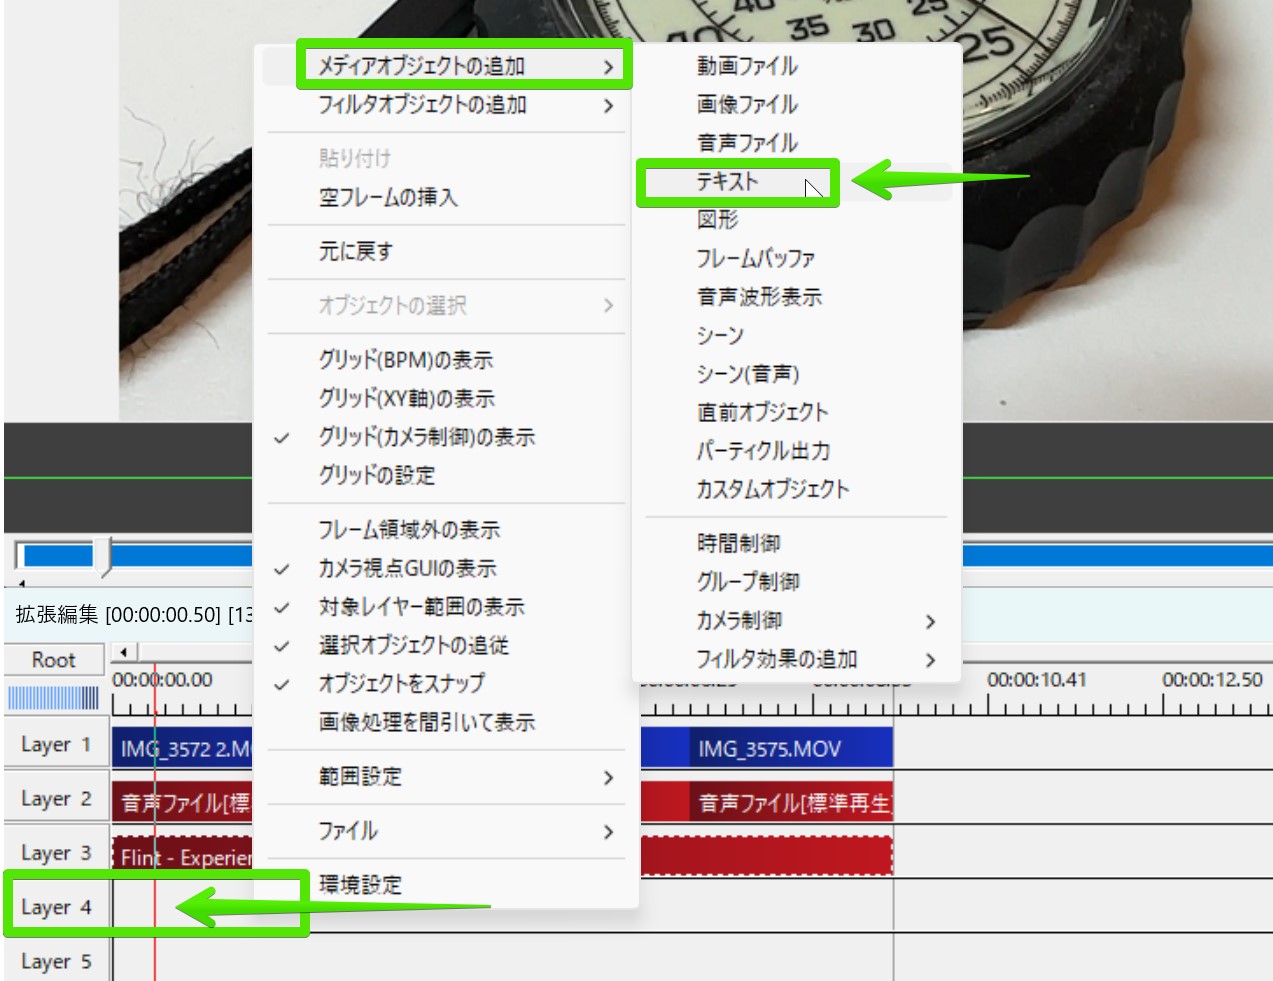
Layer4上にテキストクリップが現れました。
テキストの編集方法
テキストクリップをダブルクリックしてみましょう。
テキストウィンドウが現れます。
一番下のボックスに文字を入力します。
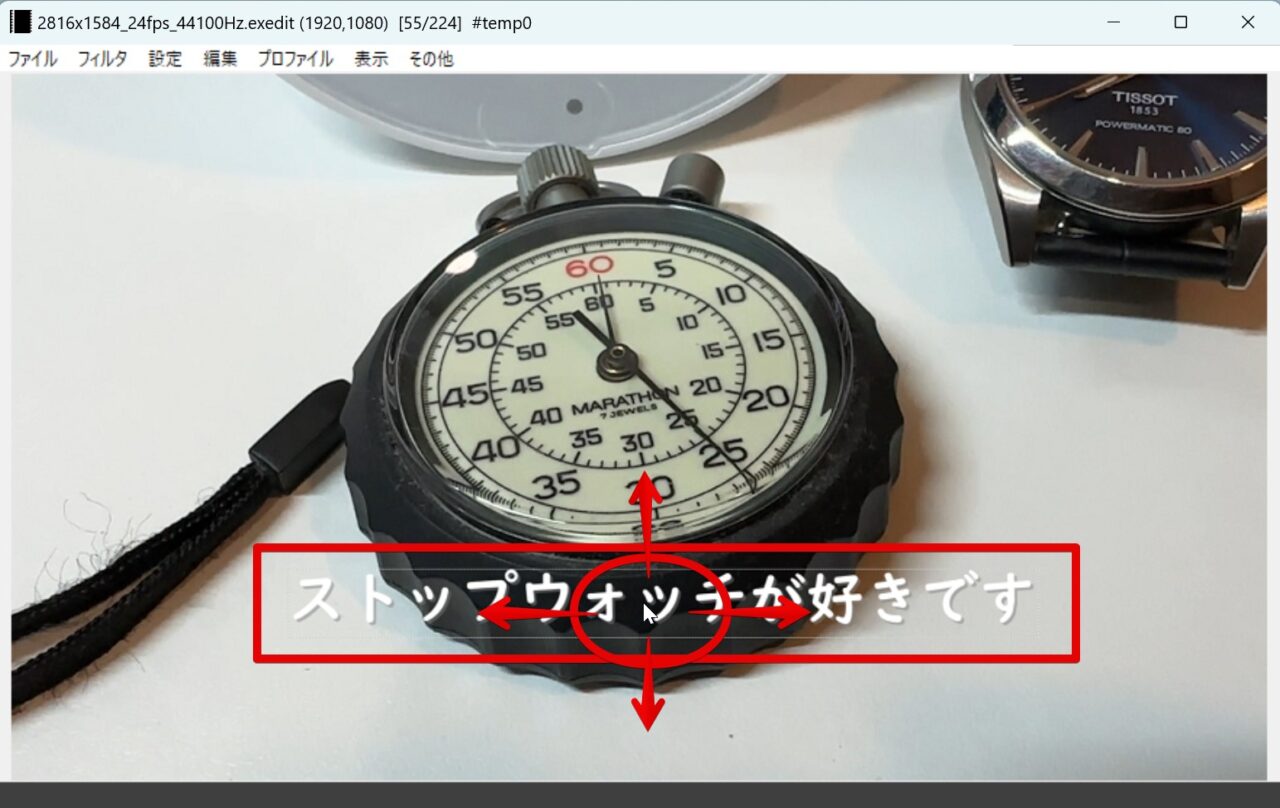
メインウィンドウ上のプレビューに文字が入ります。
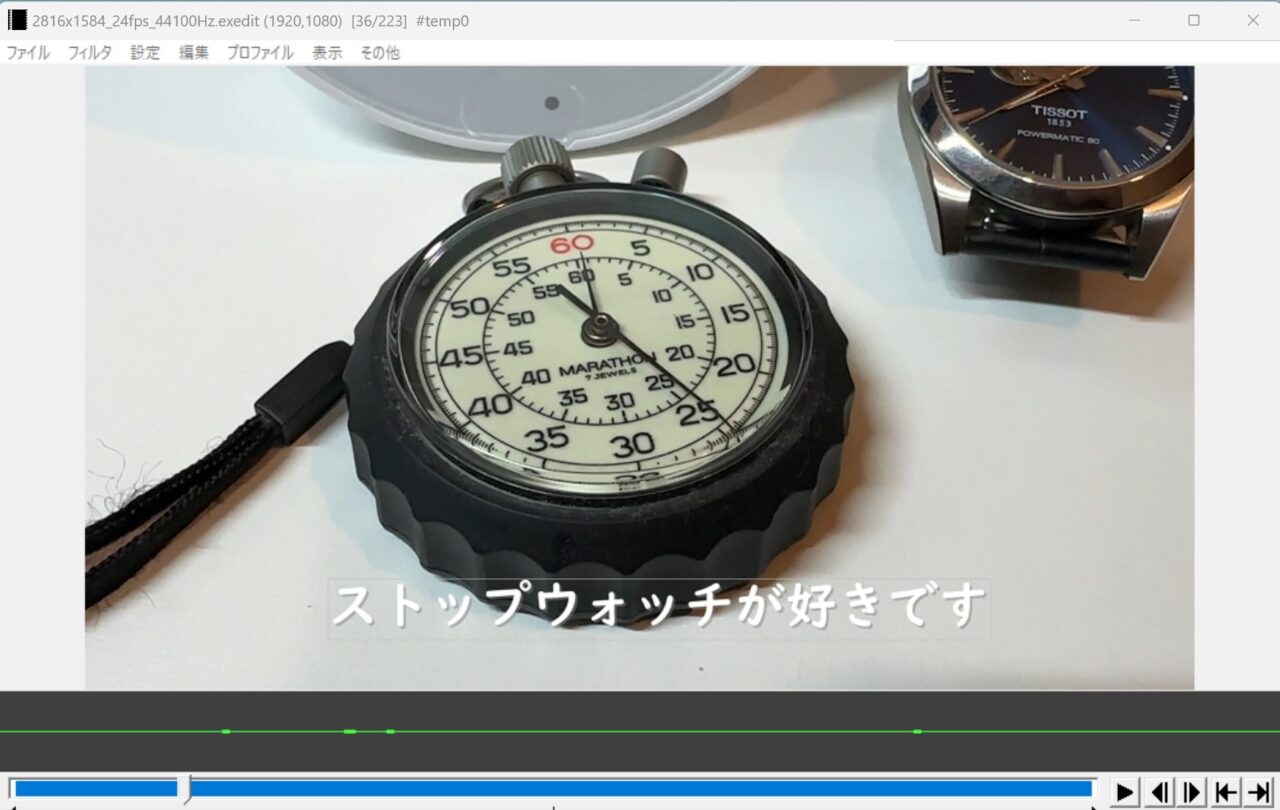
タイムライン上のテキストクリップに再生ヘッドを合わせて確認します。
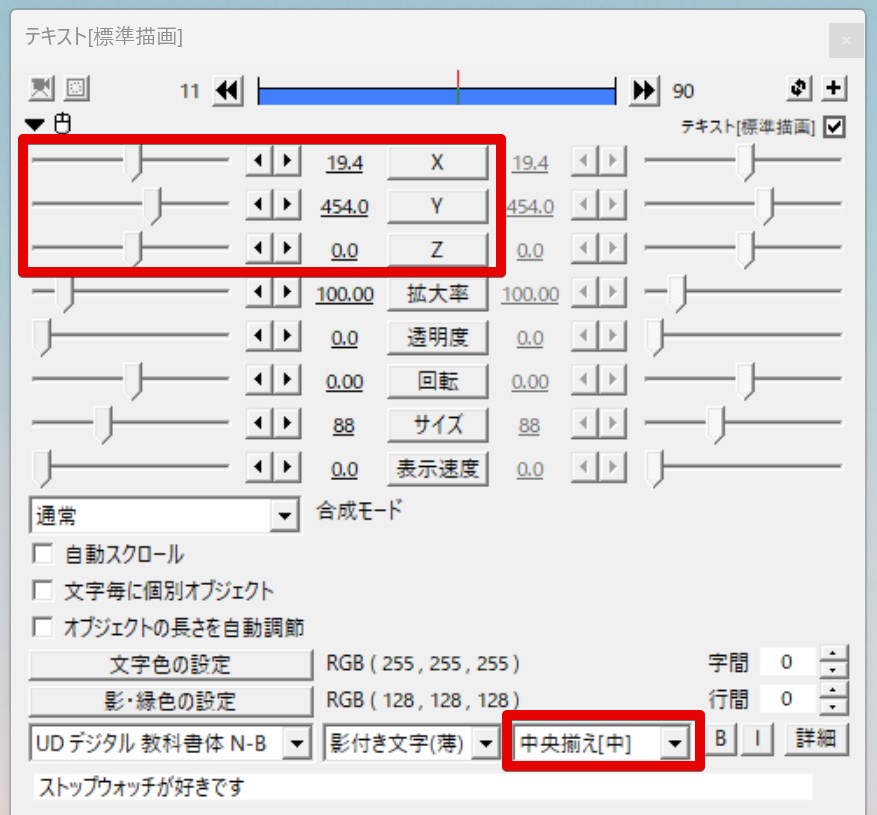
テキストの大きさ・フォント・スタイルを変える方法
デフォルトではサイズが小さすぎるので「サイズ」のスライダーを右に動かし大きくします。
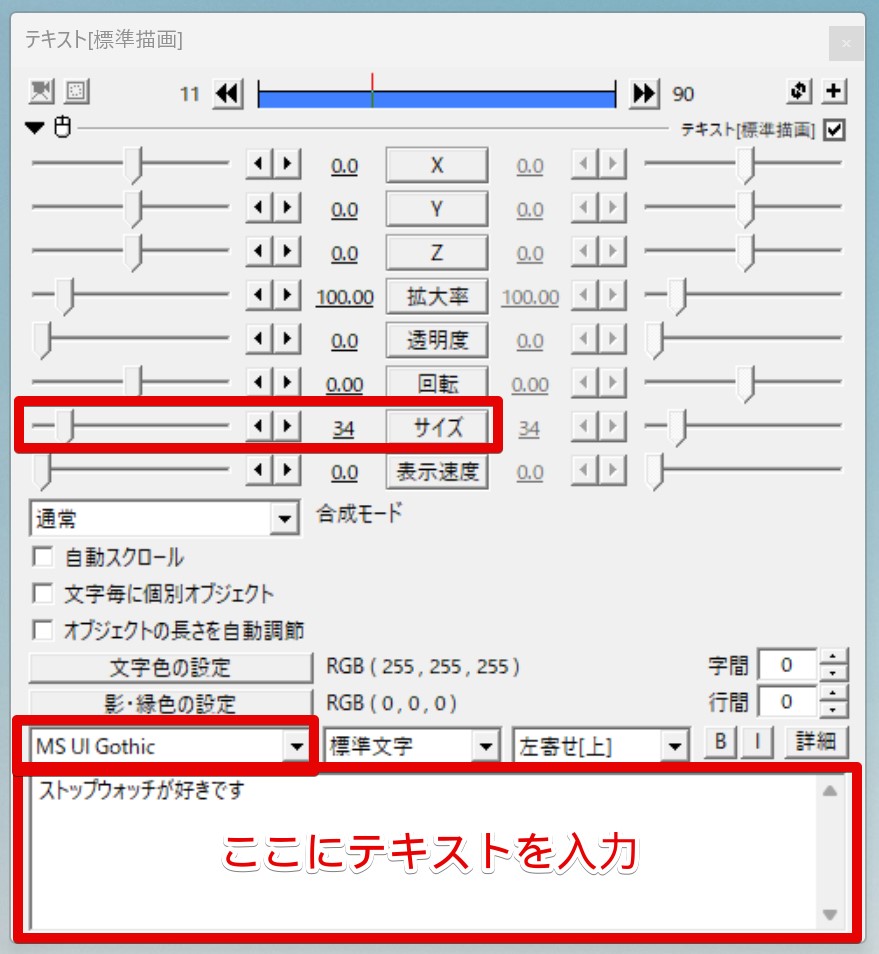
テキスト入力ボックスの上にあるフォントボックスでフォントを変えることができます。
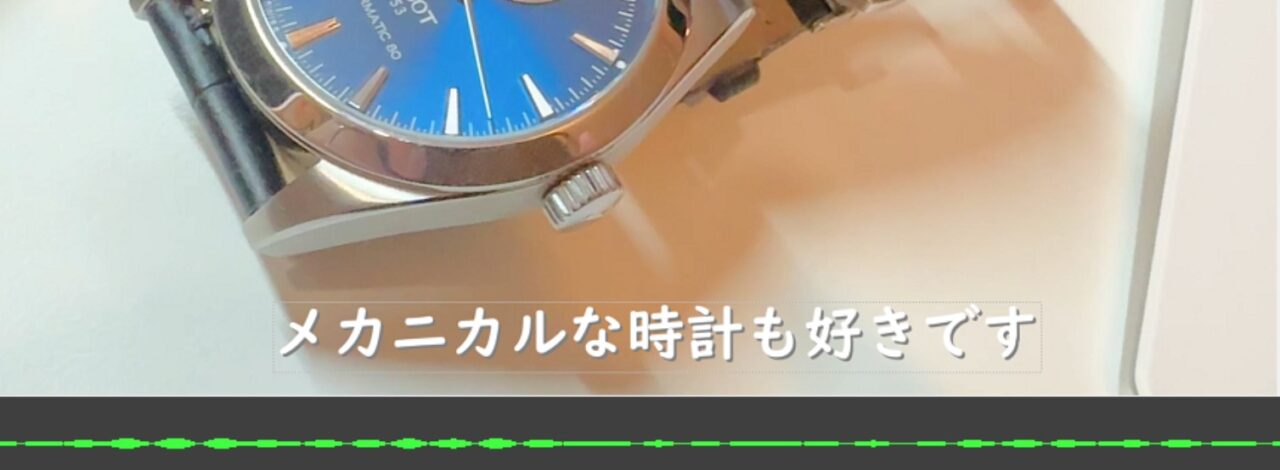
またその横の「標準文字」とあるスタイルボックスでは、簡単に文字表示のスタイルを変えることができます。
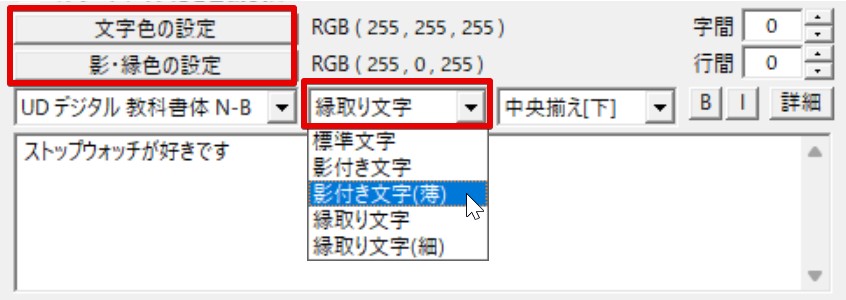
「標準文字」を「影付き文字(薄)」にしてみました。
テキストの位置を変える方法
テキストの位置は、テキストウィンドウで細かく指定できます。
また、位置揃えボックスから選択もできます。
私はよく「中央揃え[中]」を使います。
さらに、プレビュー内のテキストをドラッグしても位置を変えることができます。
テキストの色を変える方法
「文字色の設定」で色を変えることができます。

テキストに影を入れる方法
「影付き文字」「影付き文字(薄)」でテキストに影を入れることができます。
「影・縁色の設定」で影の色を変えることもできます。
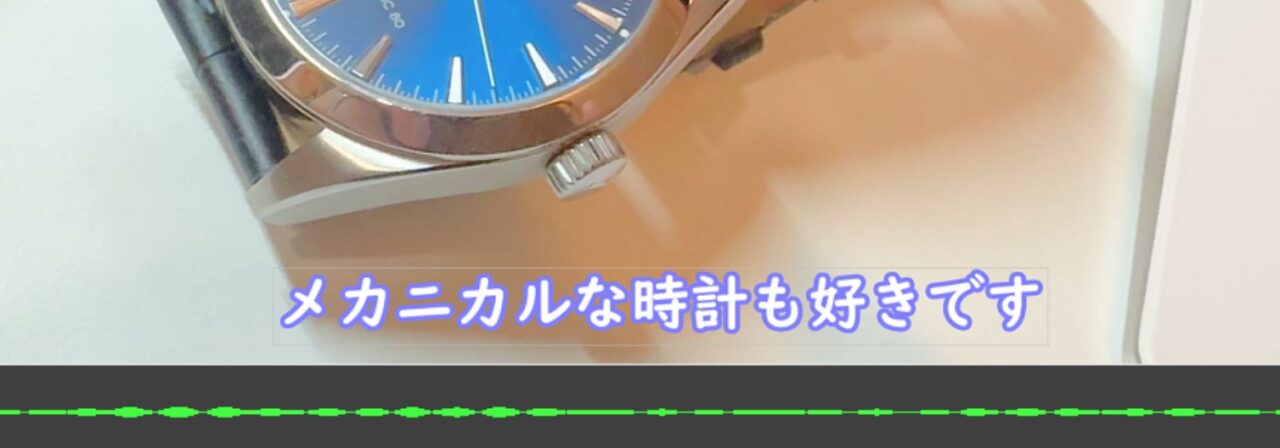
テキストに縁取りを入れる方法
「縁取り文字」で文字に縁取りを入れることができます。
「影・縁色の設定」で縁取りの色を変えることができます。
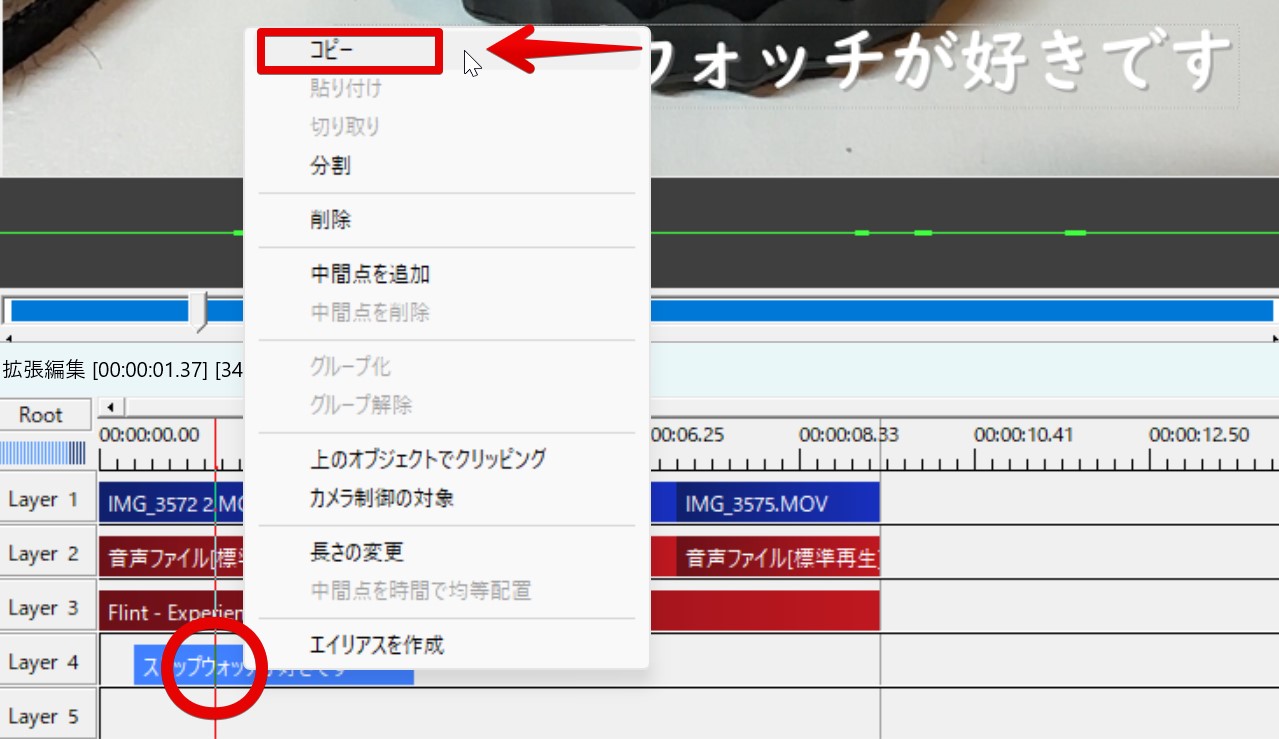
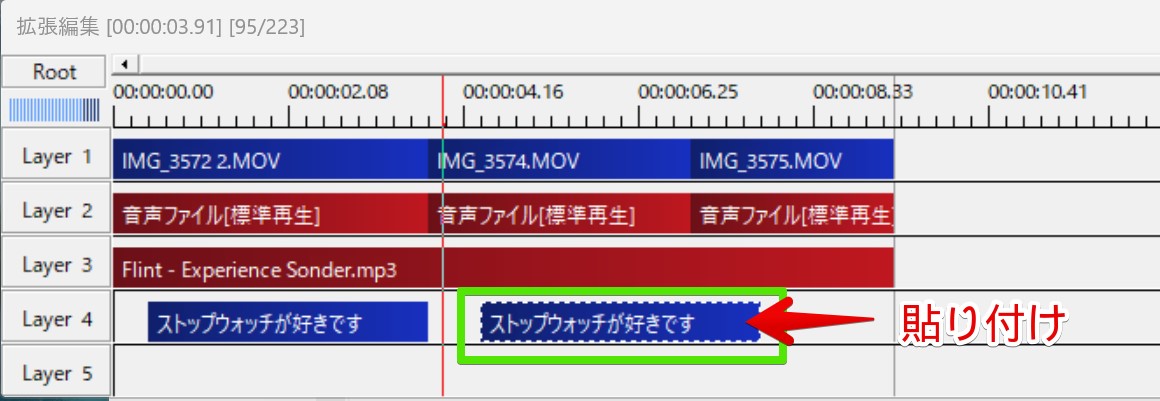
テキストをコピーする方法
同じテキストスタイルを一から設定し直すのは大変です。
コピーして、文字だけを入れ替えましょう!
テキストクリップを選択し、右クリックで「コピー」をクリックします。
テキストを入れたい場所で「貼り付け」します。
AviUtilの使い方記事一覧
- (1)特徴・メリット・デメリット・私の感想
- (2)ダウンロード・インストール・プラグイン導入方法
- (3)初期設定・タイムラインの表示方法
- (4)基本操作解説 カット編集から書き出しまで
- (5)BGMを入れフェードアウトさせる方法
- (6)テキスト・タイトル・テロップを入れる方法
- (7)シーンチェンジ(トランジション)を入れる方法
まとめ
いかがでしたでしょうか?
私はシンプルな「影付き文字(薄)」が使いやすいなと感じました。
AviUtilは2K(1920*1080)なら快適に編集できます。
ただ、少し導入が大変。。
初心者には敷居が高い動画編集ソフトです。
→ Macで使う旅Vlog動画編集ソフトおすすめ6選!初心者から上級者まで
→ Windowsで使う旅Vlog動画編集ソフトおすすめ5選