

Filmeでエフェクトを入れるにはどうしたらいいだろう?
 Hideki
作例を作りながら解説します!
Hideki Kobayashi。小さな会社の経営者。2021年より大川優介さんの動画講座OneSe Personalを受講。シネマティックVlogの撮影と編集を習得。2023年「日本で最も美しい村 動画コンテスト2022」でグランプリを受賞。動画編集ソフトはPremiereProとDavinci Resolveを主に使用。詳細はプロフィールをご覧下さい。
エフェクトを入れる方法
こちらでは控えめなエフェクトとして、「フィルター」のかけ方を解説します。
画面左上にある「フィルター」タブをクリックします。
フィルター一覧が出るので「フィルム」をクリックします。
サムネイルの中から「Film」を選んで、タイムライン上の適用したいクリップへドラッグ&ドロップします。
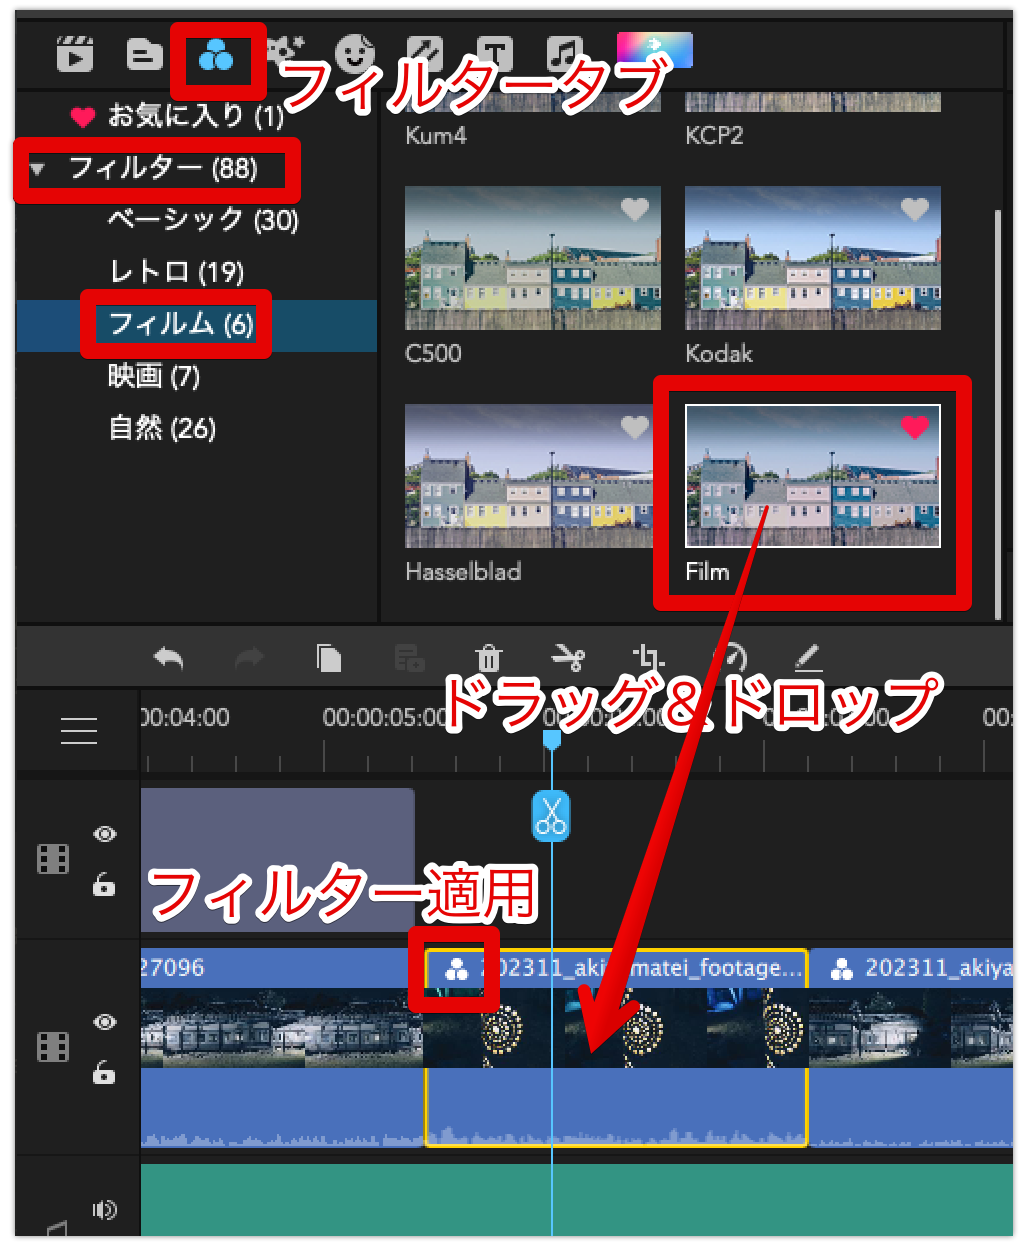
タイムライン上のクリップの左上にフィルターを適用していることを示すアイコンが表示されます。
クリップをダブルクリックすると、画面右上にプロパティパネルが現れます。
ただ、ここで色フィルターの強度を調節することはできません。
削除が可能なだけです。^^;
 Hideki
あまり派手なエフェクトは使いたくない派です^^;
トランジションを入れる方法
トランジションは場面転換のエフェクトです。
ここではトランジションで代表的な「クロスフェード」のやり方を解説します。
- 画面左上の「トランジションタブ」をクリック
- スピードブラーを選択
- 「Fade」を適用したいクリップ間にドラッグ&ドロップ
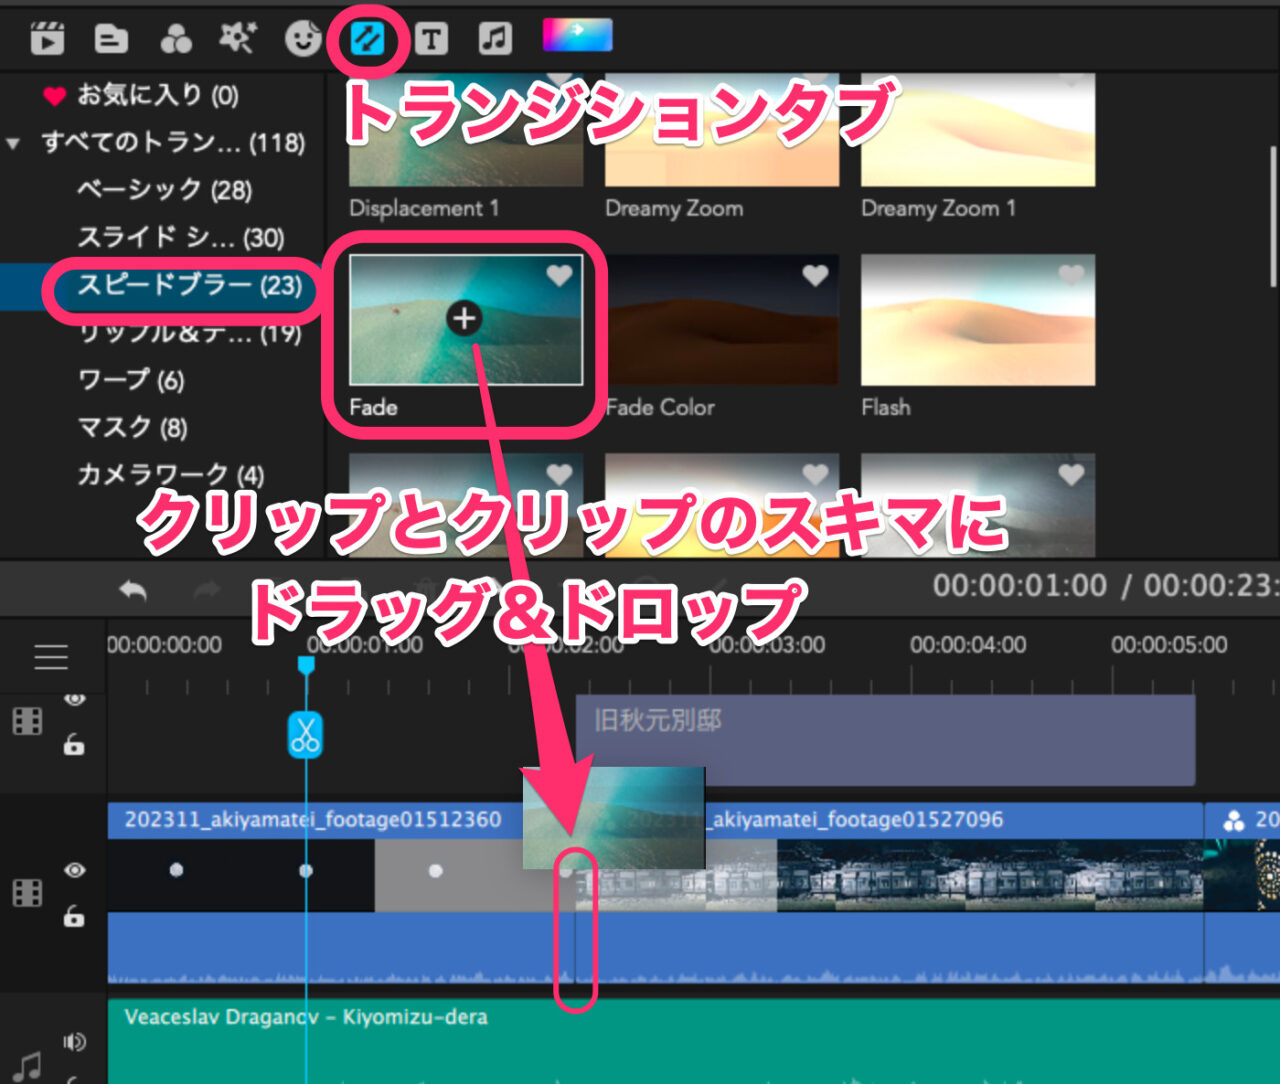
プレビュー再生でチェックしてみましょう!
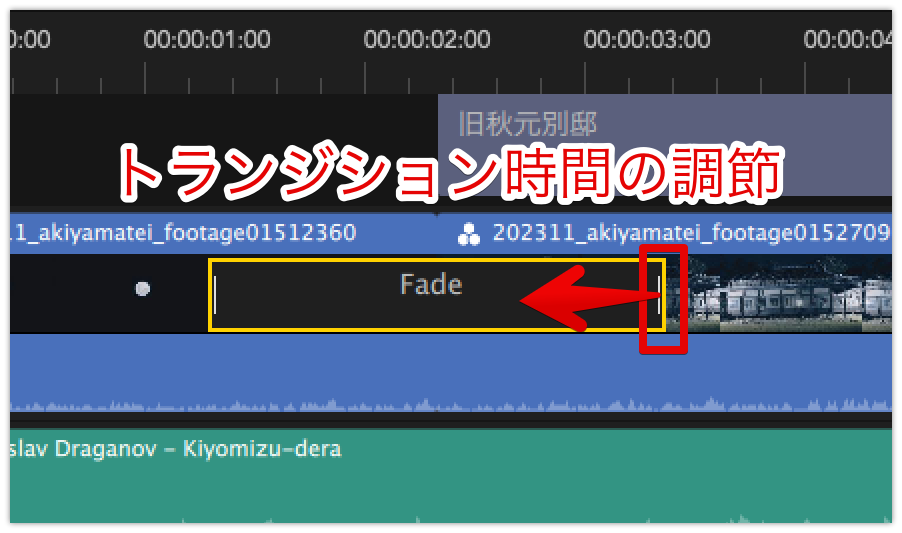
トランジションの長さは、タイムライン上のトランジションクリップの端をつまんでドラッグすることで調節できます。
Filme(フィルミ)使い方記事一覧
- 特徴・インストール方法
- 基本操作解説 カット編集から書き出しまで
- BGM音楽を入れる方法
- テキスト文字を入れる方法
- エフェクト・トランジションを入れる方法 <イマココ
- 書き出し方
まとめ
いかがでしたでしょうか?
Filme(フィルミ)では、エフェクトやトランジションを簡単に入れることが出来ます。
ただ、色フィルターについては、適用する強度を調節できません。
私がよく使っているPowerDirector 365では、フィルターをもっと細かく調節ができます。
種類も豊富にあり実用的なものばかりです。
PowerDirector 365には無料お試し版もあるのでぜひ一度試してみてください。