


AvidのMedia Composer Firstのエフェクトやトランジションを入れる方法を知りたい!
 Hideki
作例を作りながら解説していきます!
AvidのMedia Composer Firstは、Windows,Macで使えるソフトです。
いくつかラインナップがありますが、この記事では無料版である「First」の使い方を解説していきます!
Hideki Kobayashi。小さな会社の経営者。2021年より大川優介さんの動画講座OneSe Personalを受講。シネマティックVlogの撮影と編集を習得。2023年「日本で最も美しい村 動画コンテスト2022」でグランプリを受賞。動画編集ソフトはPremiereProとDavinci Resolveを主に使用。詳細はプロフィールをご覧下さい。
エフェクトを入れる方法
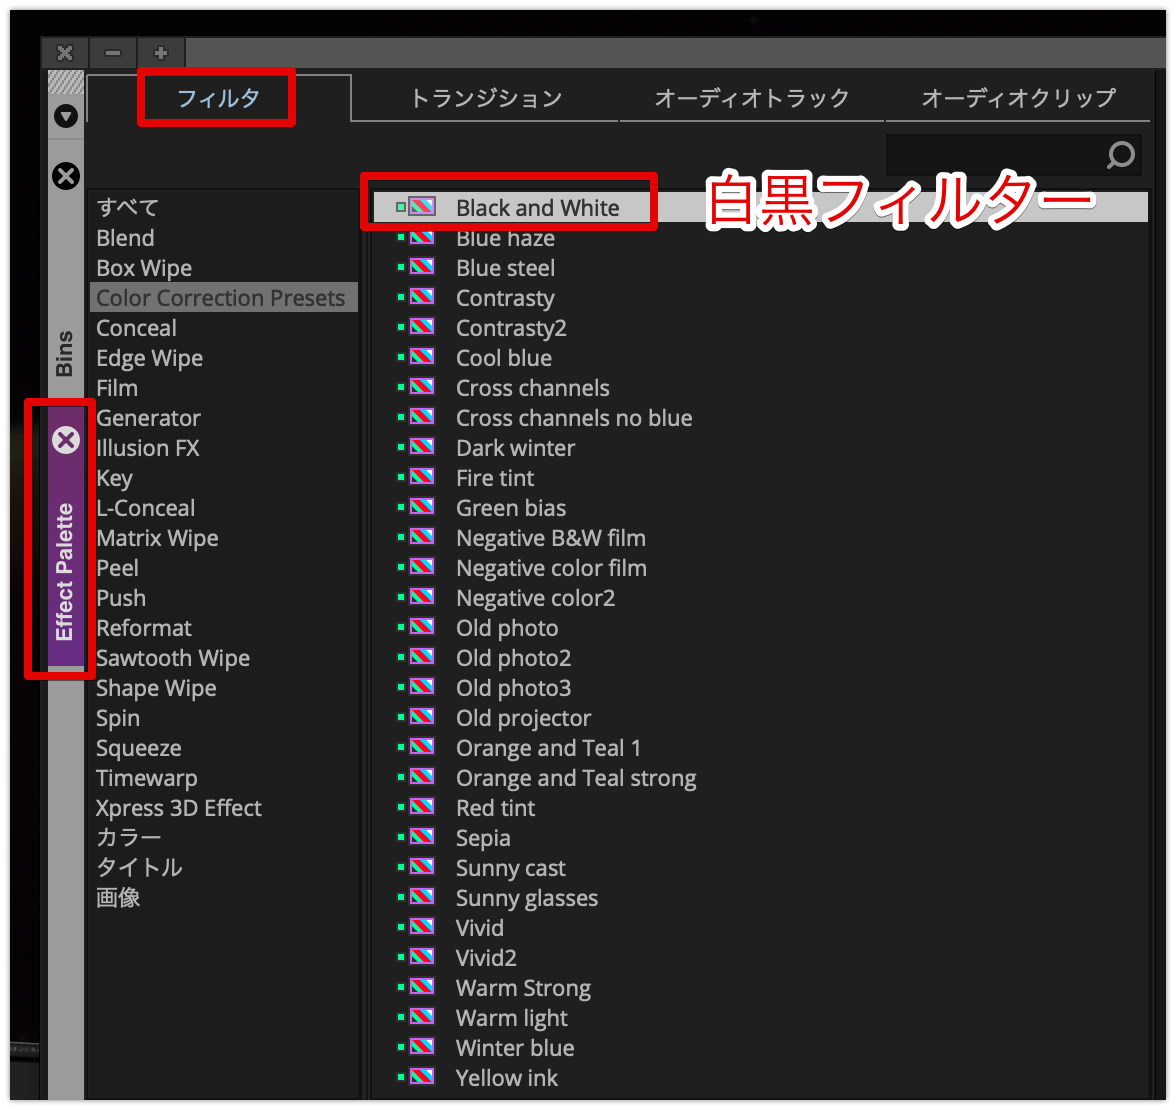
Avid Media Composer Firstでエフェクトを入れるには、「Effect Palette」タブ内から選択して使用します。
まず、画面左上のメディアパネルの左端にある「Effect Palette」タブをクリックします。
Effect Palette内の上部にあるタブから「フィルター」タブをクリックします。
今回は「Black and White(白黒)」フィルターを使ってみます。
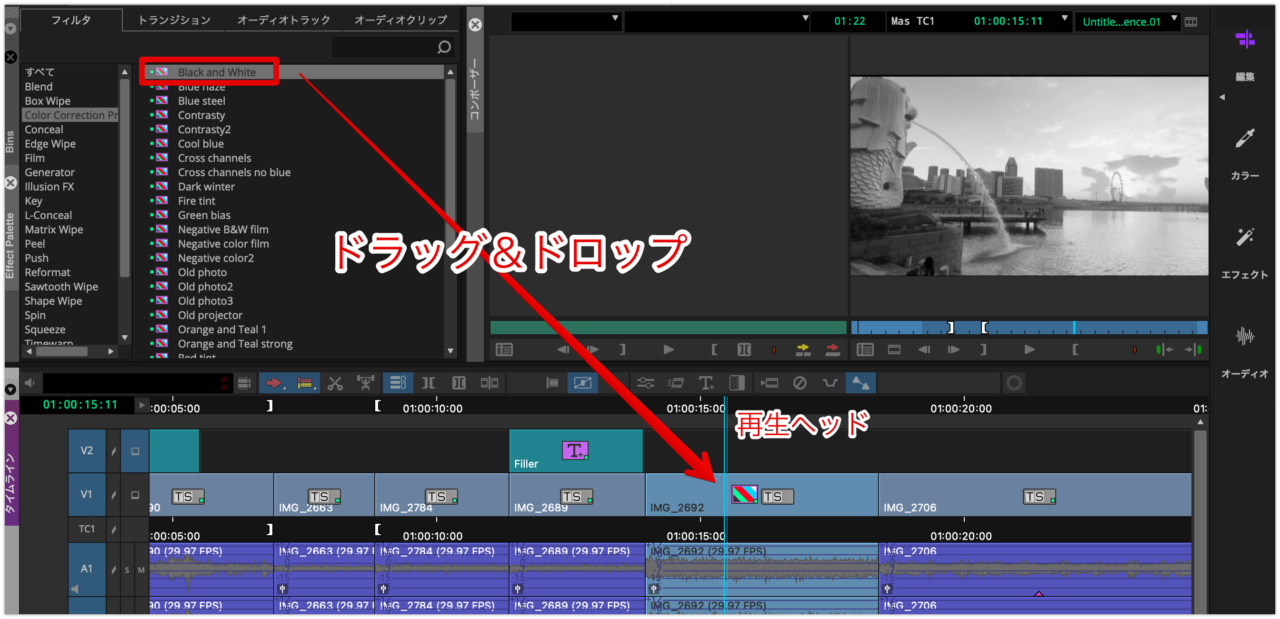
フィルターエフェクトの適用は簡単です。
フィルターを選択して、適用させたいクリップにドラッグ&ドロップするだけです。
再生ヘッドを合わせておけば、すぐにプレビューで効果を確認できます。
他のフィルターエフェクトを試したい場合は、すぐに「command + Z」でUNDOして、次のフィルターを試してみましょう。
トランジションを入れる方法
トランジションは場面転換のためのエフェクトです。
代表的なトランジションに「ディゾルブ」があります。
今のクリップから次のクリップへ映る時に、少しづつ映像が重なりながら場面転換していきます。
まず、画面左上のメディアパネル左端にある「Effect Palette」タブをクリックします。
Effect Palette内の上部にあるタブから「トランジション」タブをクリックします。
今回は「ディゾルブ」トランジションを使ってみます。
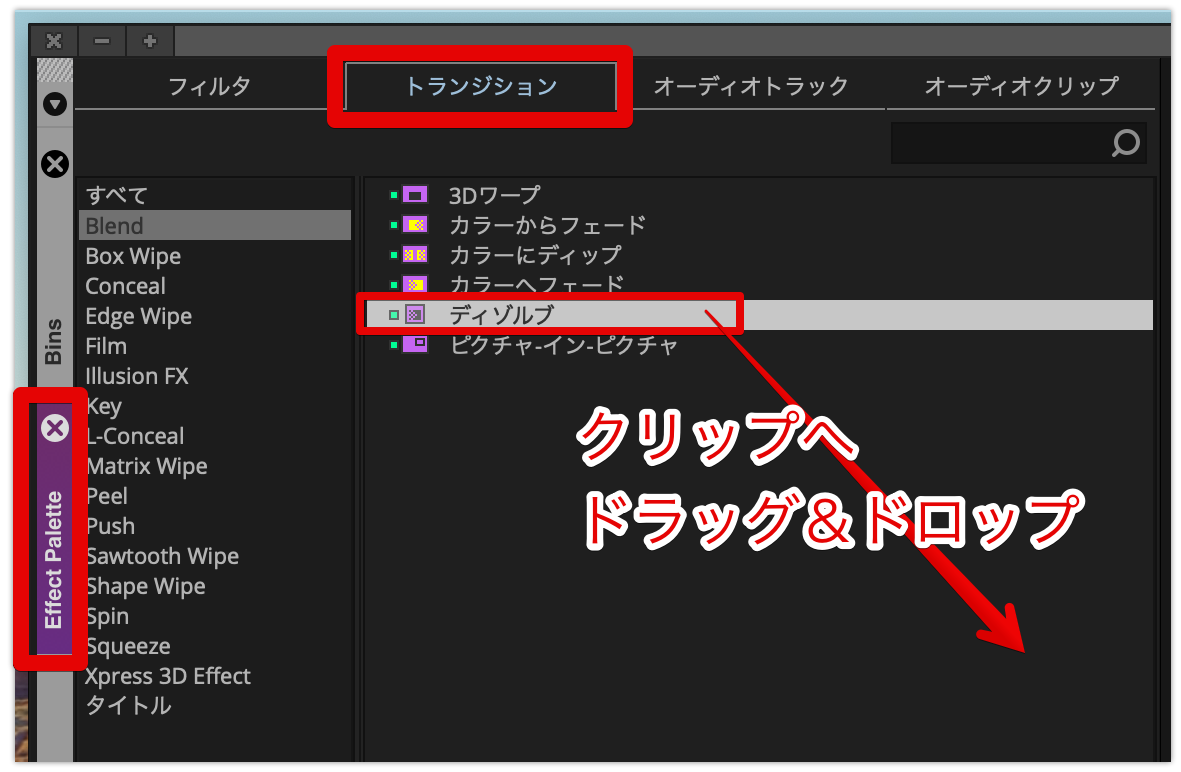
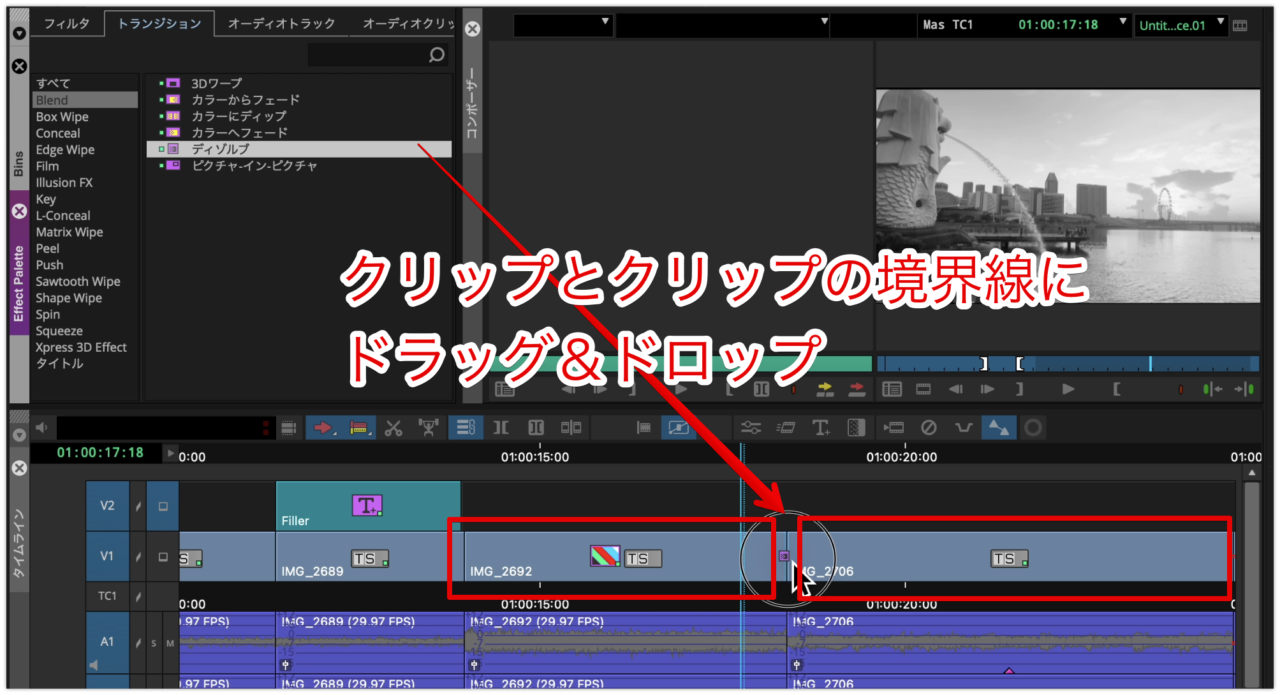
メディアパネルにある「ディゾルブ」トランジションをタイムライン上のクリップとクリップの境界線上にドラッグ&ドロップします。
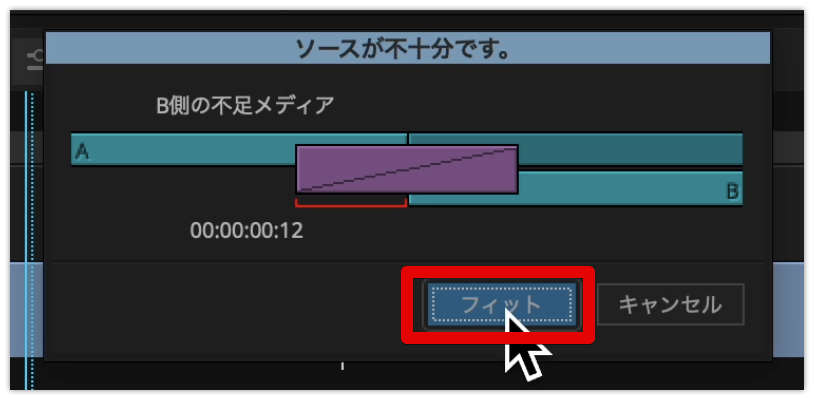
ドロップすると、以下のウィンドウが出ますが、気にせず「フィット」をクリックします。
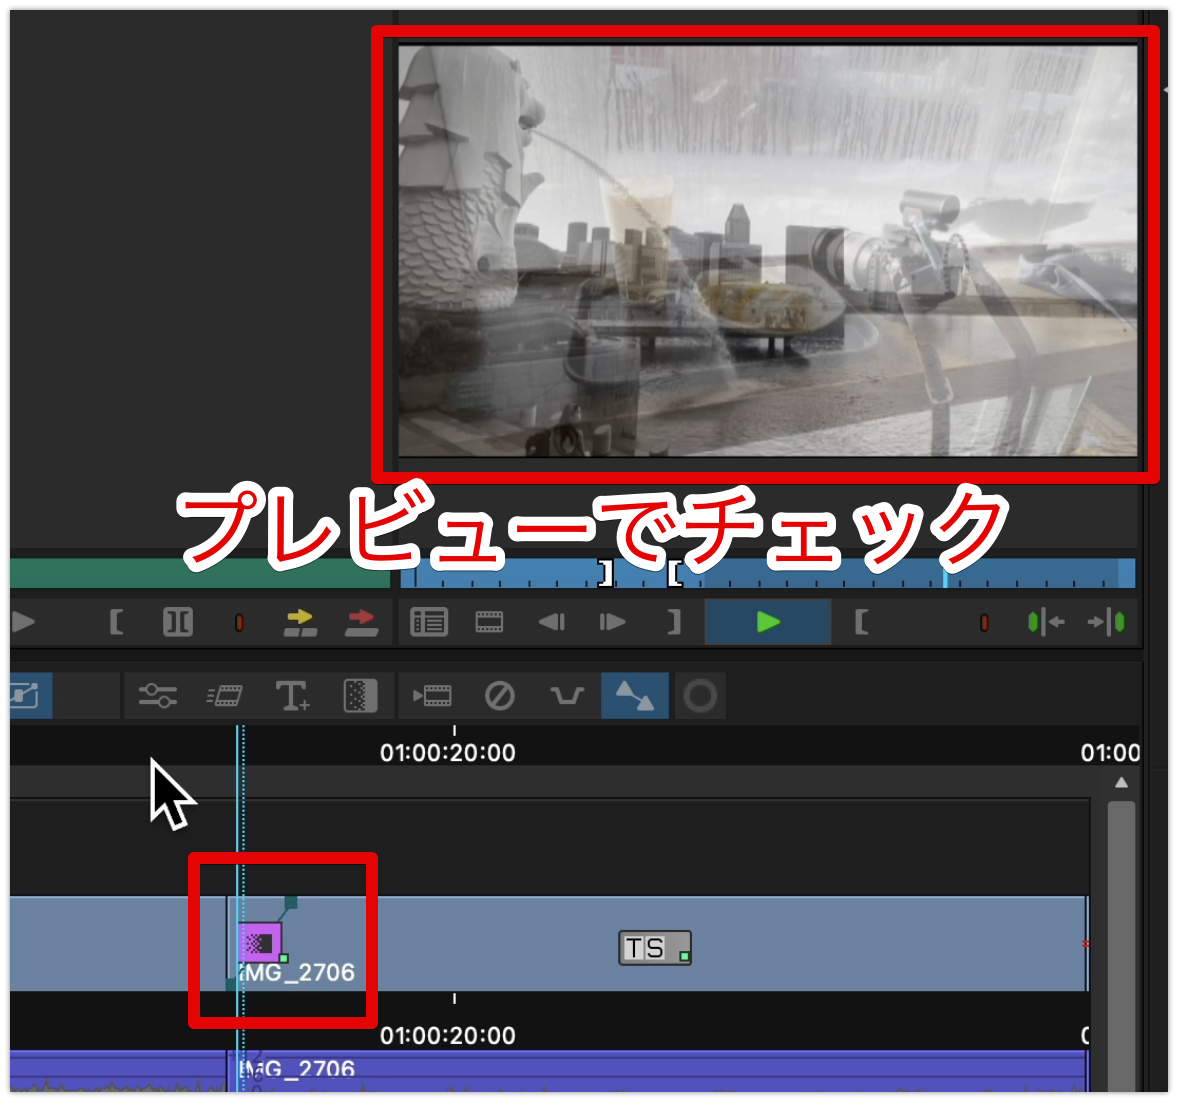
プレビュー再生して、トランジションの長さ、タイミングをチェックしてみましょう!
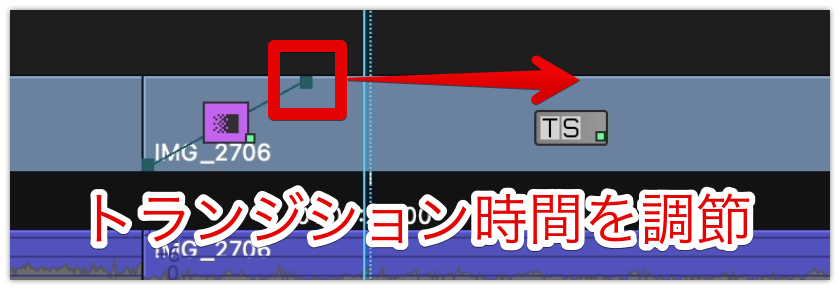
トランジションの長さを調節する
クリップ上にある、下図のポイントを左右に移動させることで、トランジションの時間を調節できます。
Avid Media Composer Firstの使い方記事一覧
まとめ
いかがでしたでしょうか?
AVID Media Composer Firstで、エフェクトやトランジションを入れる方法は簡単でした。
種類も結構あるので、みなさんも試してみてください。
私がよく使うPowerDirectorなら、インターフェイスが初心者向きで、何をしたらいいか直感的にわかりやすいです。
PowerDirectorには無料版もあるので、ぜひ試してみてください!