

Adobe Premiere Rushってどんなアプリ?使い勝手はいいの?
 Hideki
AdobeのアプリなのでID作成など少し手間がかかります。
Hideki Kobayashi。小さな会社の経営者。2021年より大川優介さんの動画講座OneSe Personalを受講。シネマティックVlogの撮影と編集を習得。2023年「日本で最も美しい村 動画コンテスト2022」でグランプリを受賞。動画編集ソフトはPremiereProとDavinci Resolveを主に使用。詳細はプロフィールをご覧下さい。
Adobe Premiere Rushとは?特徴は?
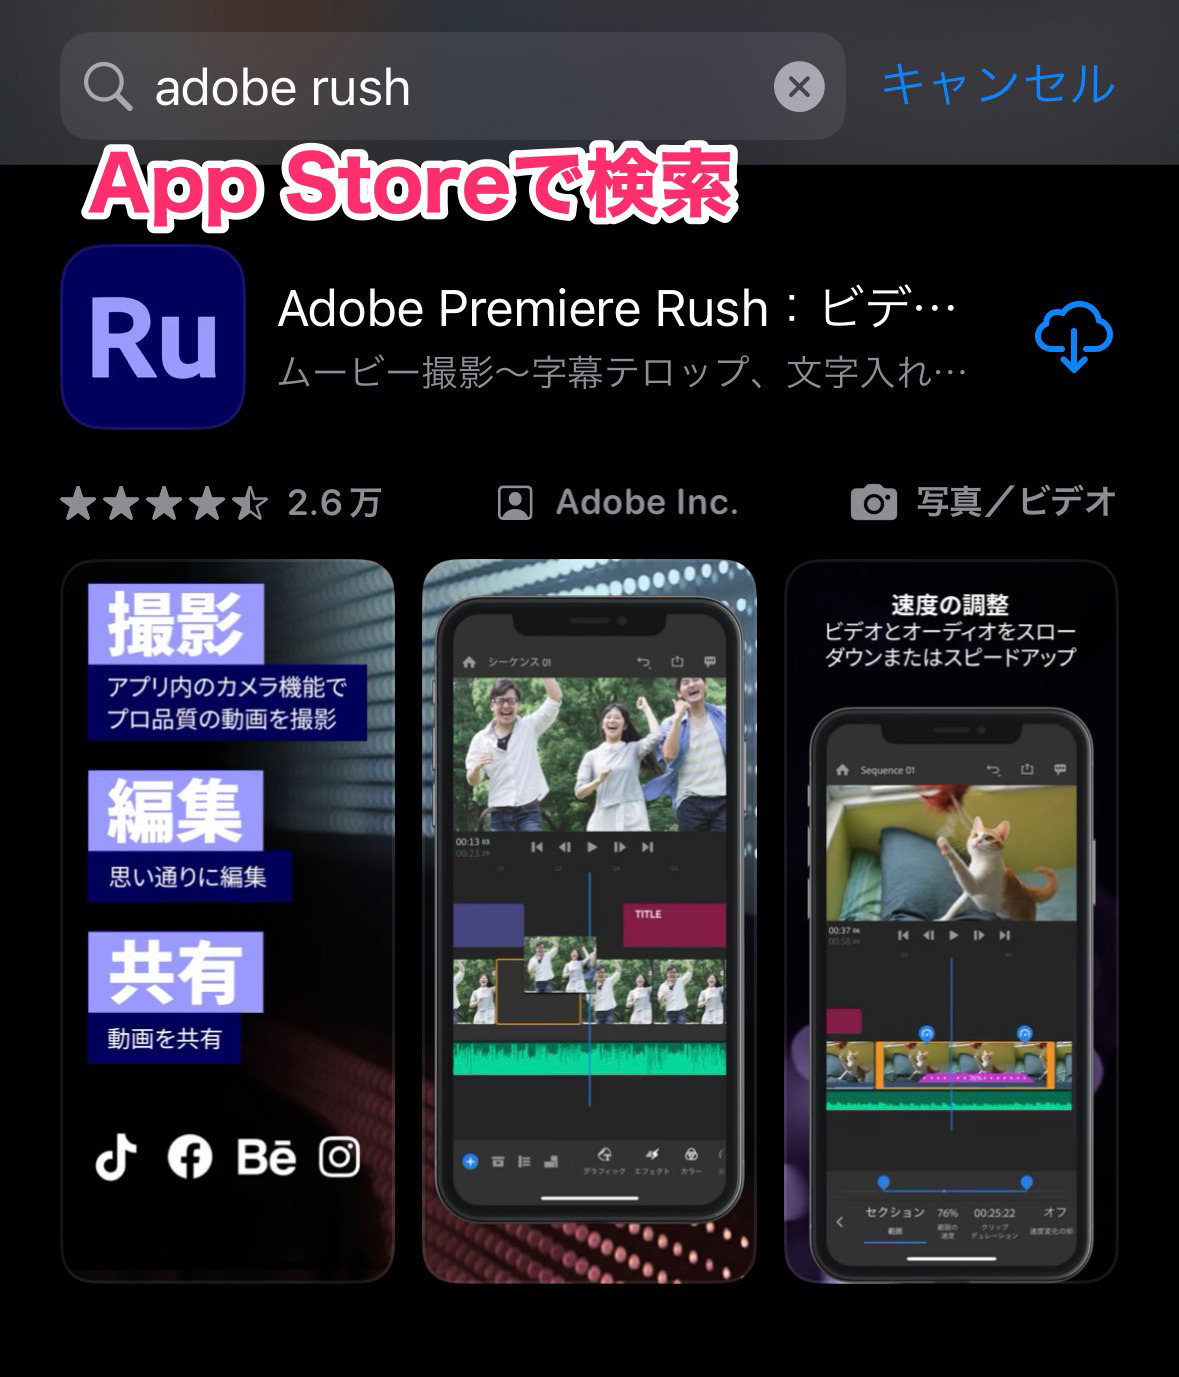
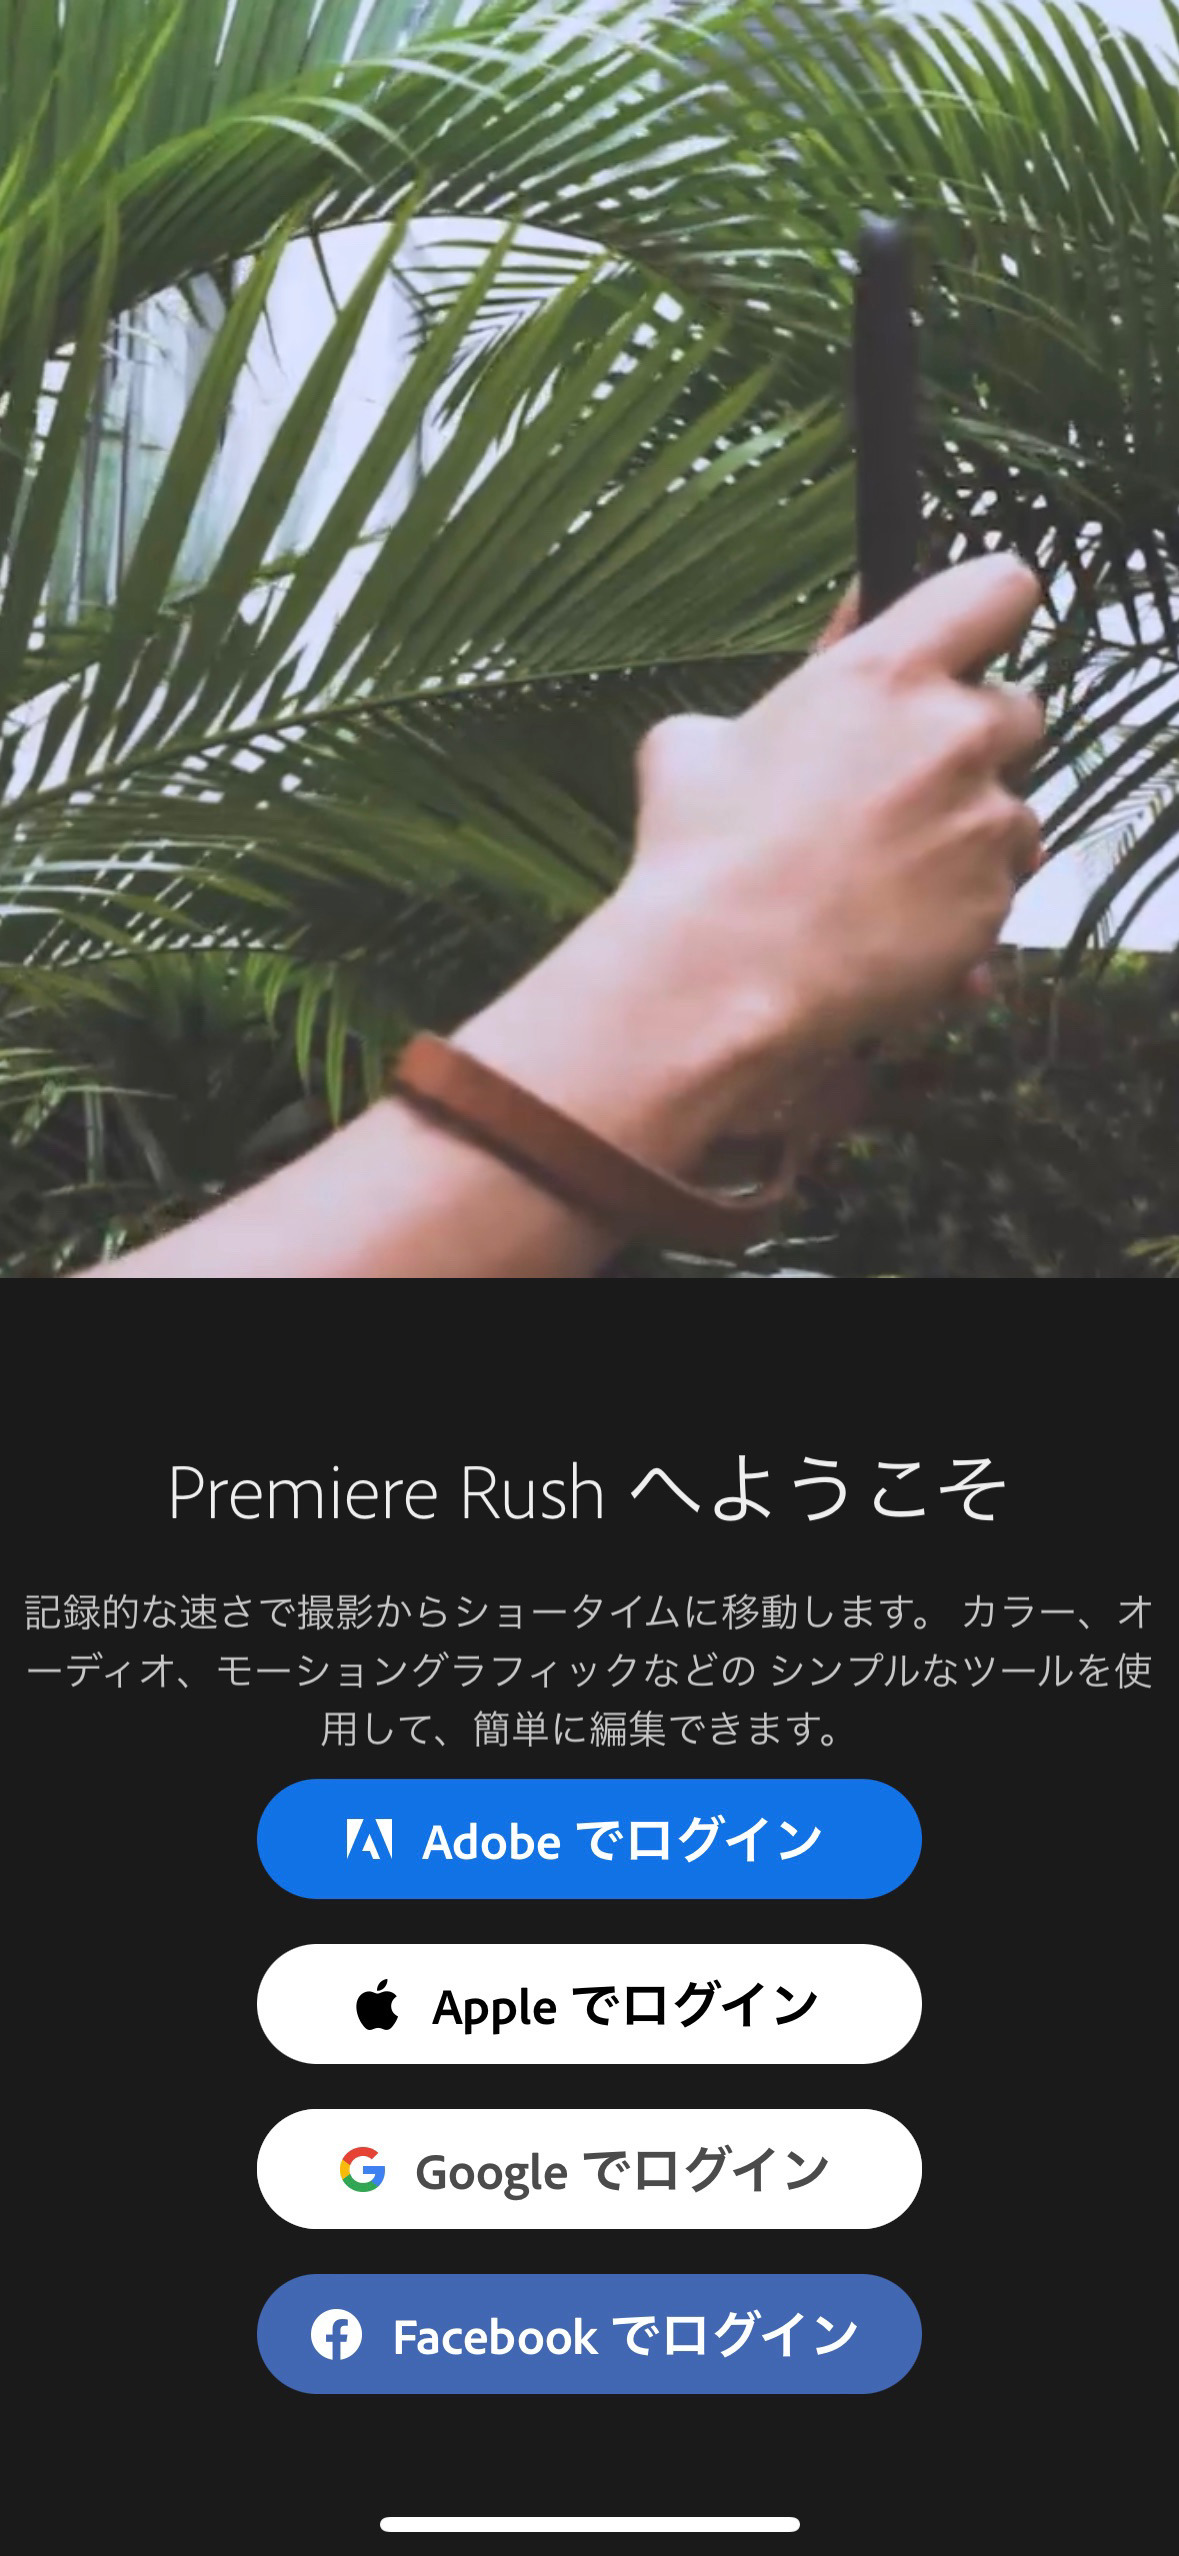
Adobe Premiere RushはAdobeの動画編集アプリです。
iPhoneのAppStoreで「adobe rush」と検索して探してみましょう!
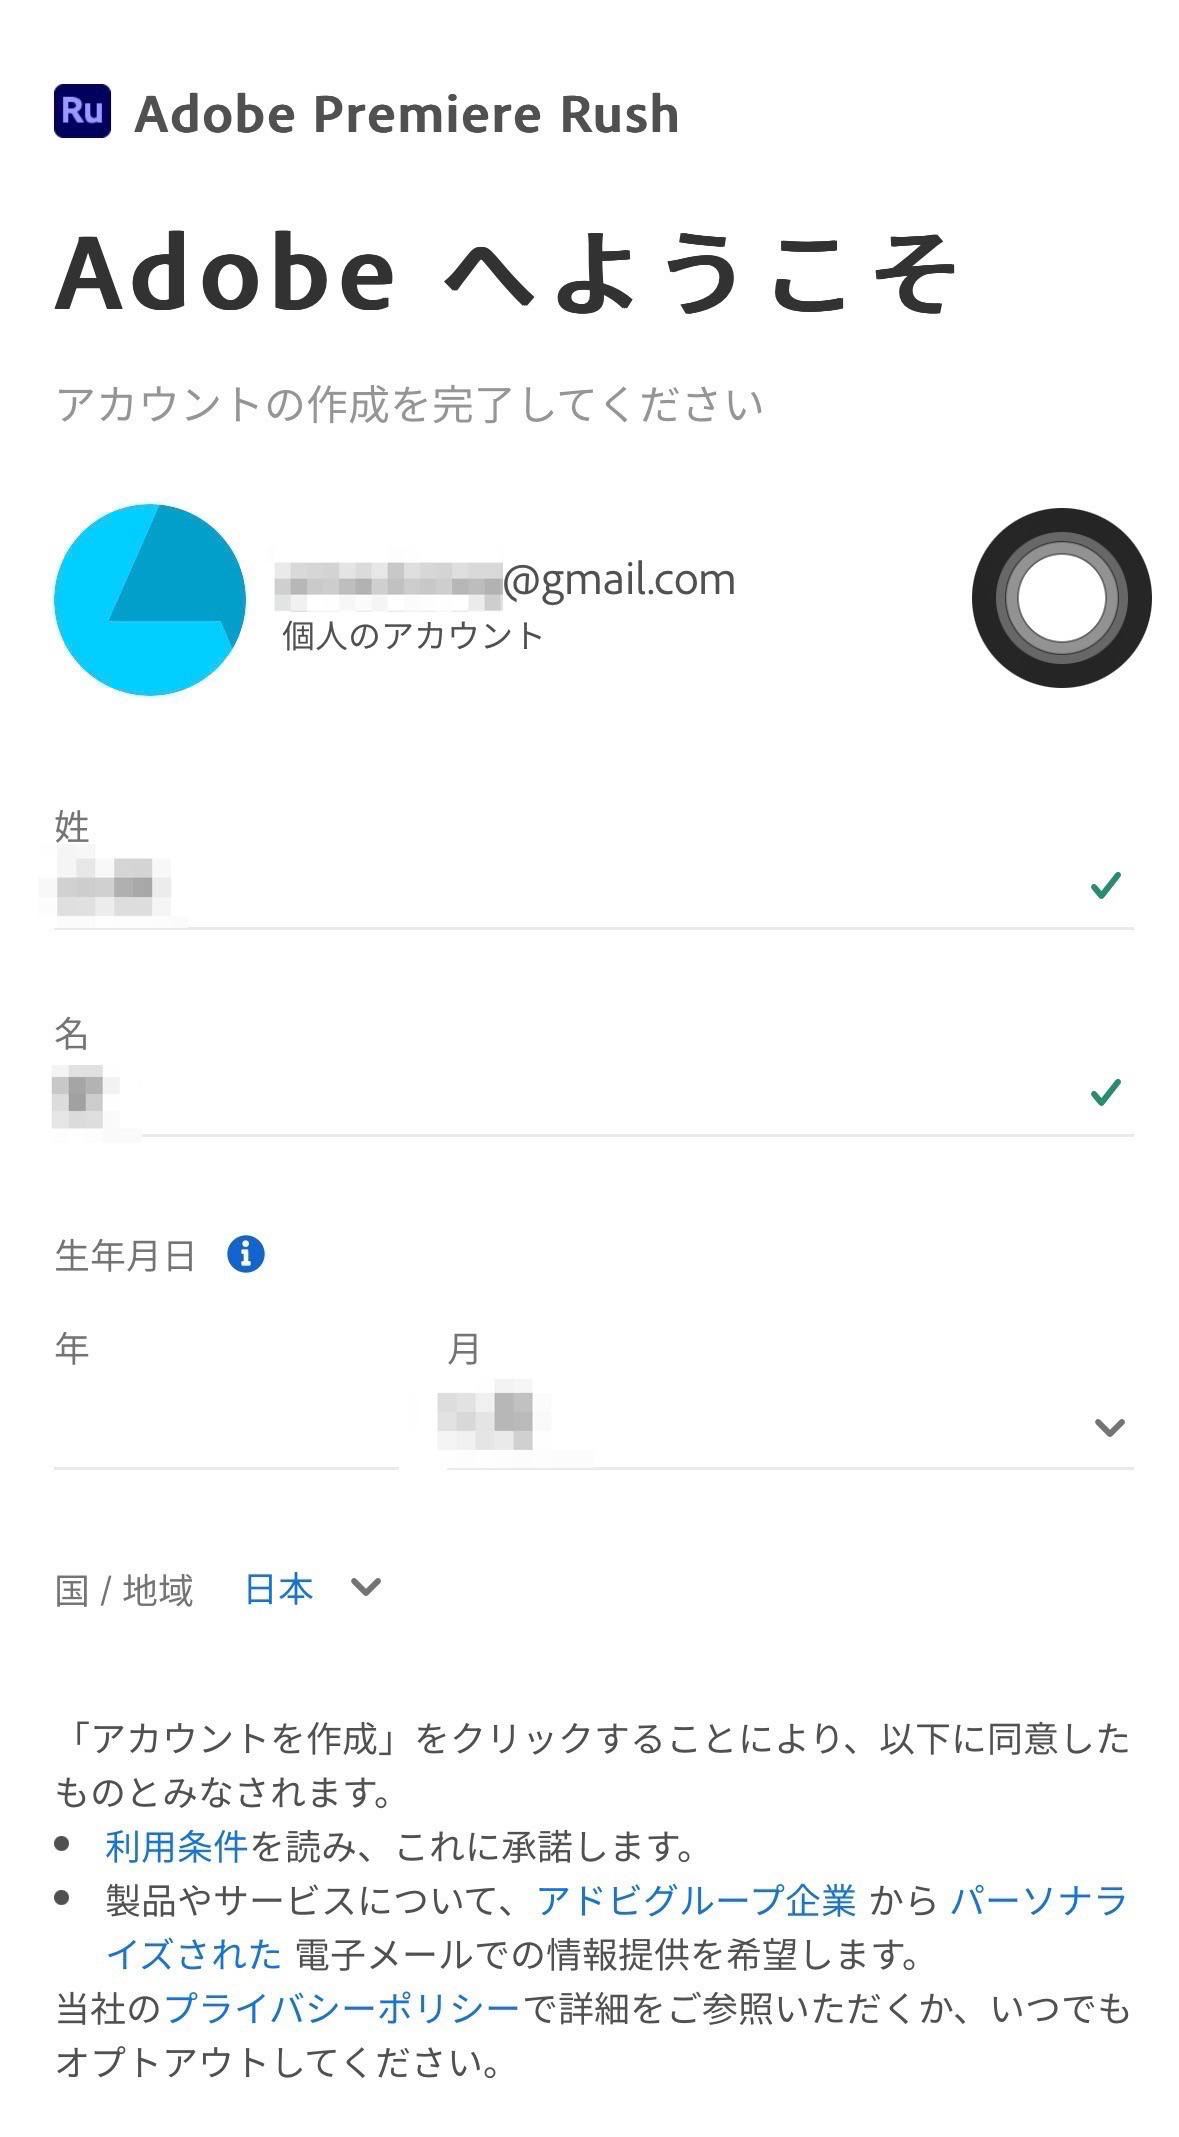
Adobe IDを作る必要がある
Adobe Premiere Rushで面倒なのは、Adobeのアカウントを持っていないとアプリを使えないことです。
Adobeのアプリなので仕方がないことです。
「Googleでログイン」であっても、Adobeアカウントが無いと作らなくてはなりません。
必要項目はメールアドレスと名前と生年月日だけです。
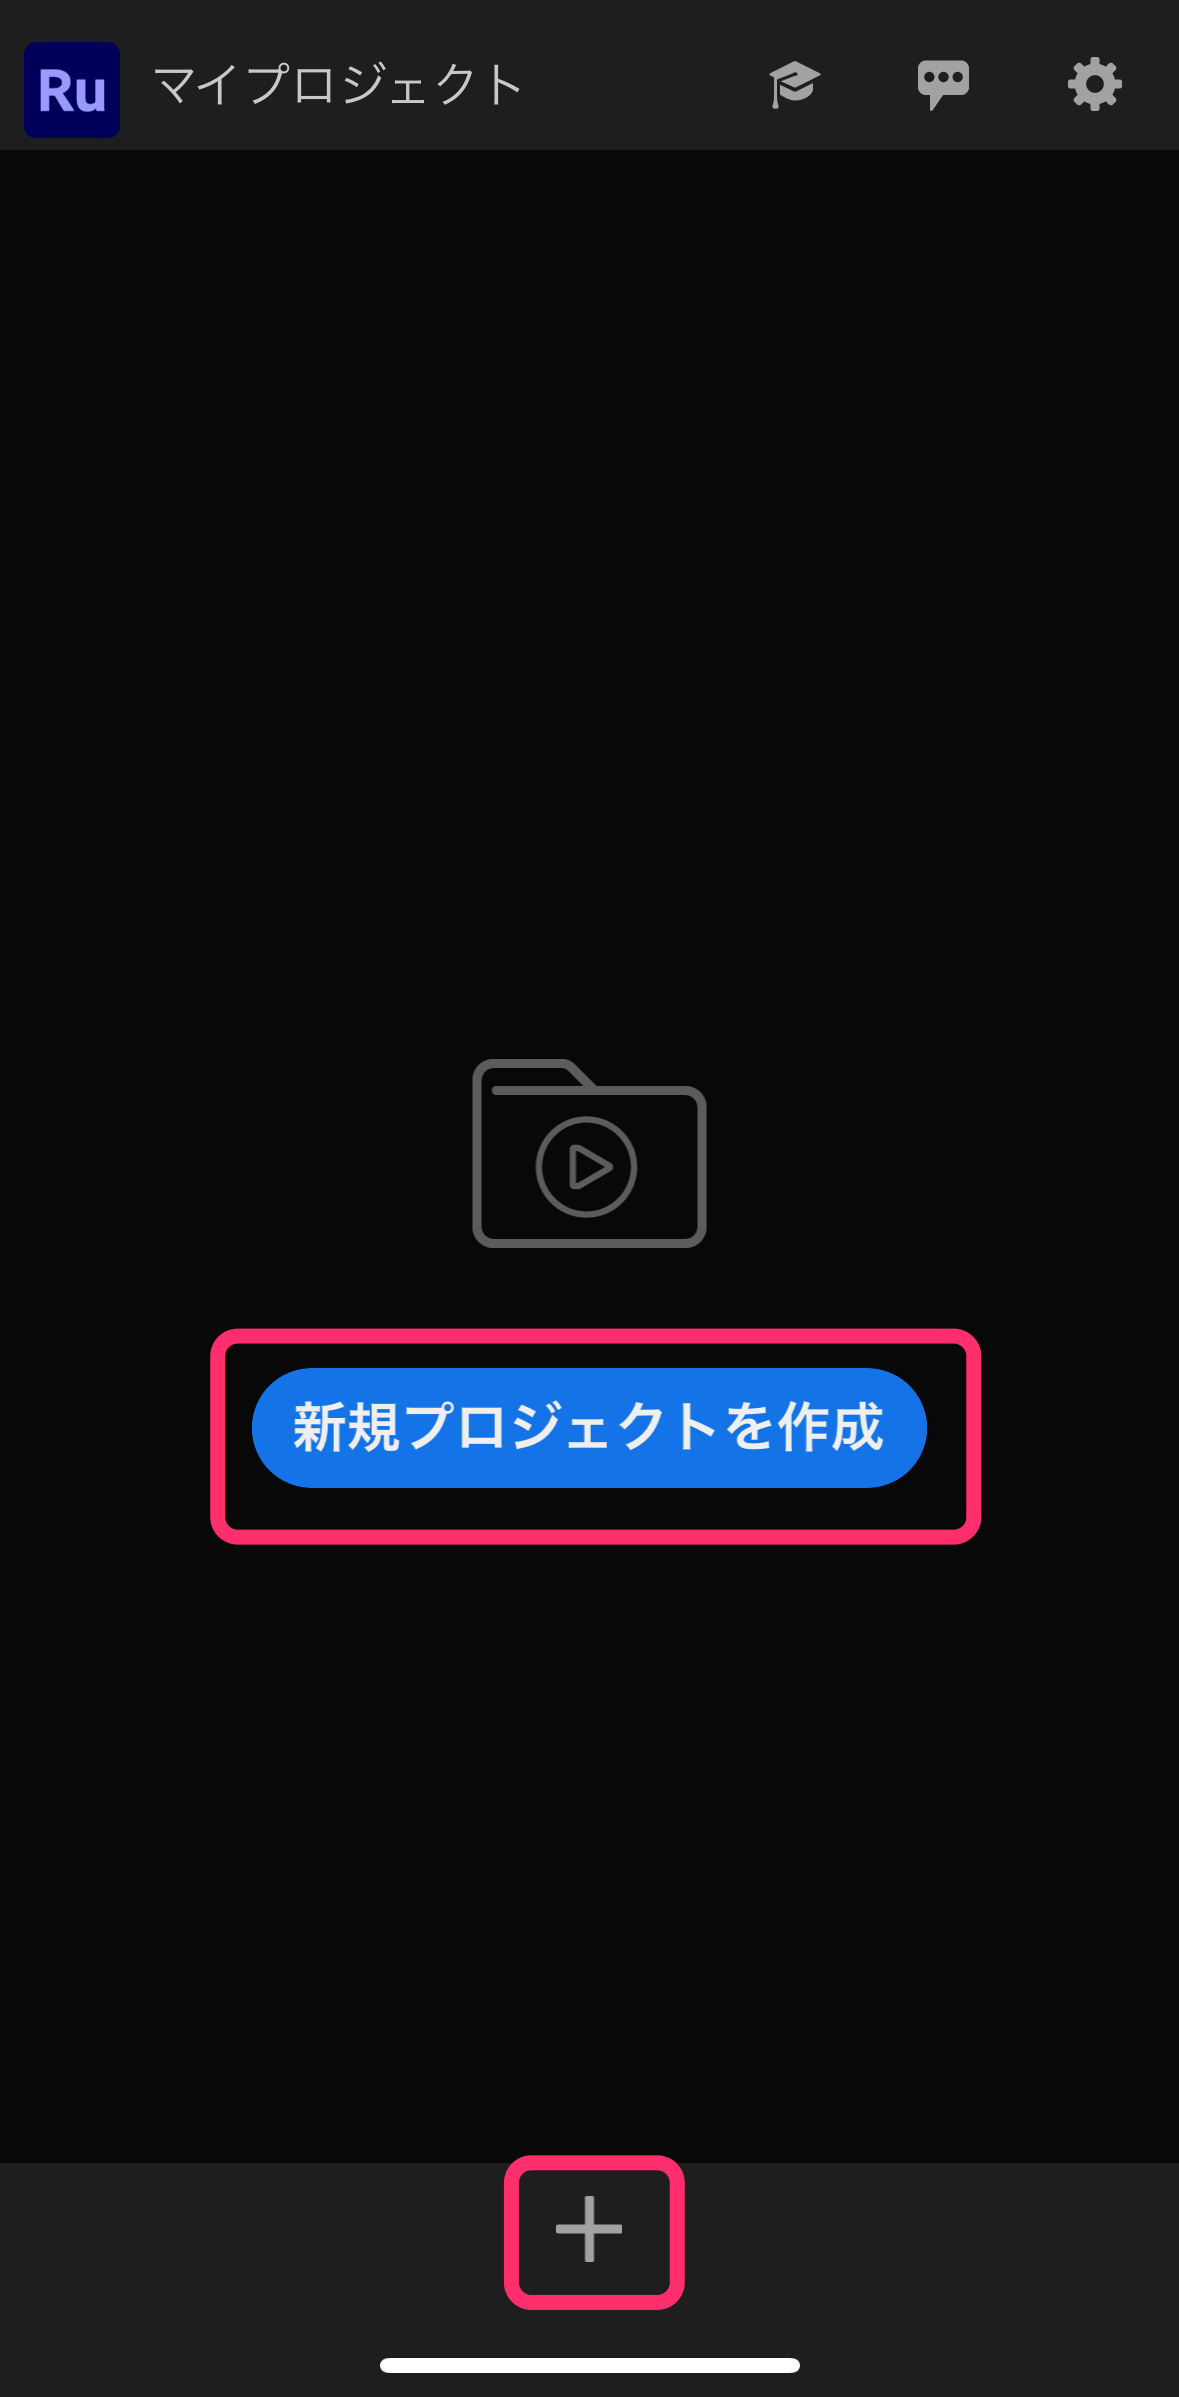
プロジェクトの作成方法
すでに撮影された素材を扱う場合は「新規プロジェクトを作成」をタップします。
画面下の「+」内には「ビデオまたは写真を撮影」の項目があり、その場で撮影してプロジェクトに追加していくことができます。
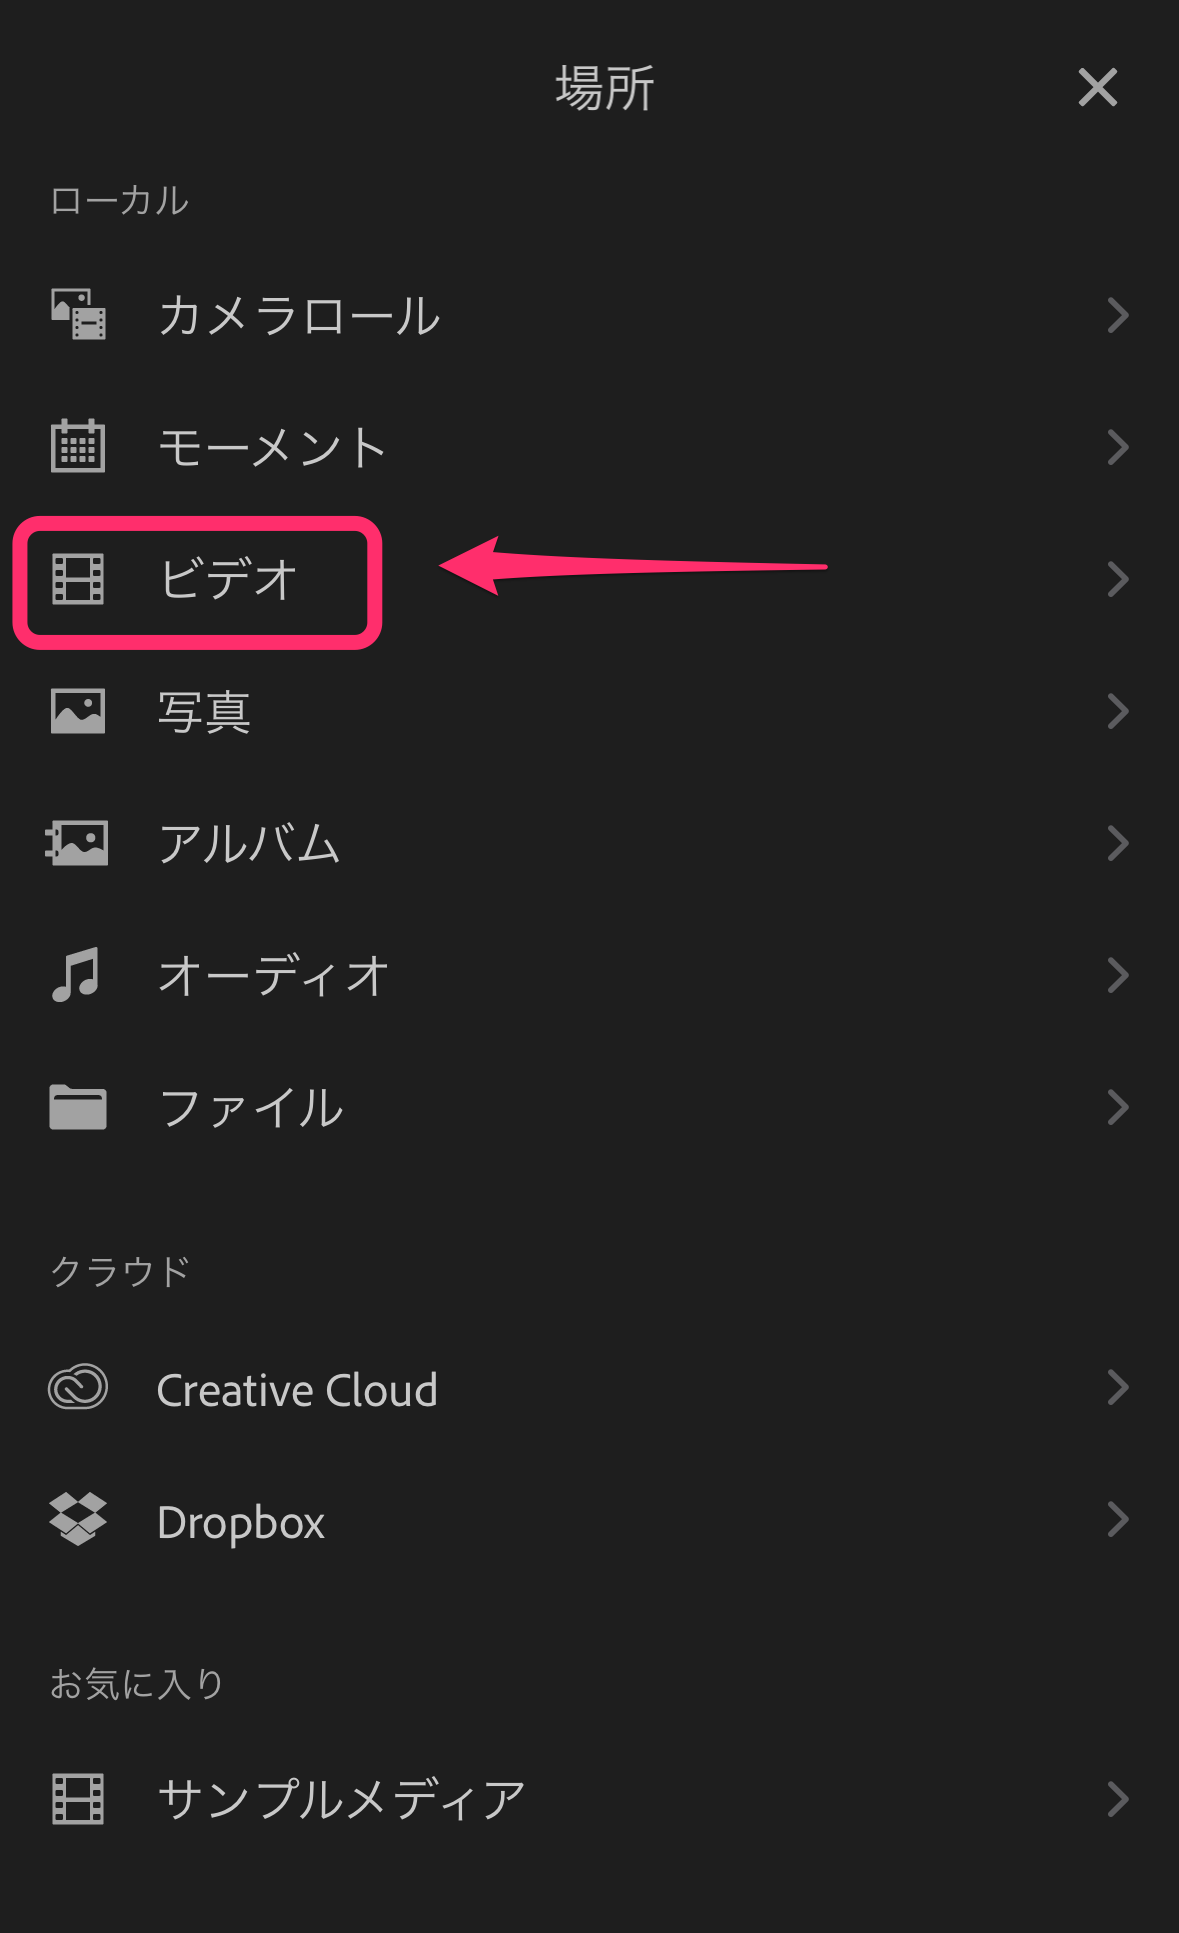
次に、動画クリップをどこから読み込むかの選択をします。
ここでは、iPhone内の「ビデオ」から読み込む方法を解説します。
動画クリップの読み込み方法
iPhone内のビデオの内容が表示されたら、読み込みたいクリップを一つ長押ししてみましょう!
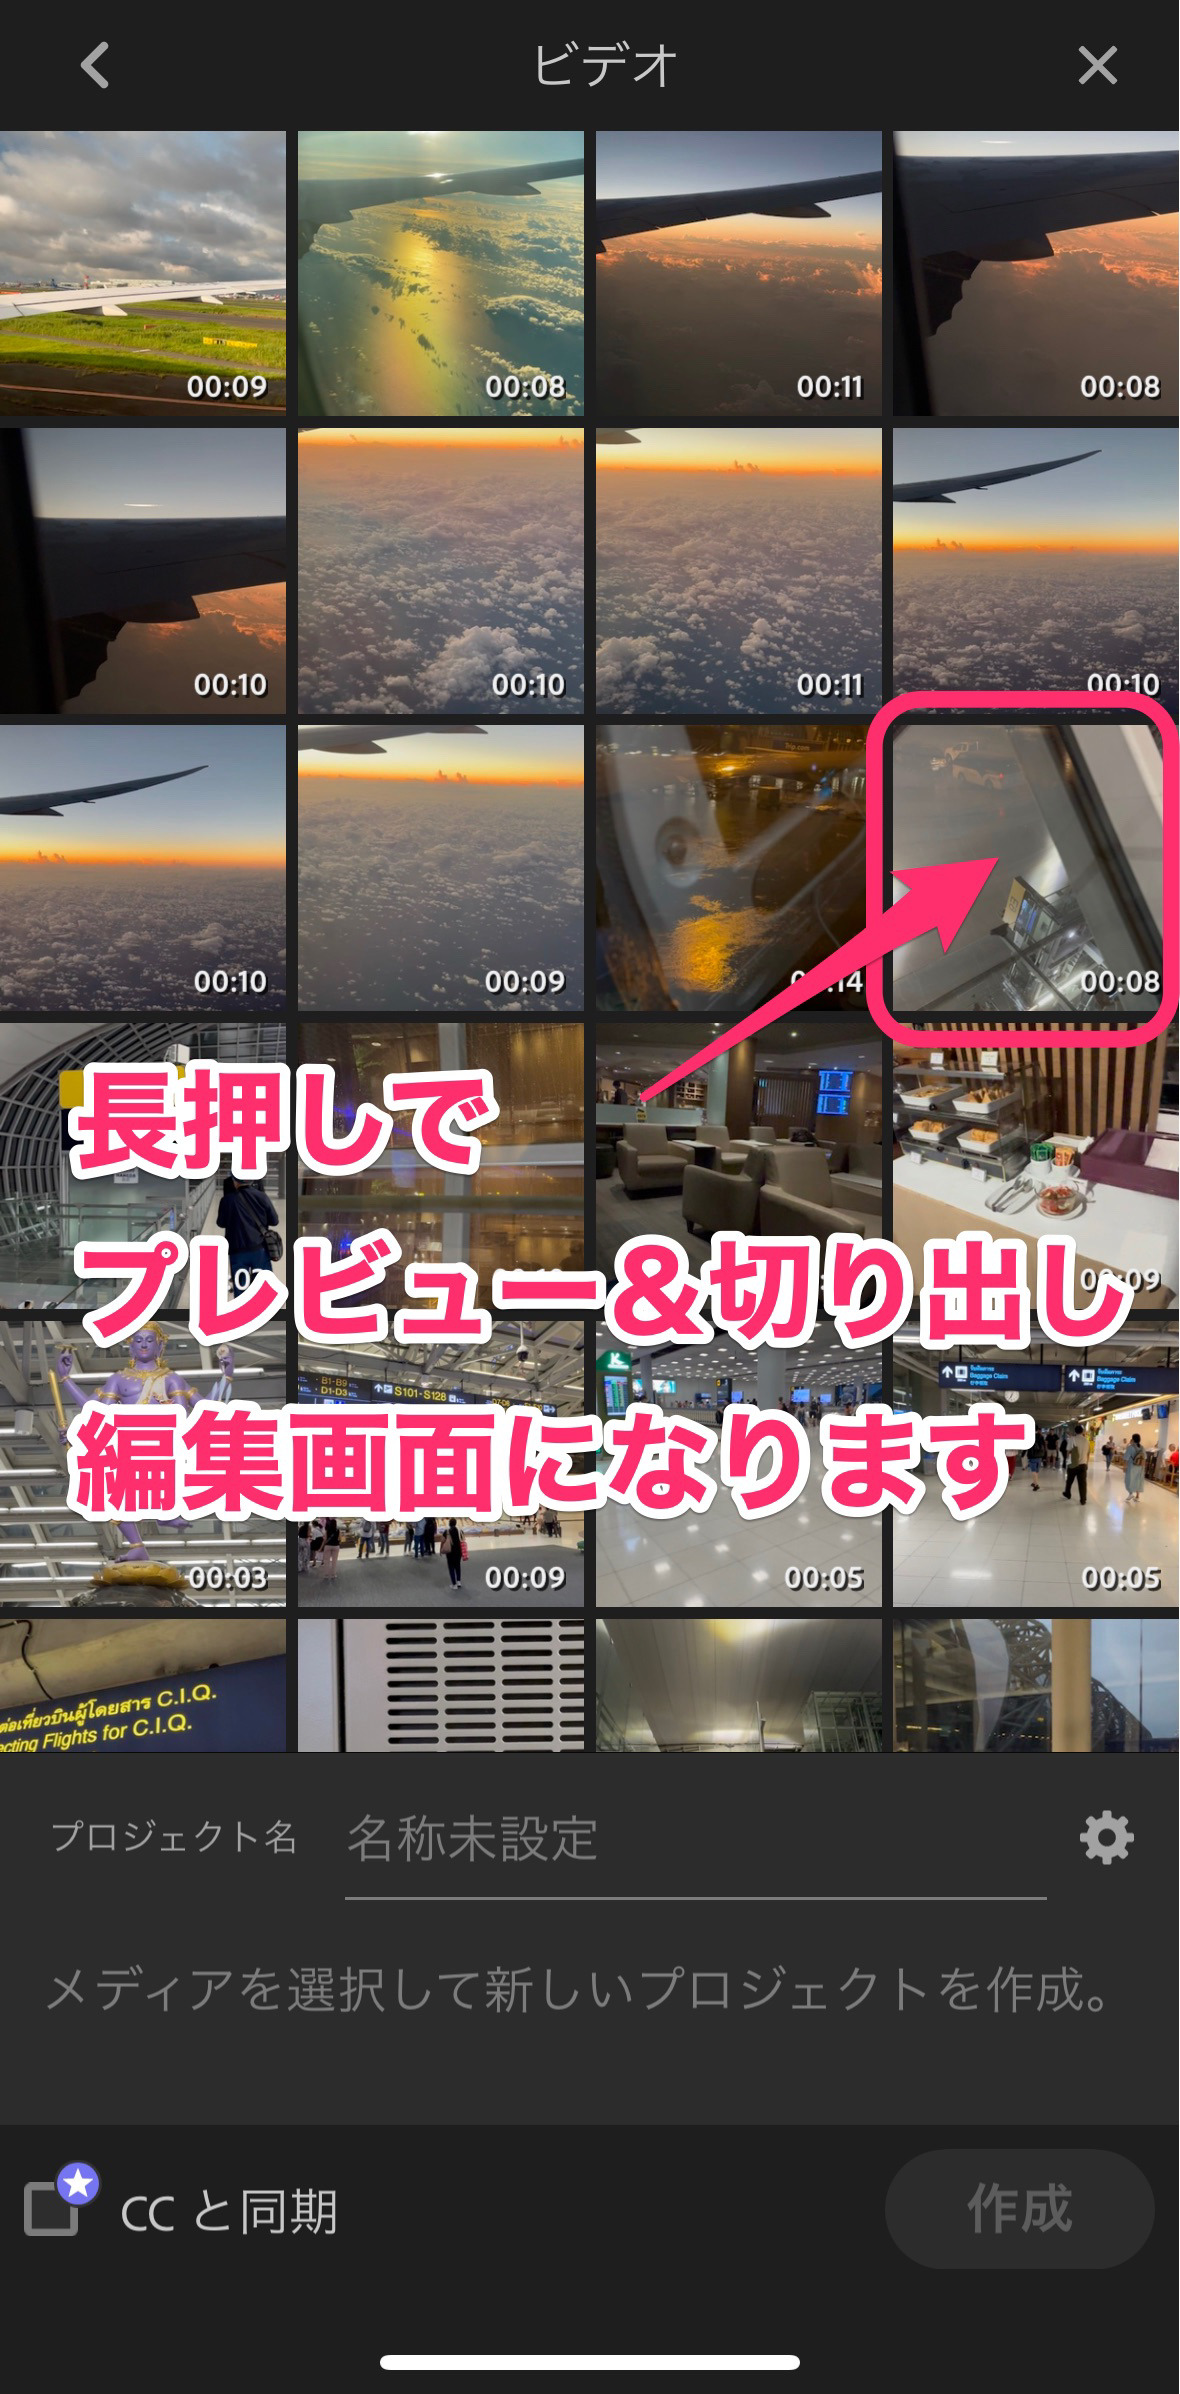
プレビューと簡単なカット編集(トリミング)をすることができます。
このプレビュー画面である程度トリミングして、タイムラインに配置することができます。
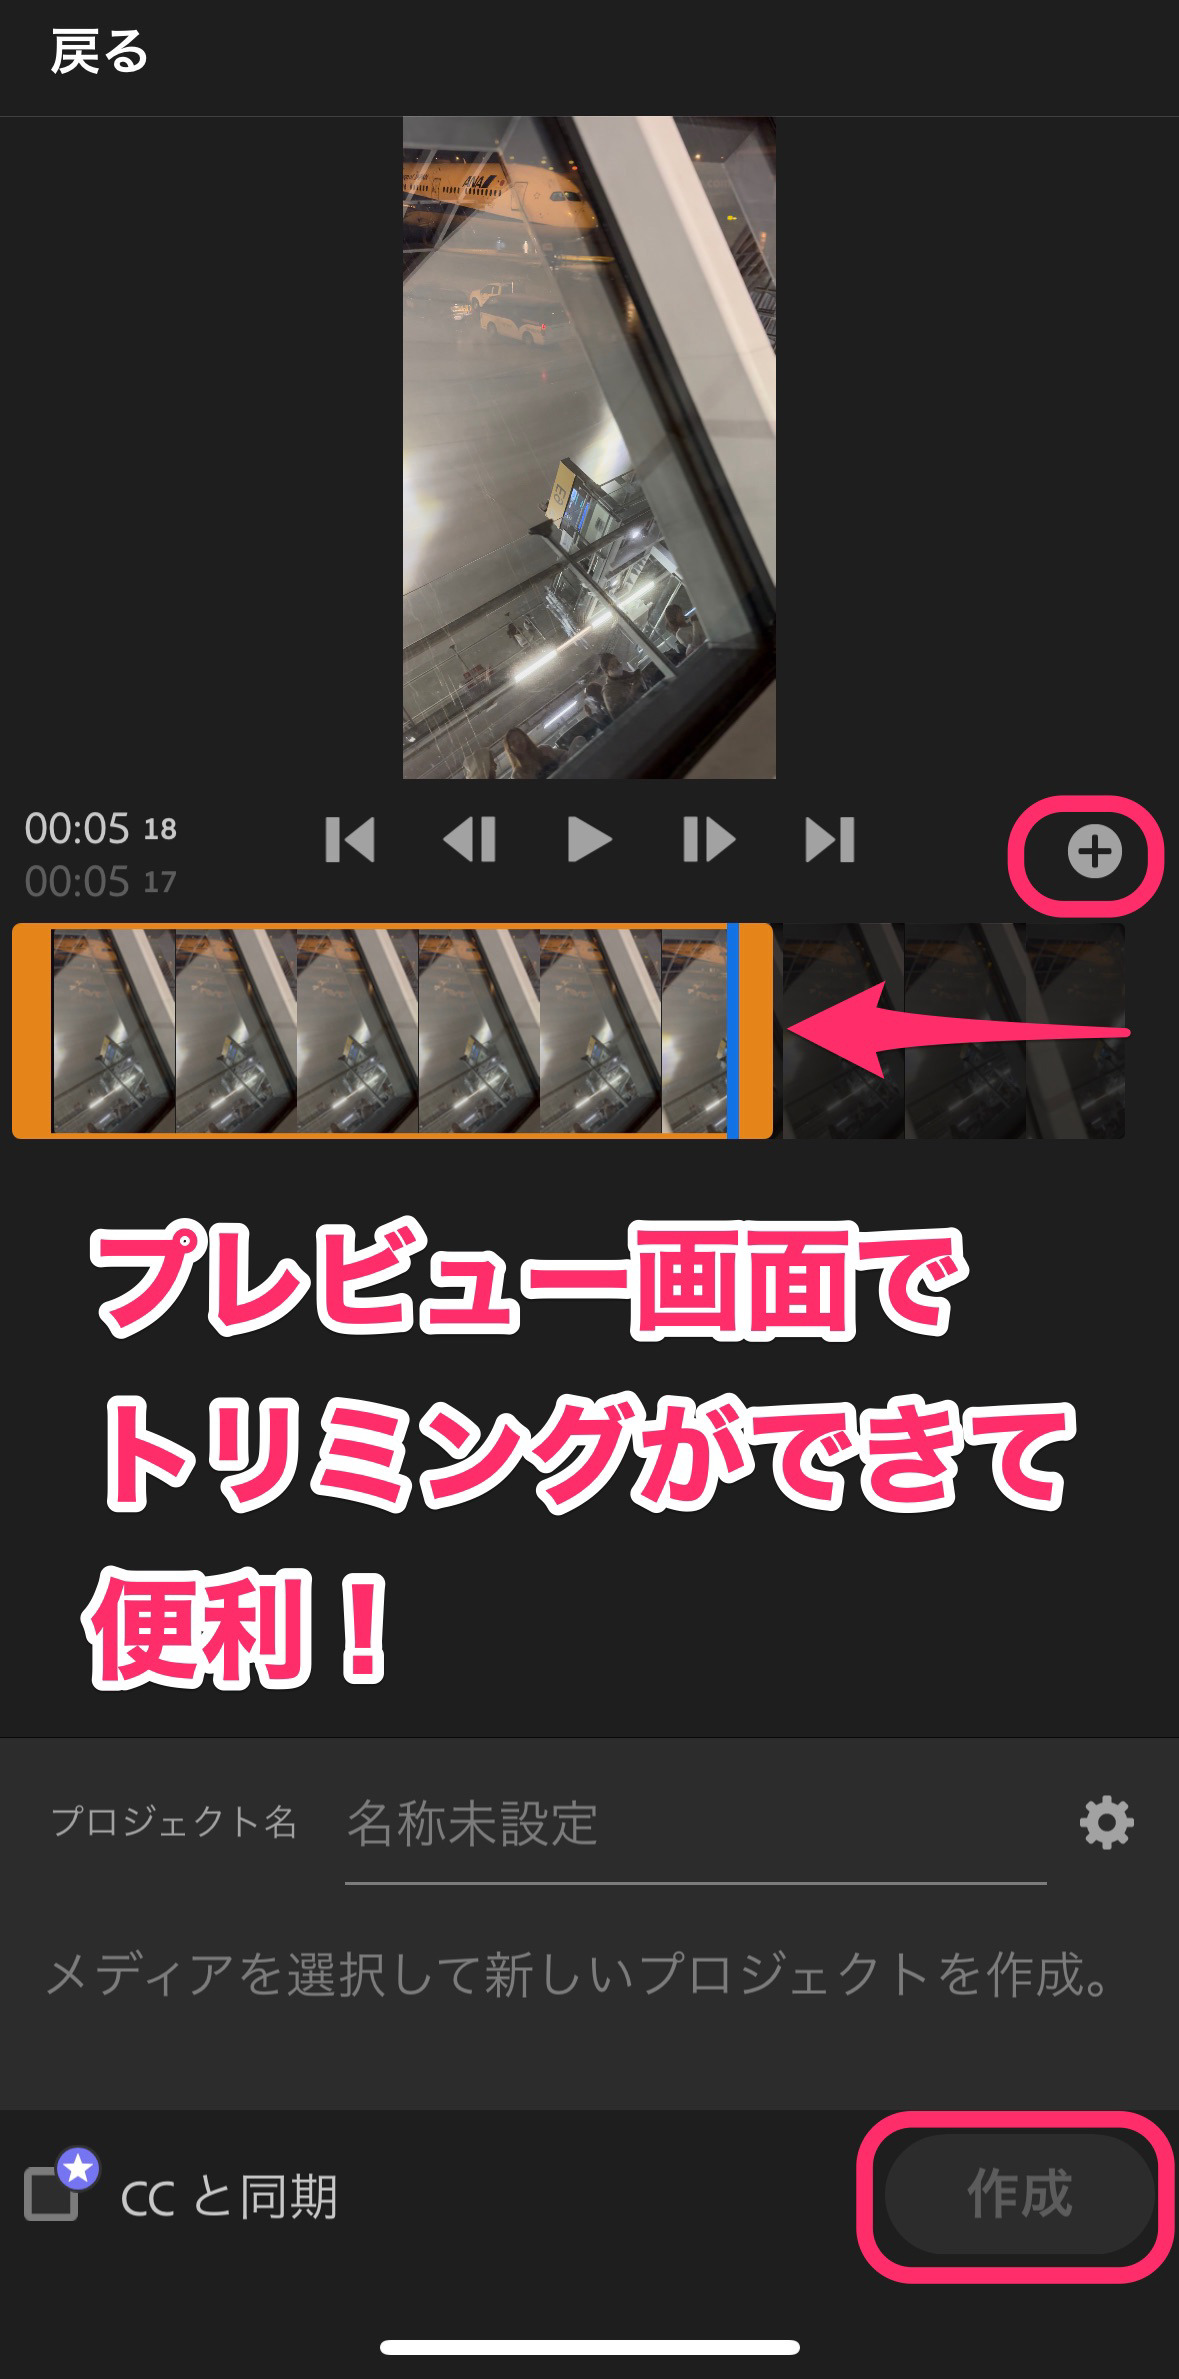
画面右中央にある「+」マークをタップして、「作成」をタップするとプロジェクトの新規作成が完了します。
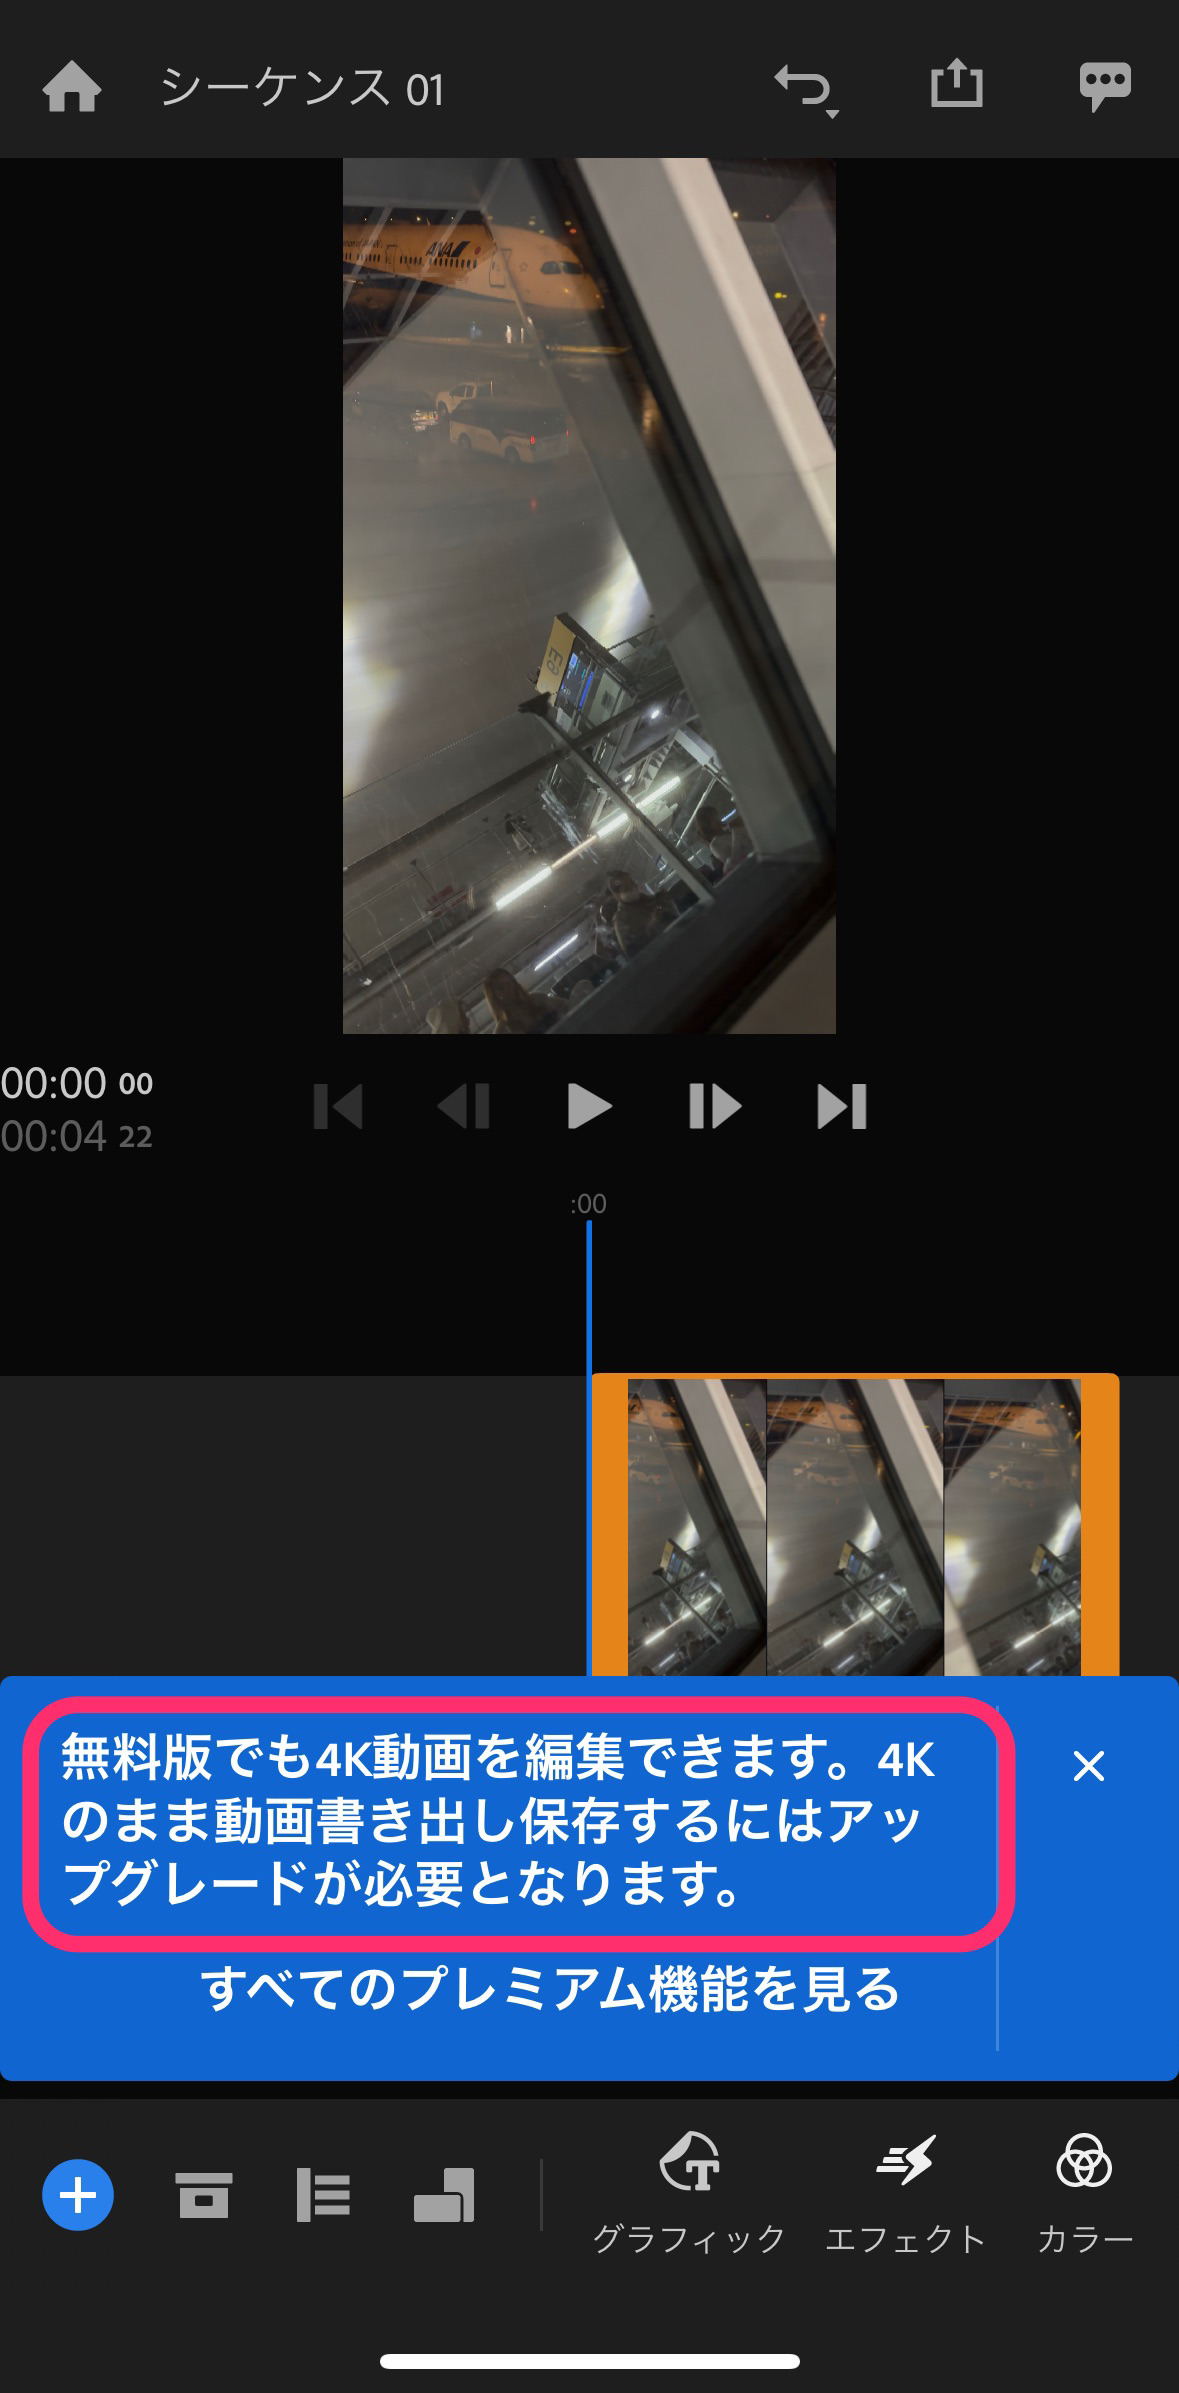
ここでタイムライン画面となりますが、注意事項が出ます。
無料版では、4K書き出しができません。
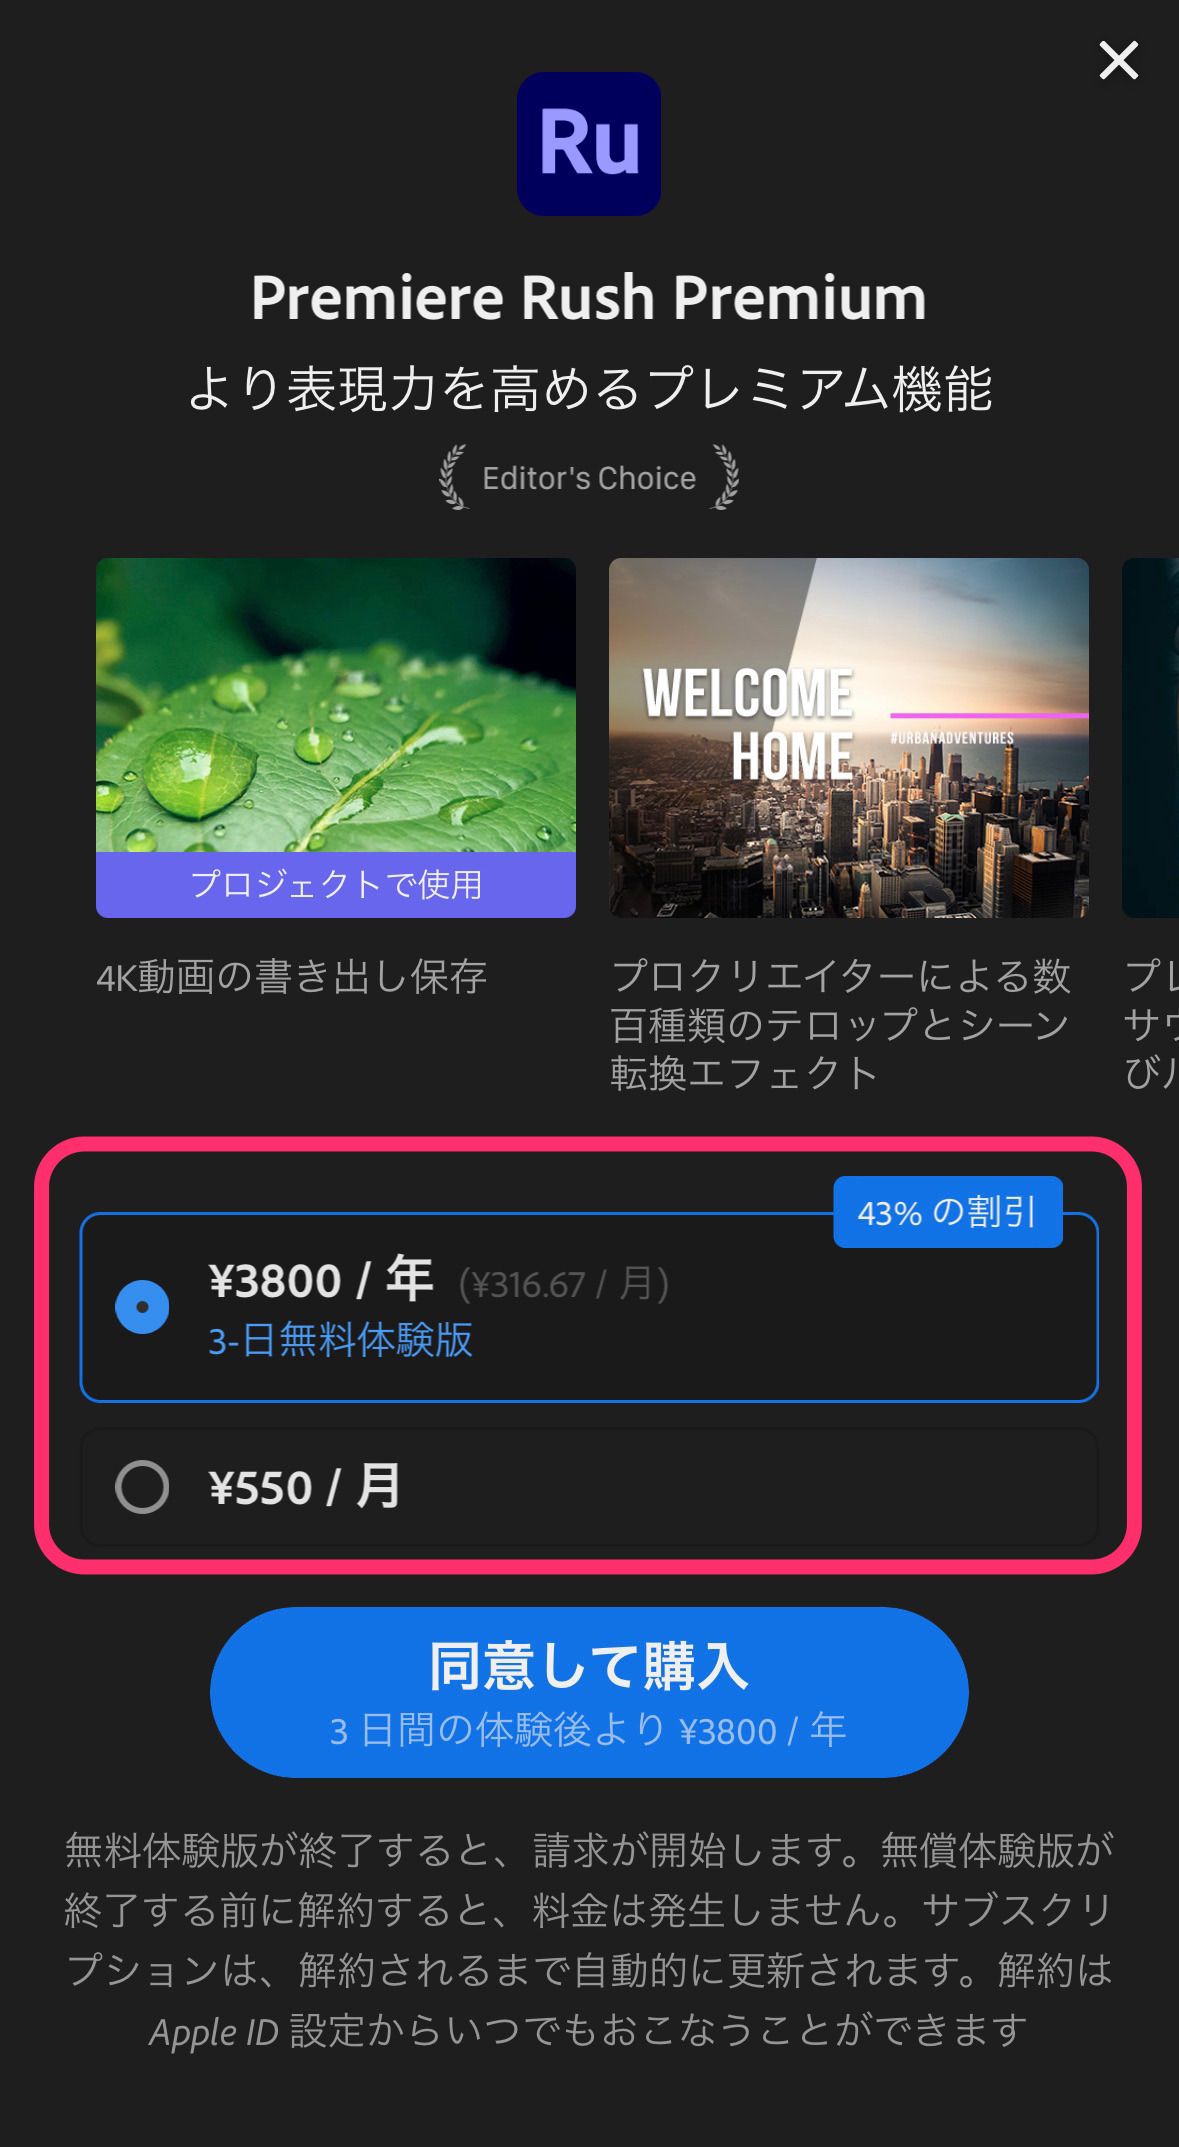
サブスク版の価格は3,800円/年です。
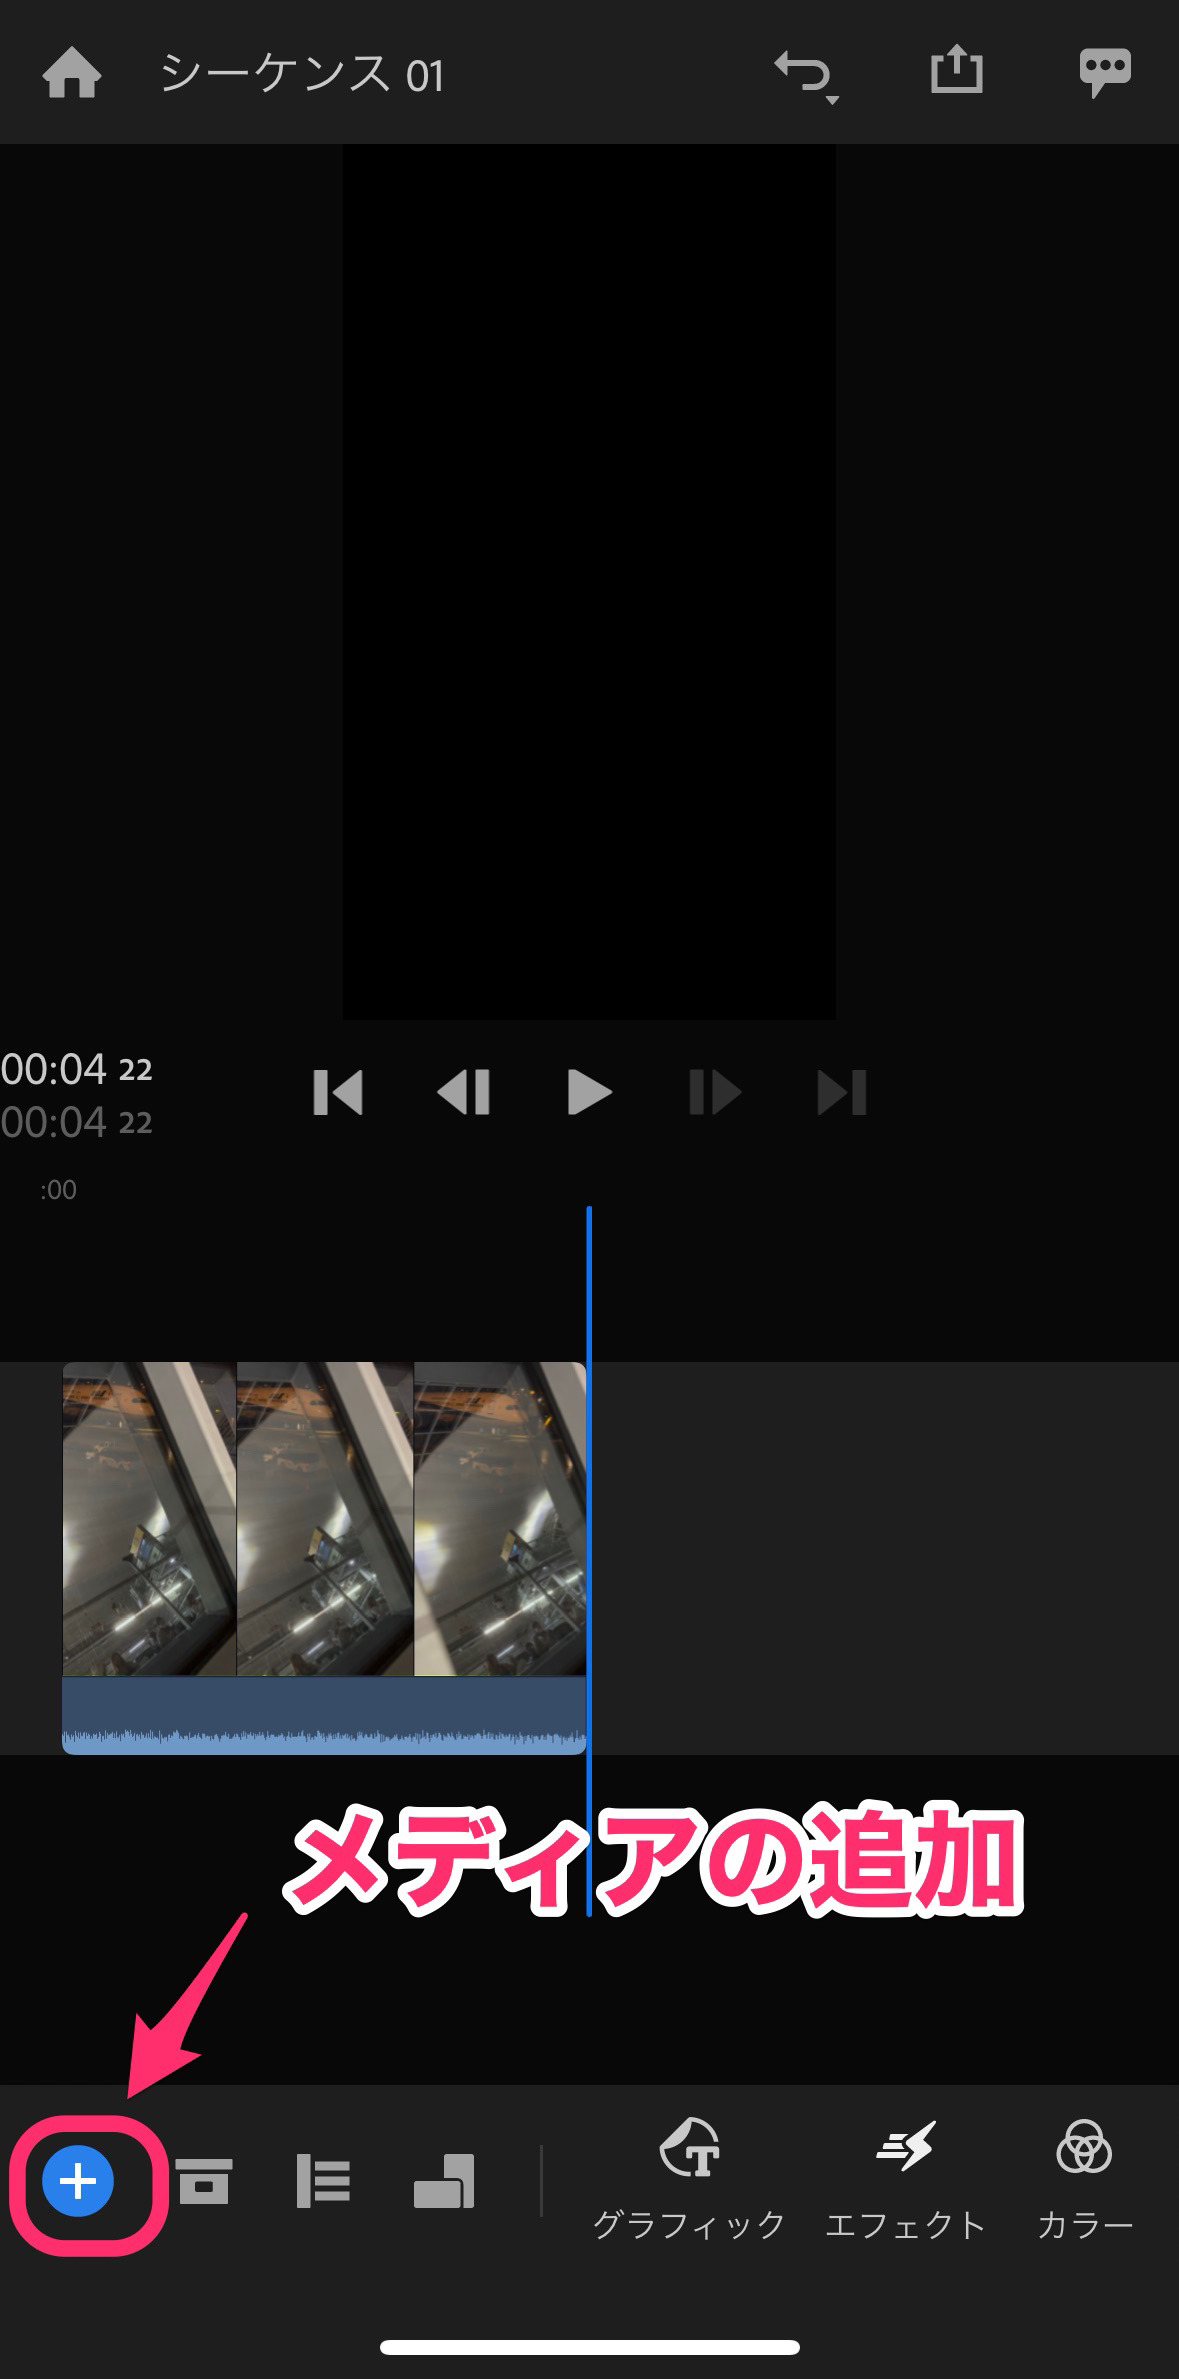
さらに動画クリップなどのメディアファイルを追加したい場合は、画面左下の「+」マークをタップします。
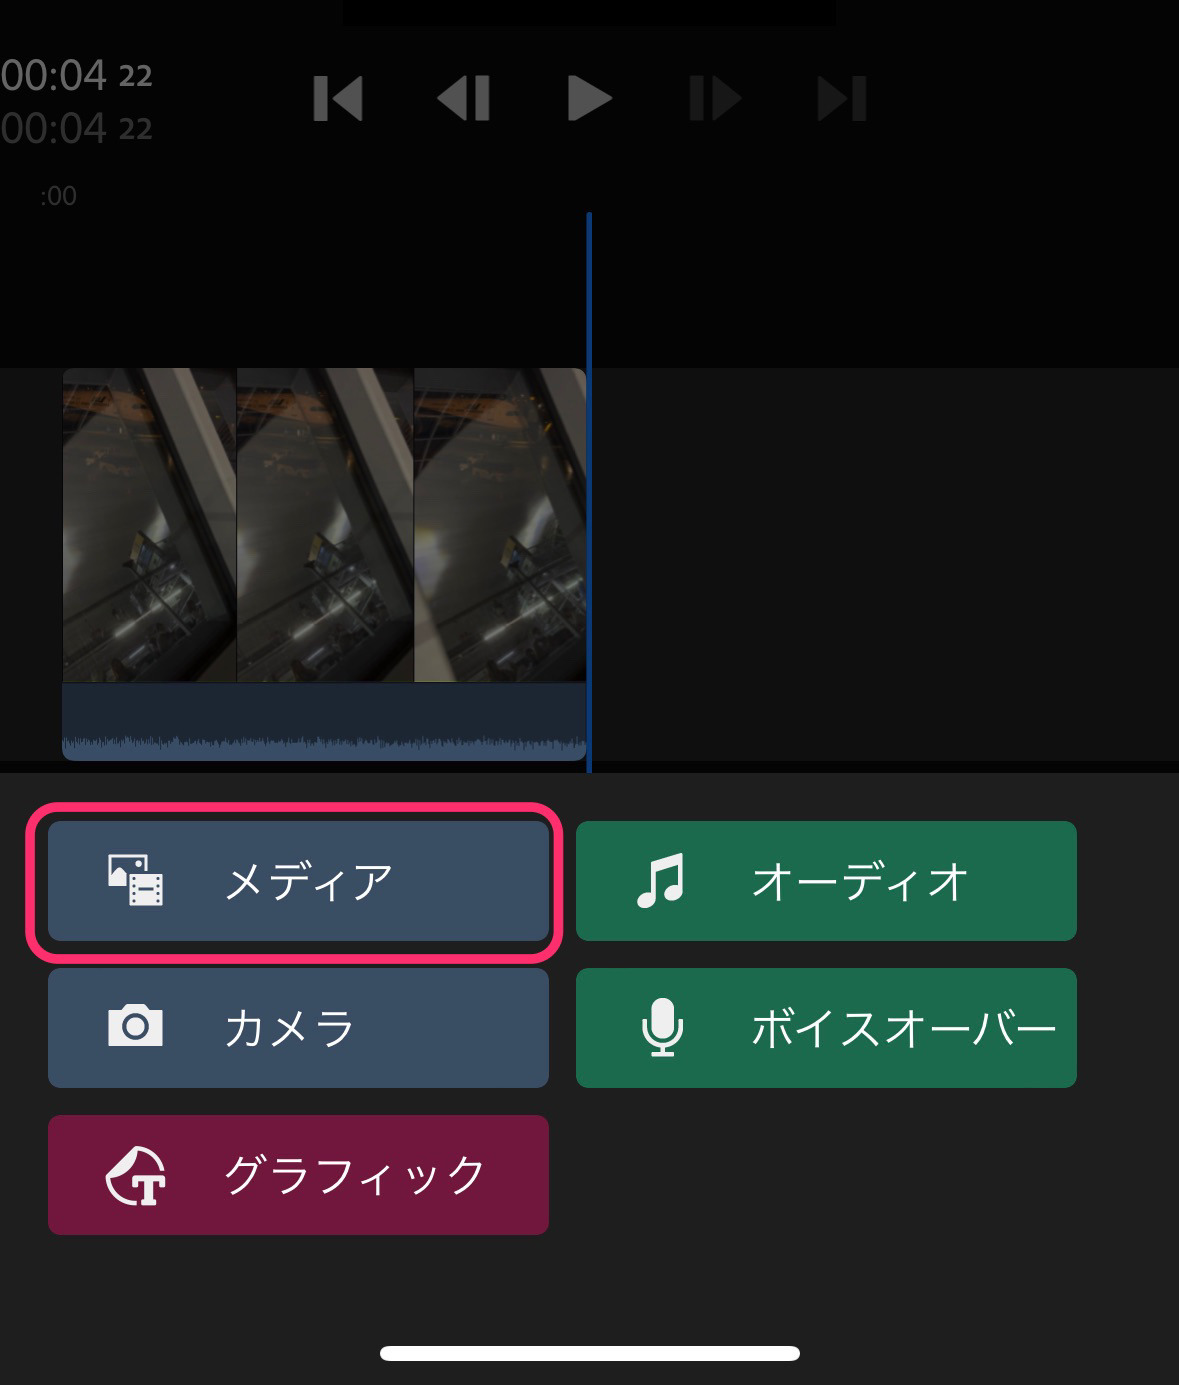
「メディア」をタップします。
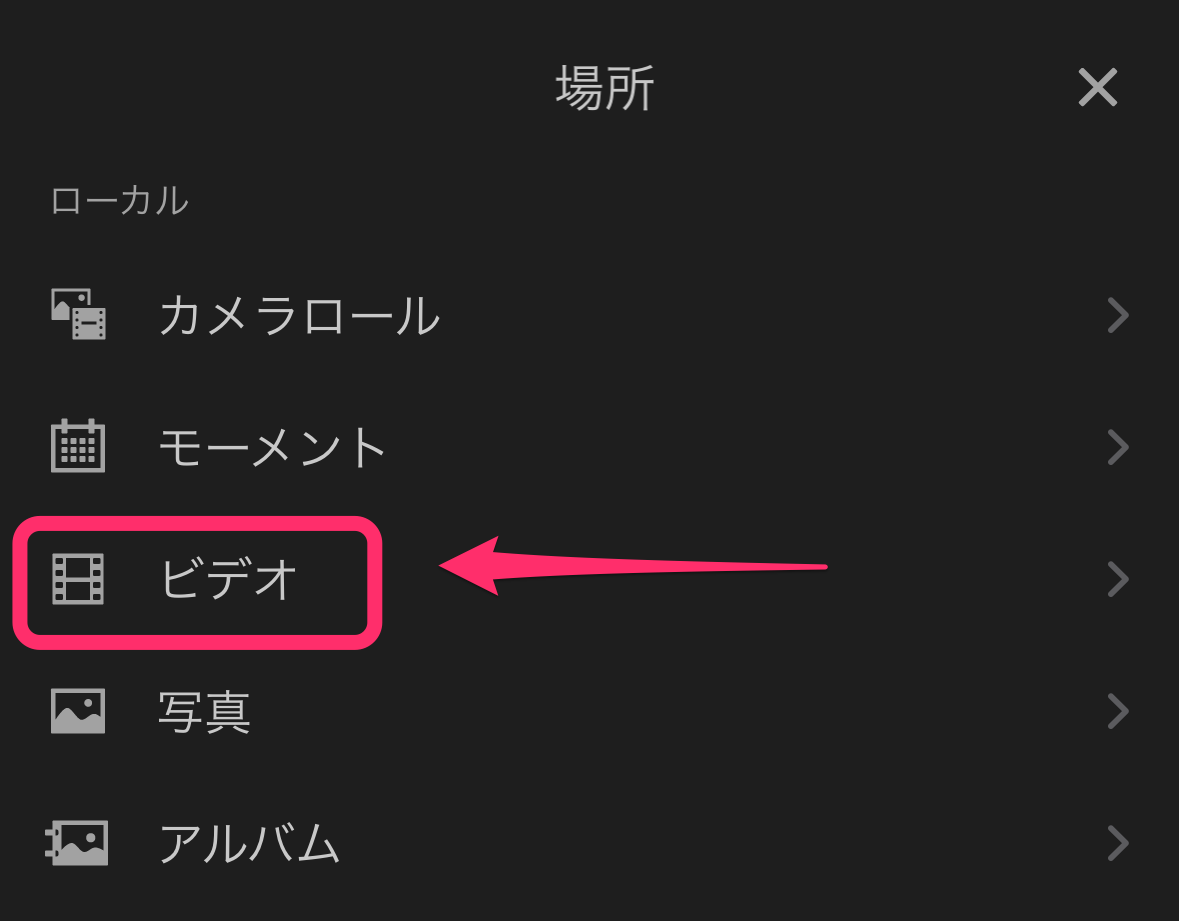
先程と同様に、iPhone内の「ビデオ」から動画クリップを読み込みます。
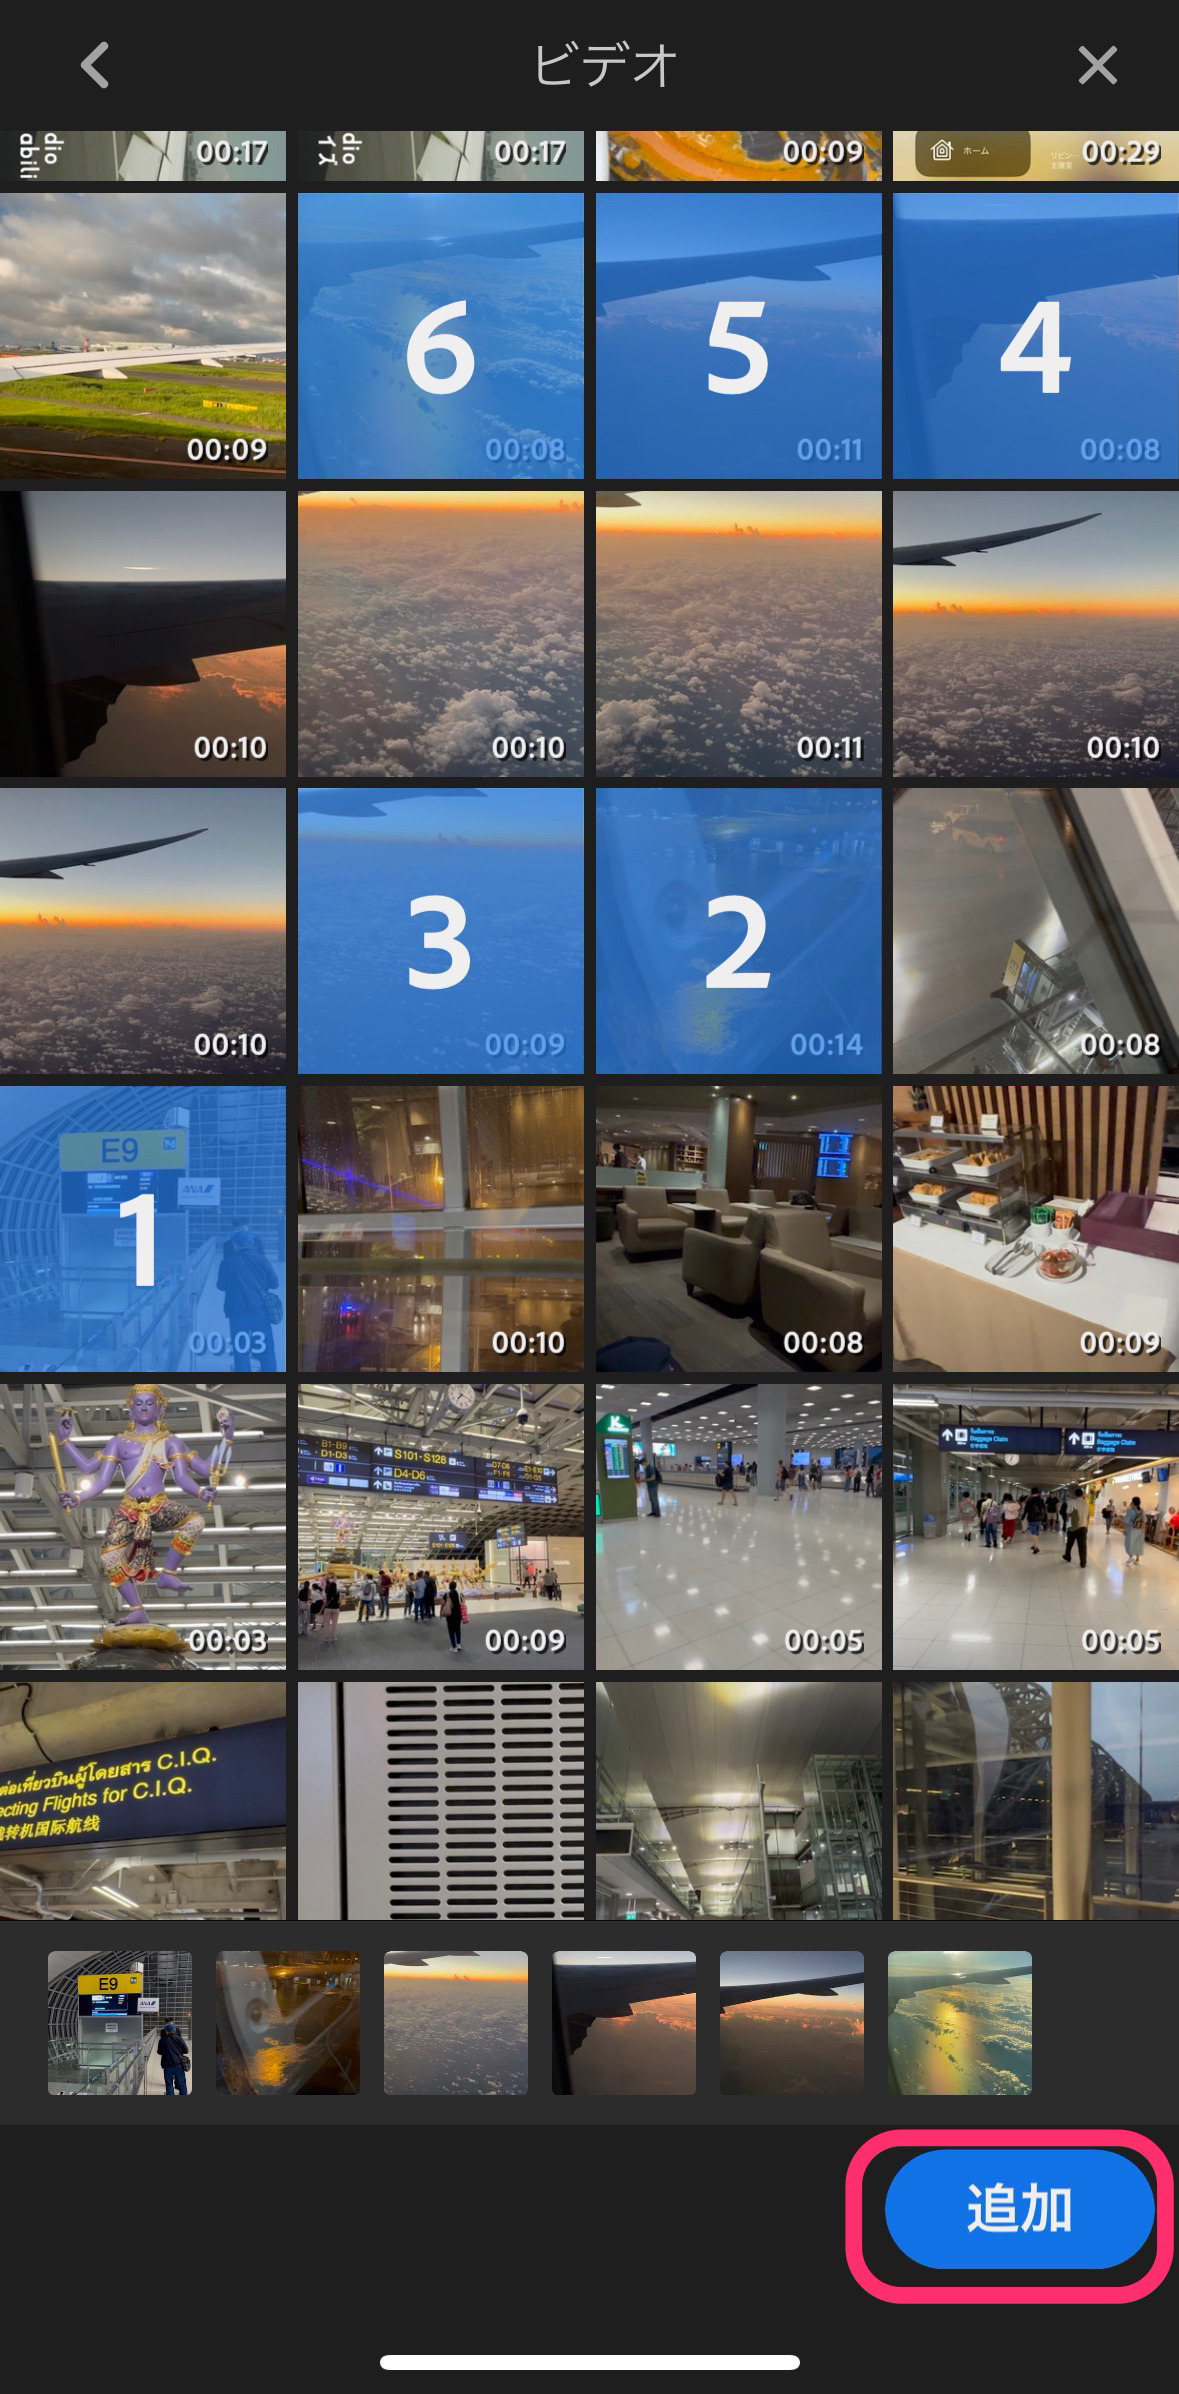
長押しして動画のプレビューを確認。トリミングをして、プレビュー画面左上の「戻る」で戻り、複数選択して一気に「追加」することもできます。
カット編集のやり方
カット編集には、クリップの端を詰めるトリミングと、分割して不要部分を削除する方法があります。
まずトリミングの解説をします。
トリミングのやり方
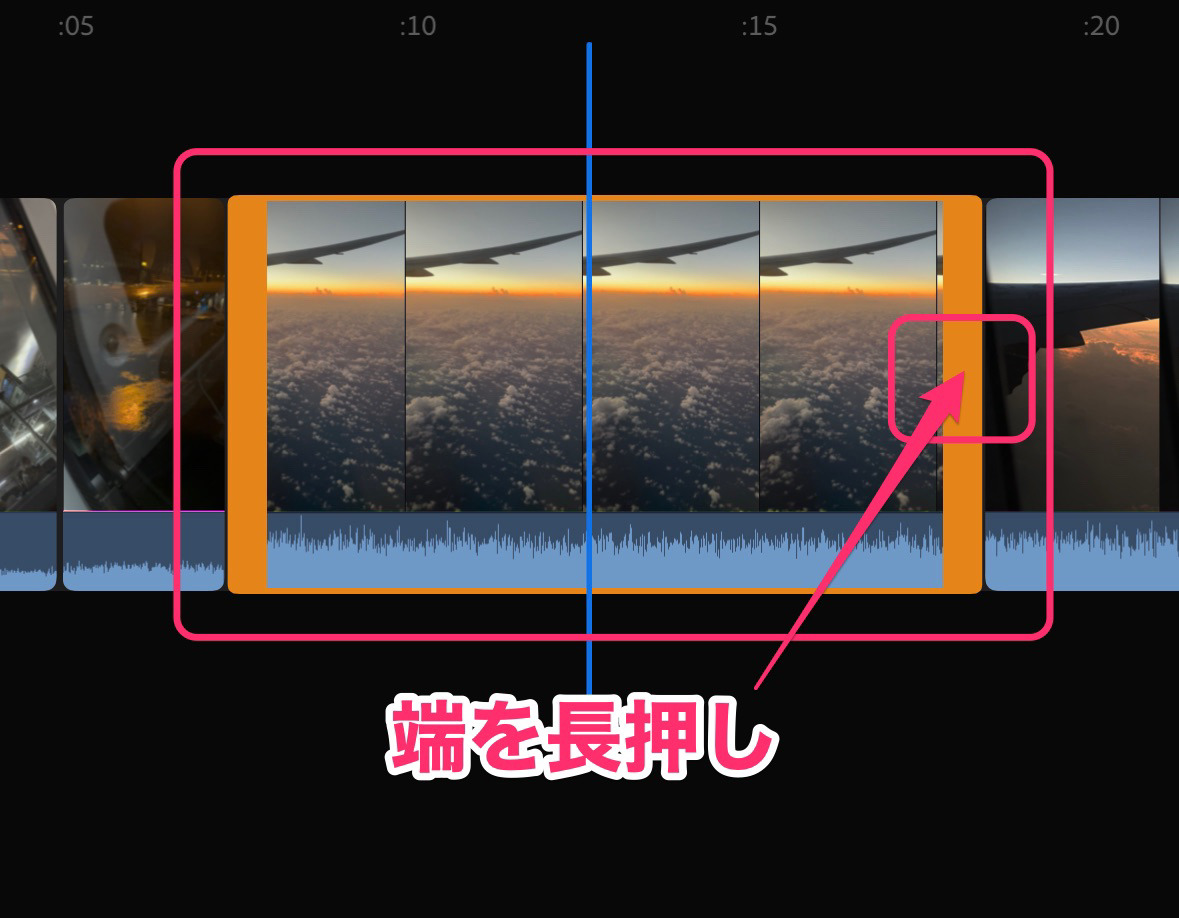
Adobe Premiere Rushのトリミングはとても簡単です。
動画クリップをタップして選択状態にして、端を長押しします。
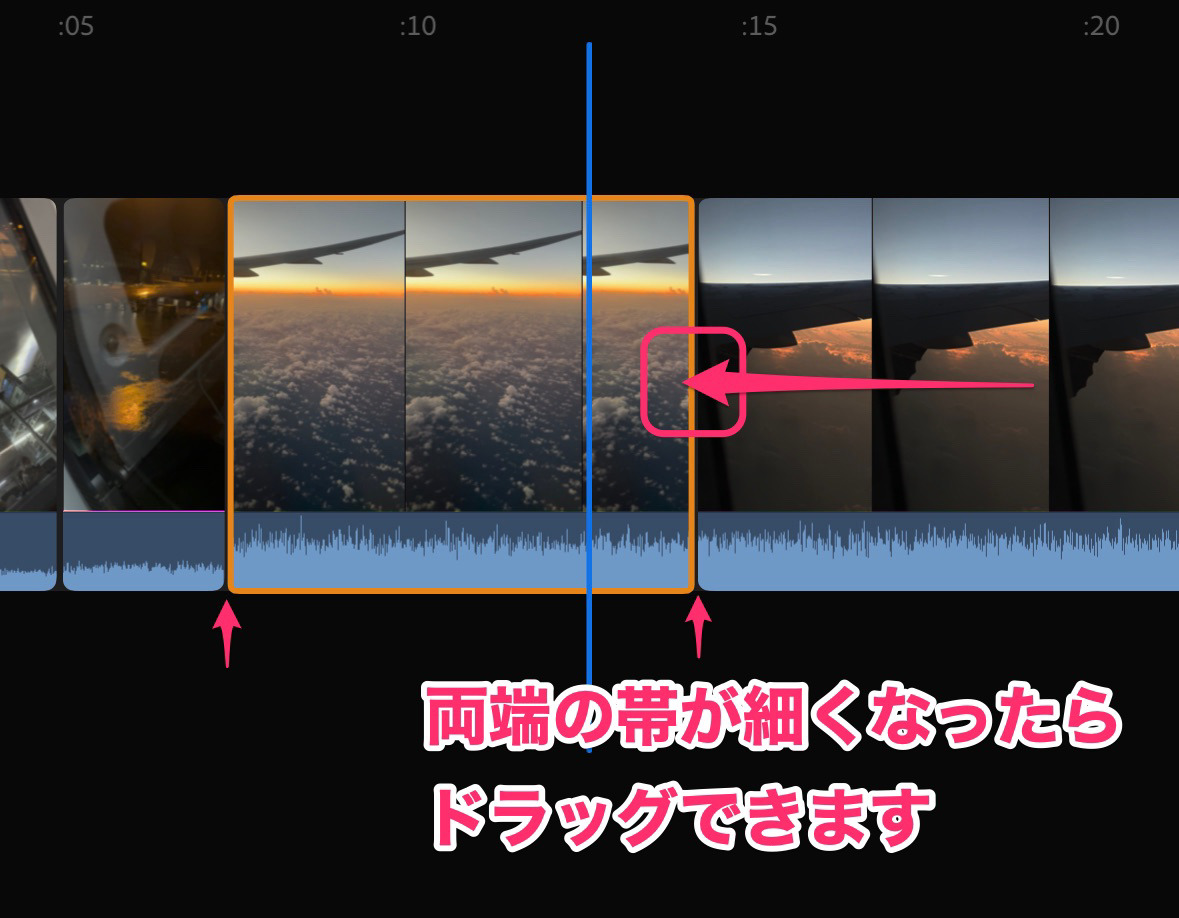
端の帯が細くなったらドラッグして、クリップをトリミングしていきます。
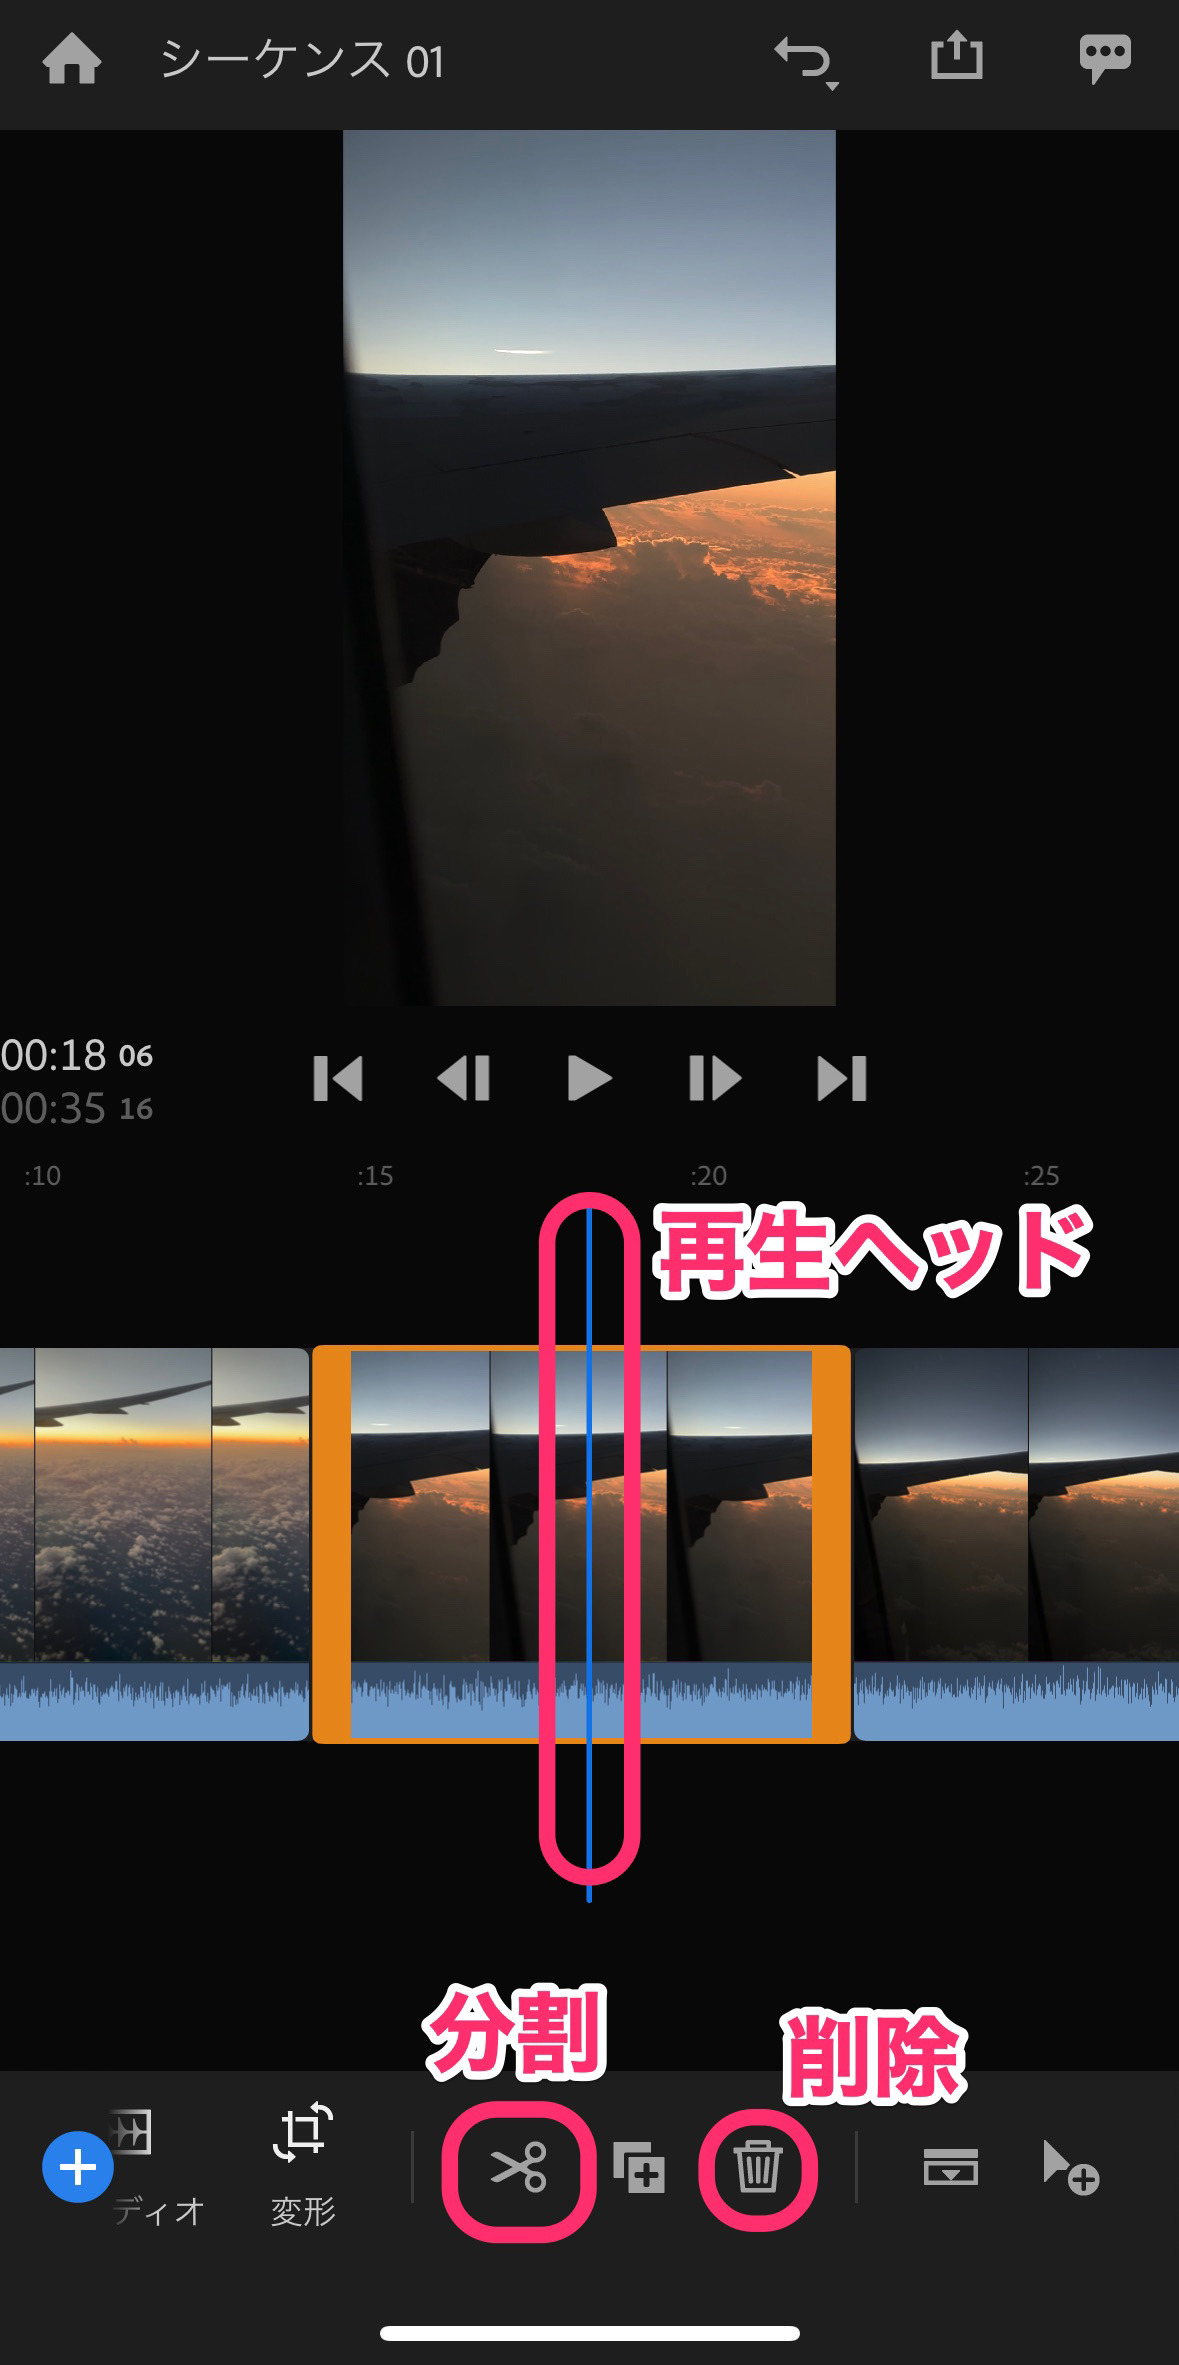
分割するやり方
もう一つのカット編集のやり方は、動画クリップを分割して不要な部分を削除する方法です。
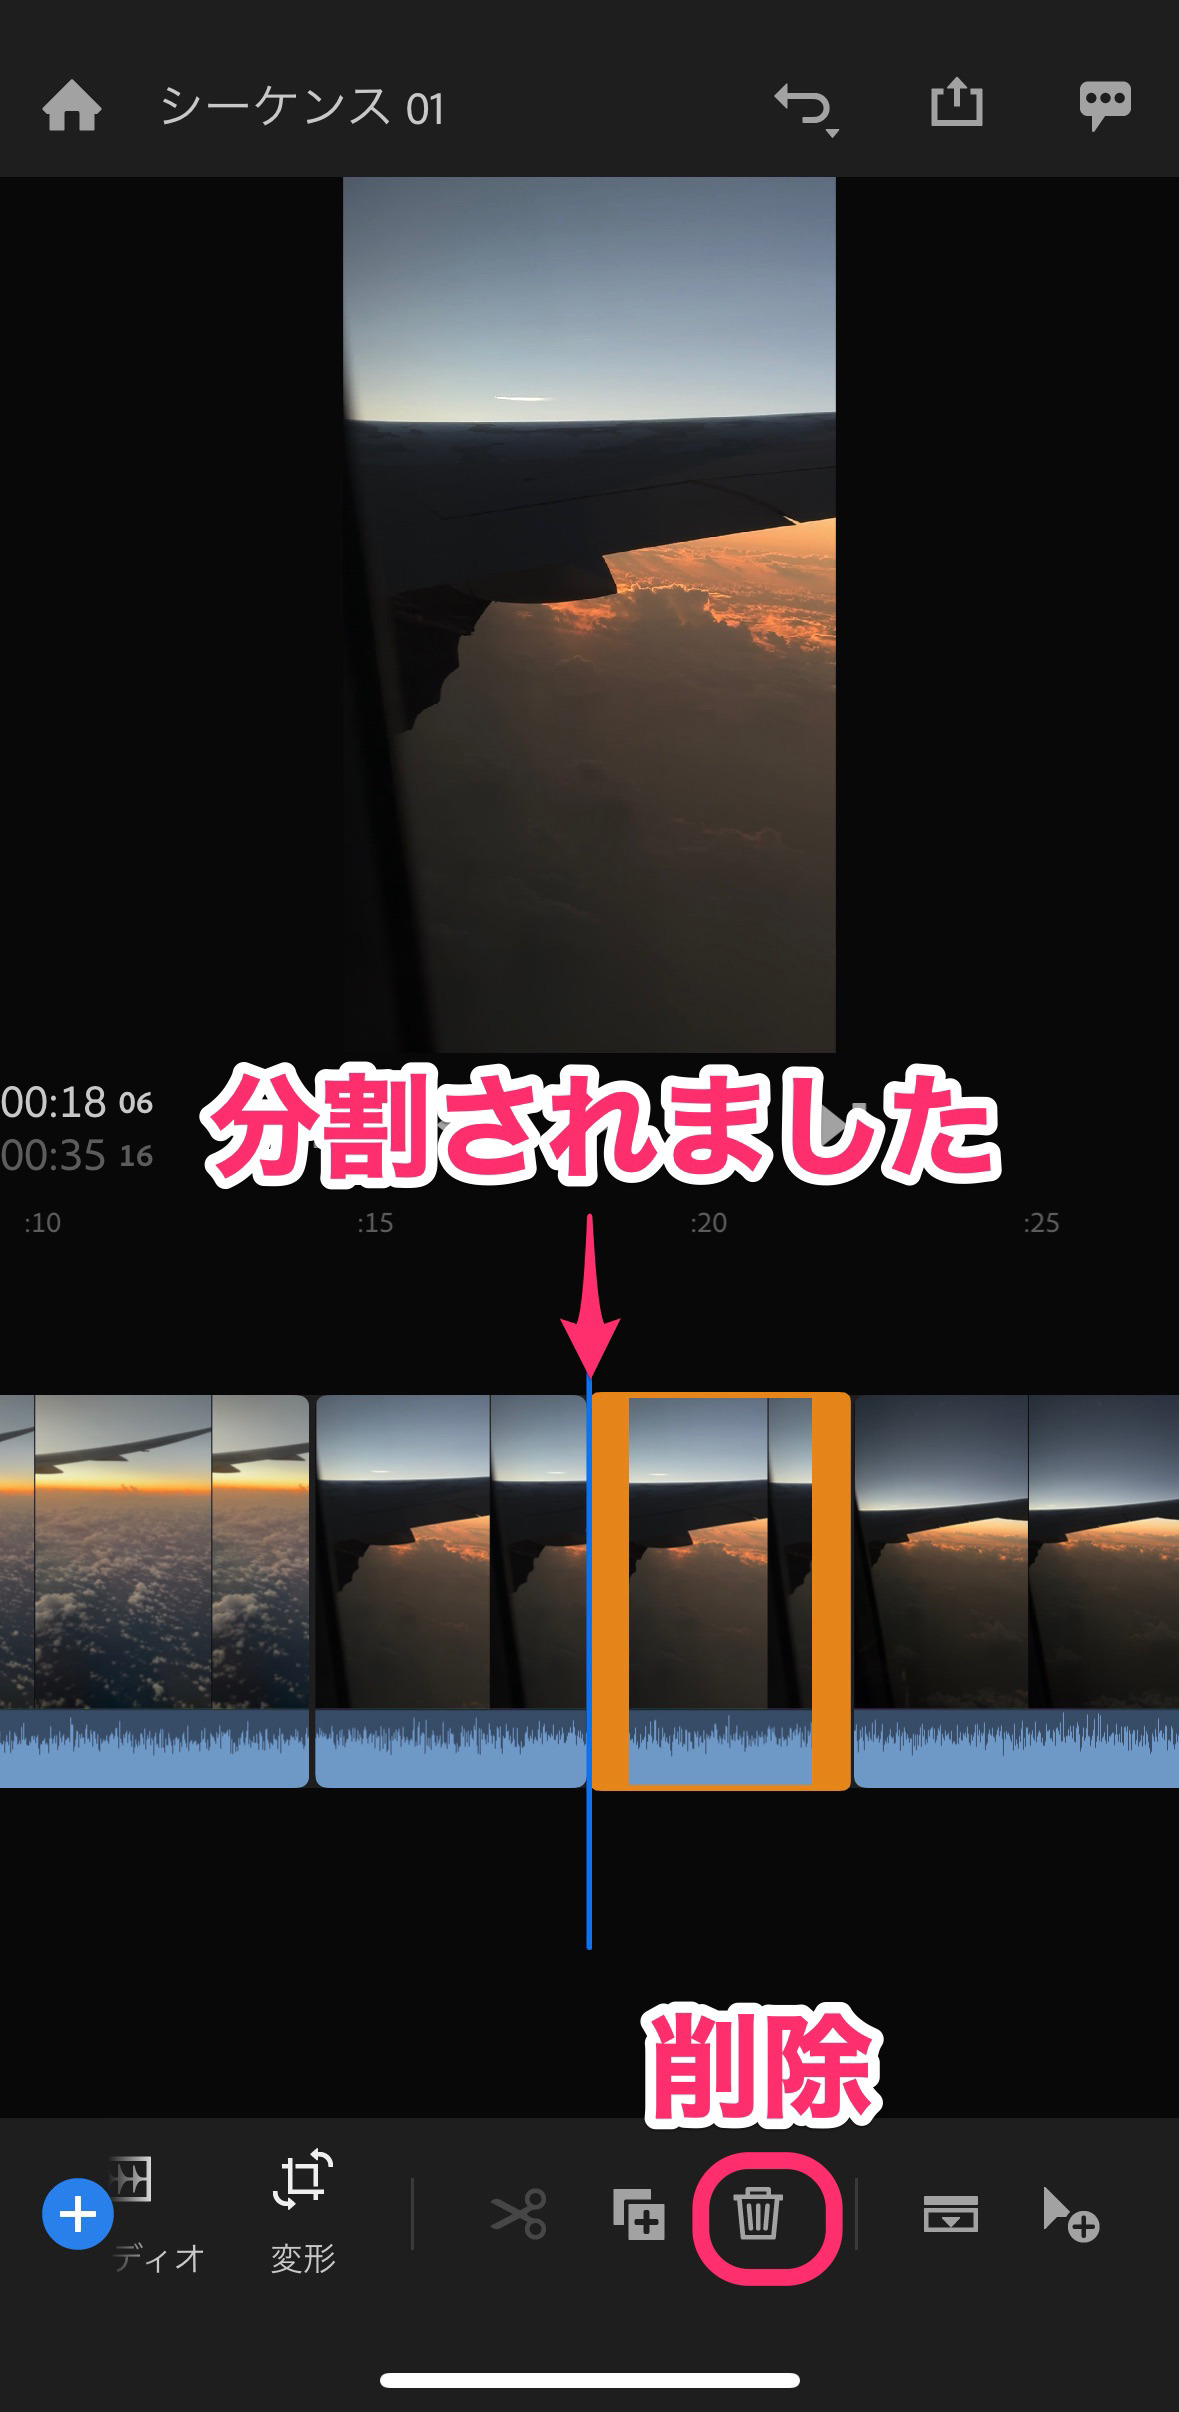
クリップが分割され自動的に再生ヘッドより後ろのクリップが選択状態になりました。
再生ヘッドより後ろが不要部分なら、このまま「削除」をタップします。
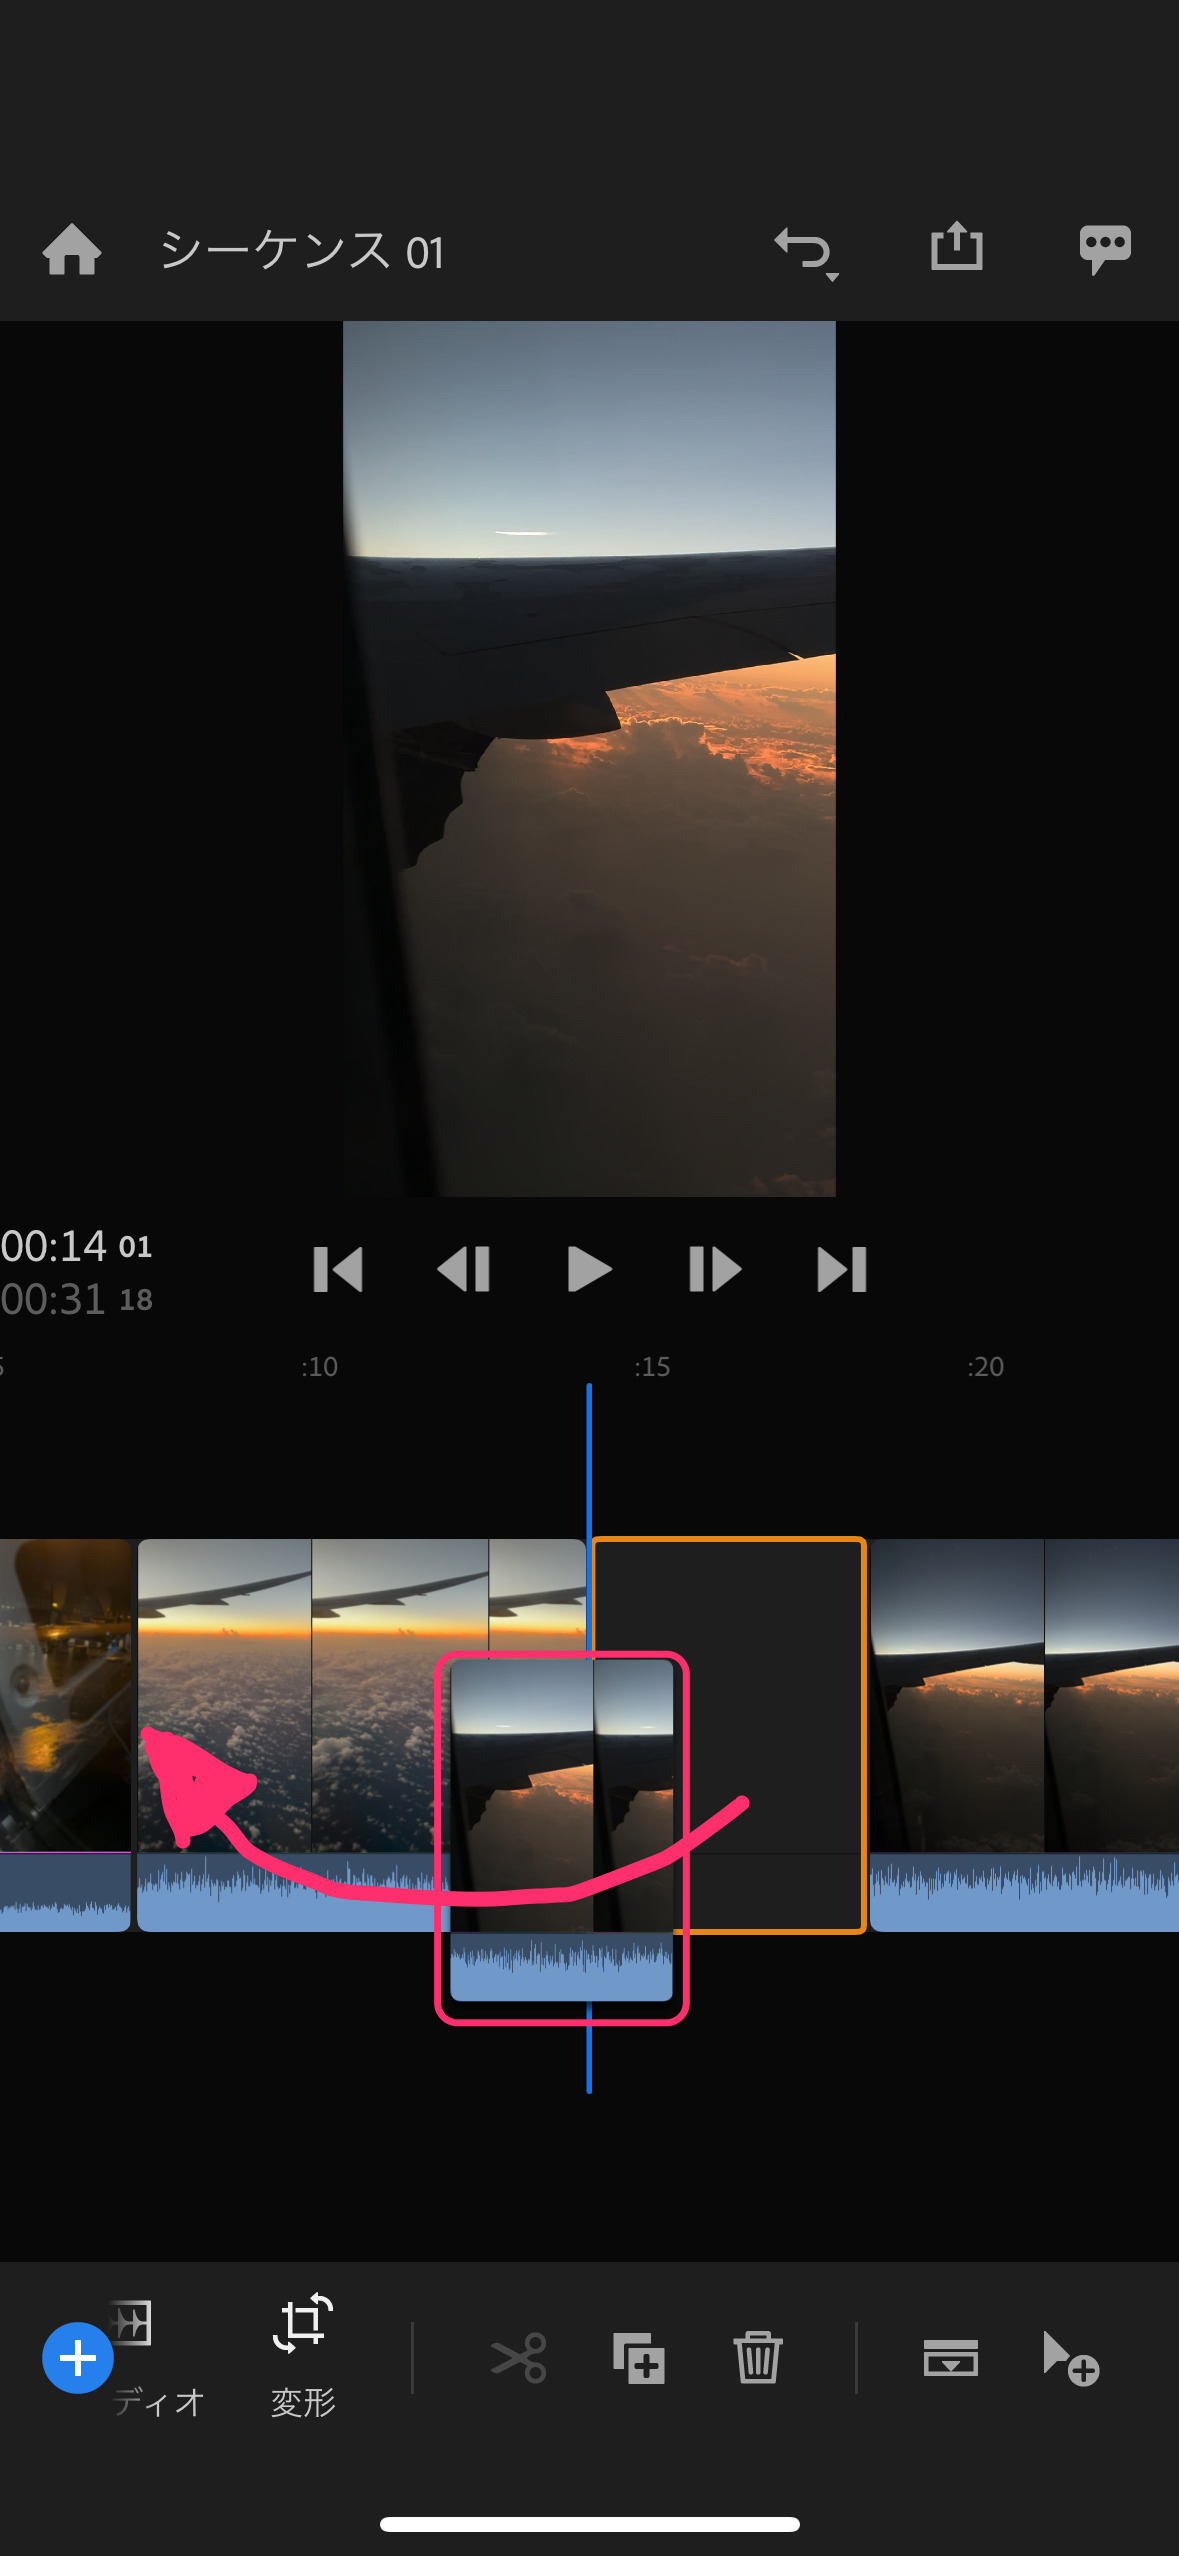
クリップの入替え方法
クリップの入替え方法は、直感的に操作できます。
入替えたいクリップを長押しして、表示が浮き上がったら、ドラッグして移動させます。
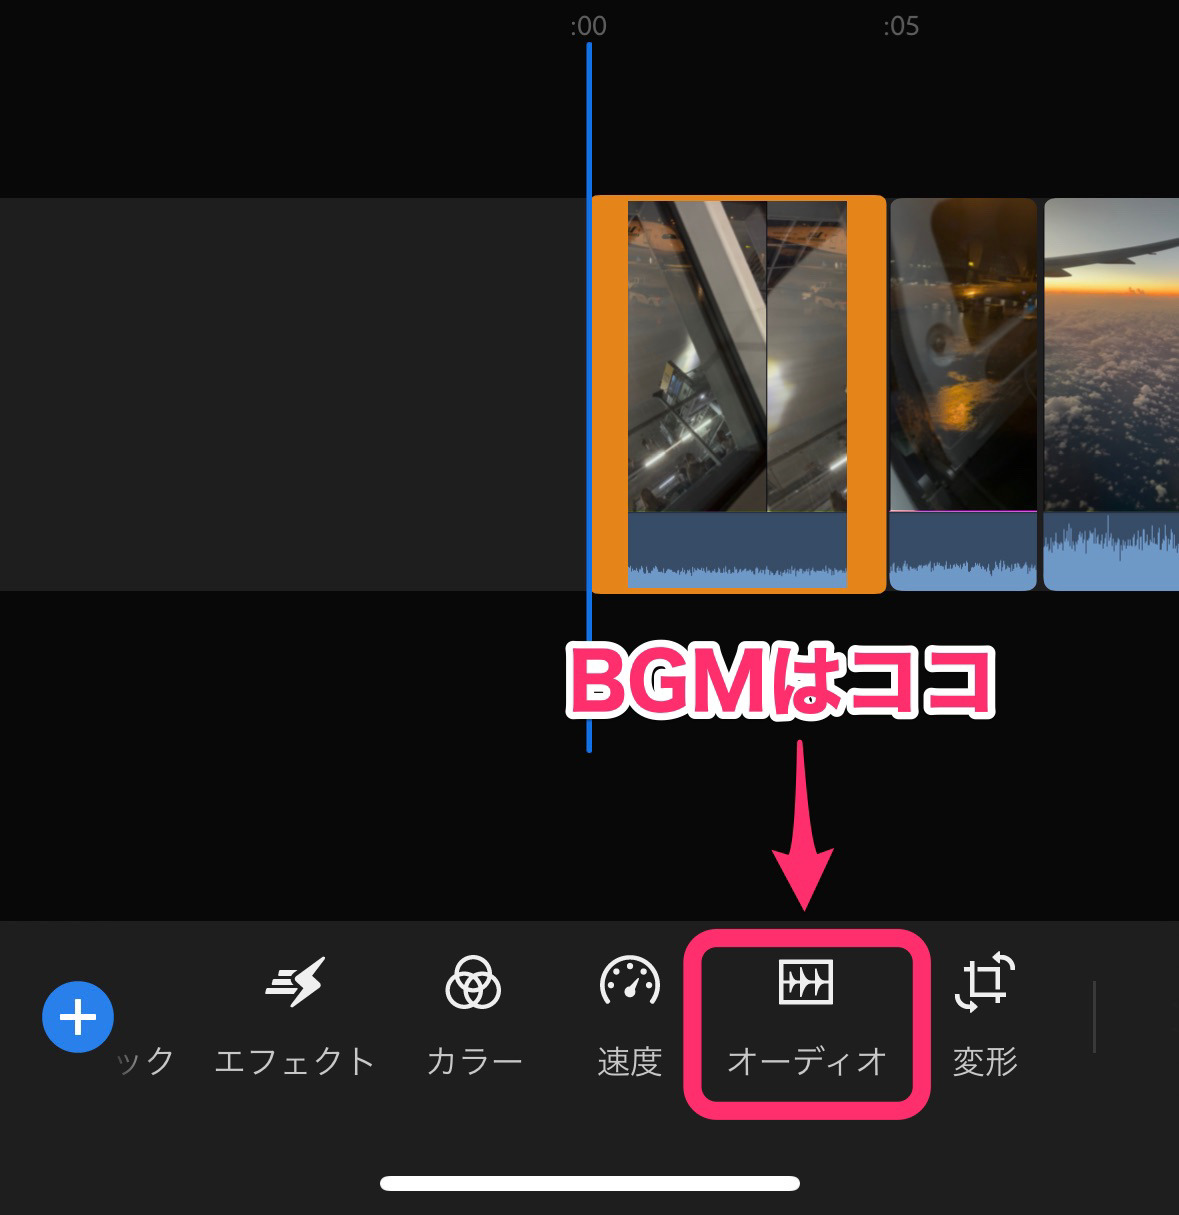
BGM音楽を入れる方法
BGM音楽は「オーディオ」の「参照」の中にあります。
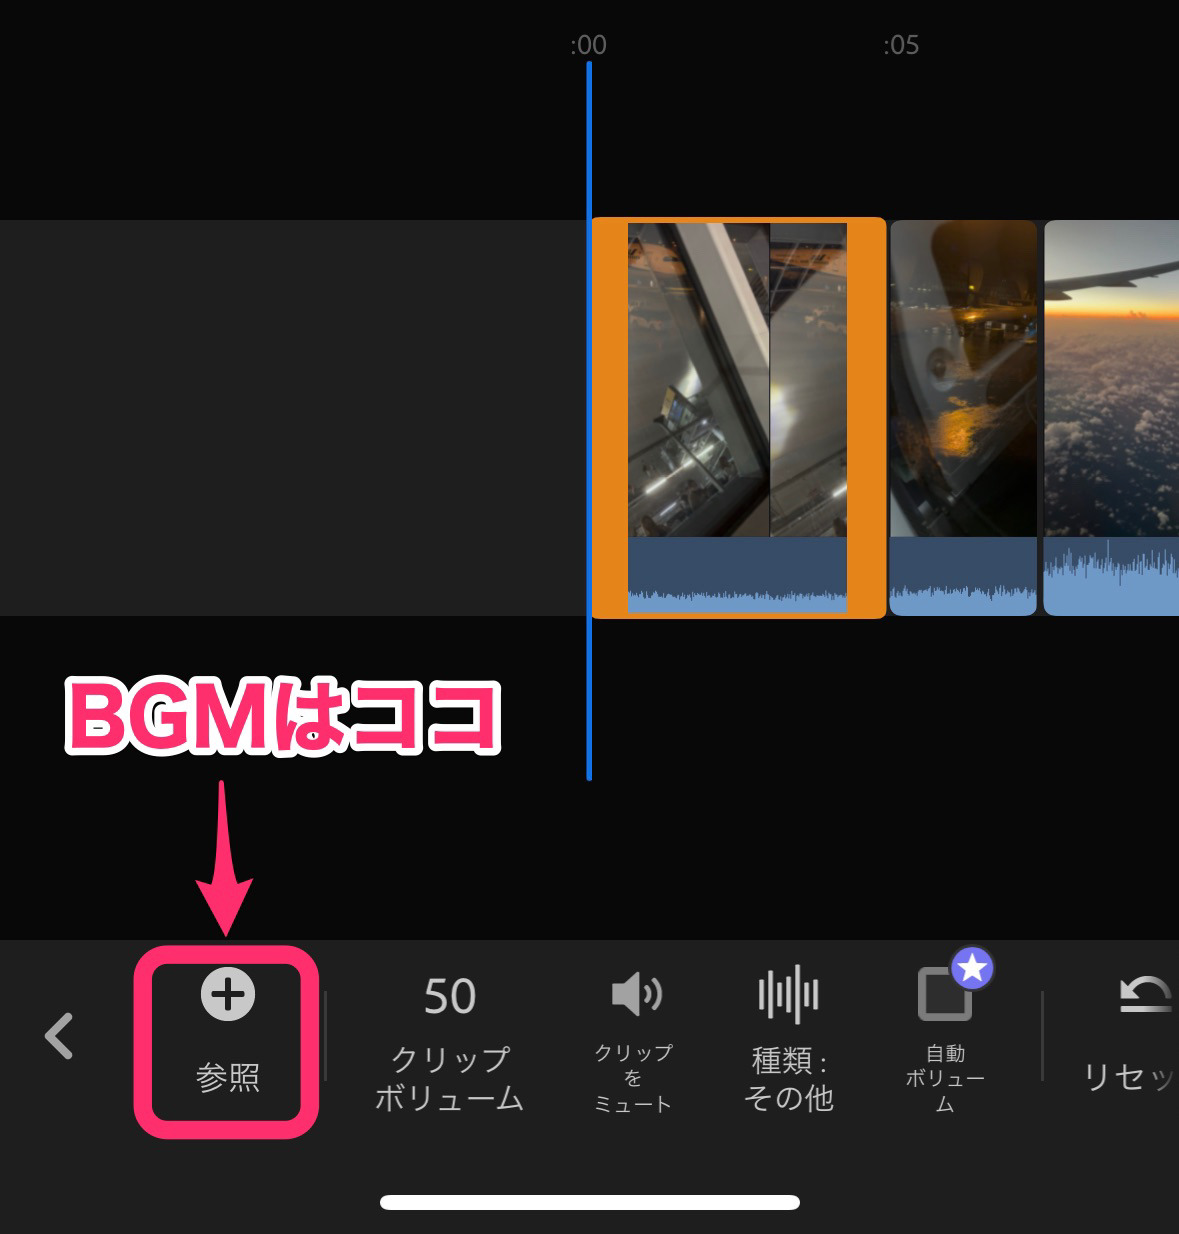
オーディオを参照画面になります。
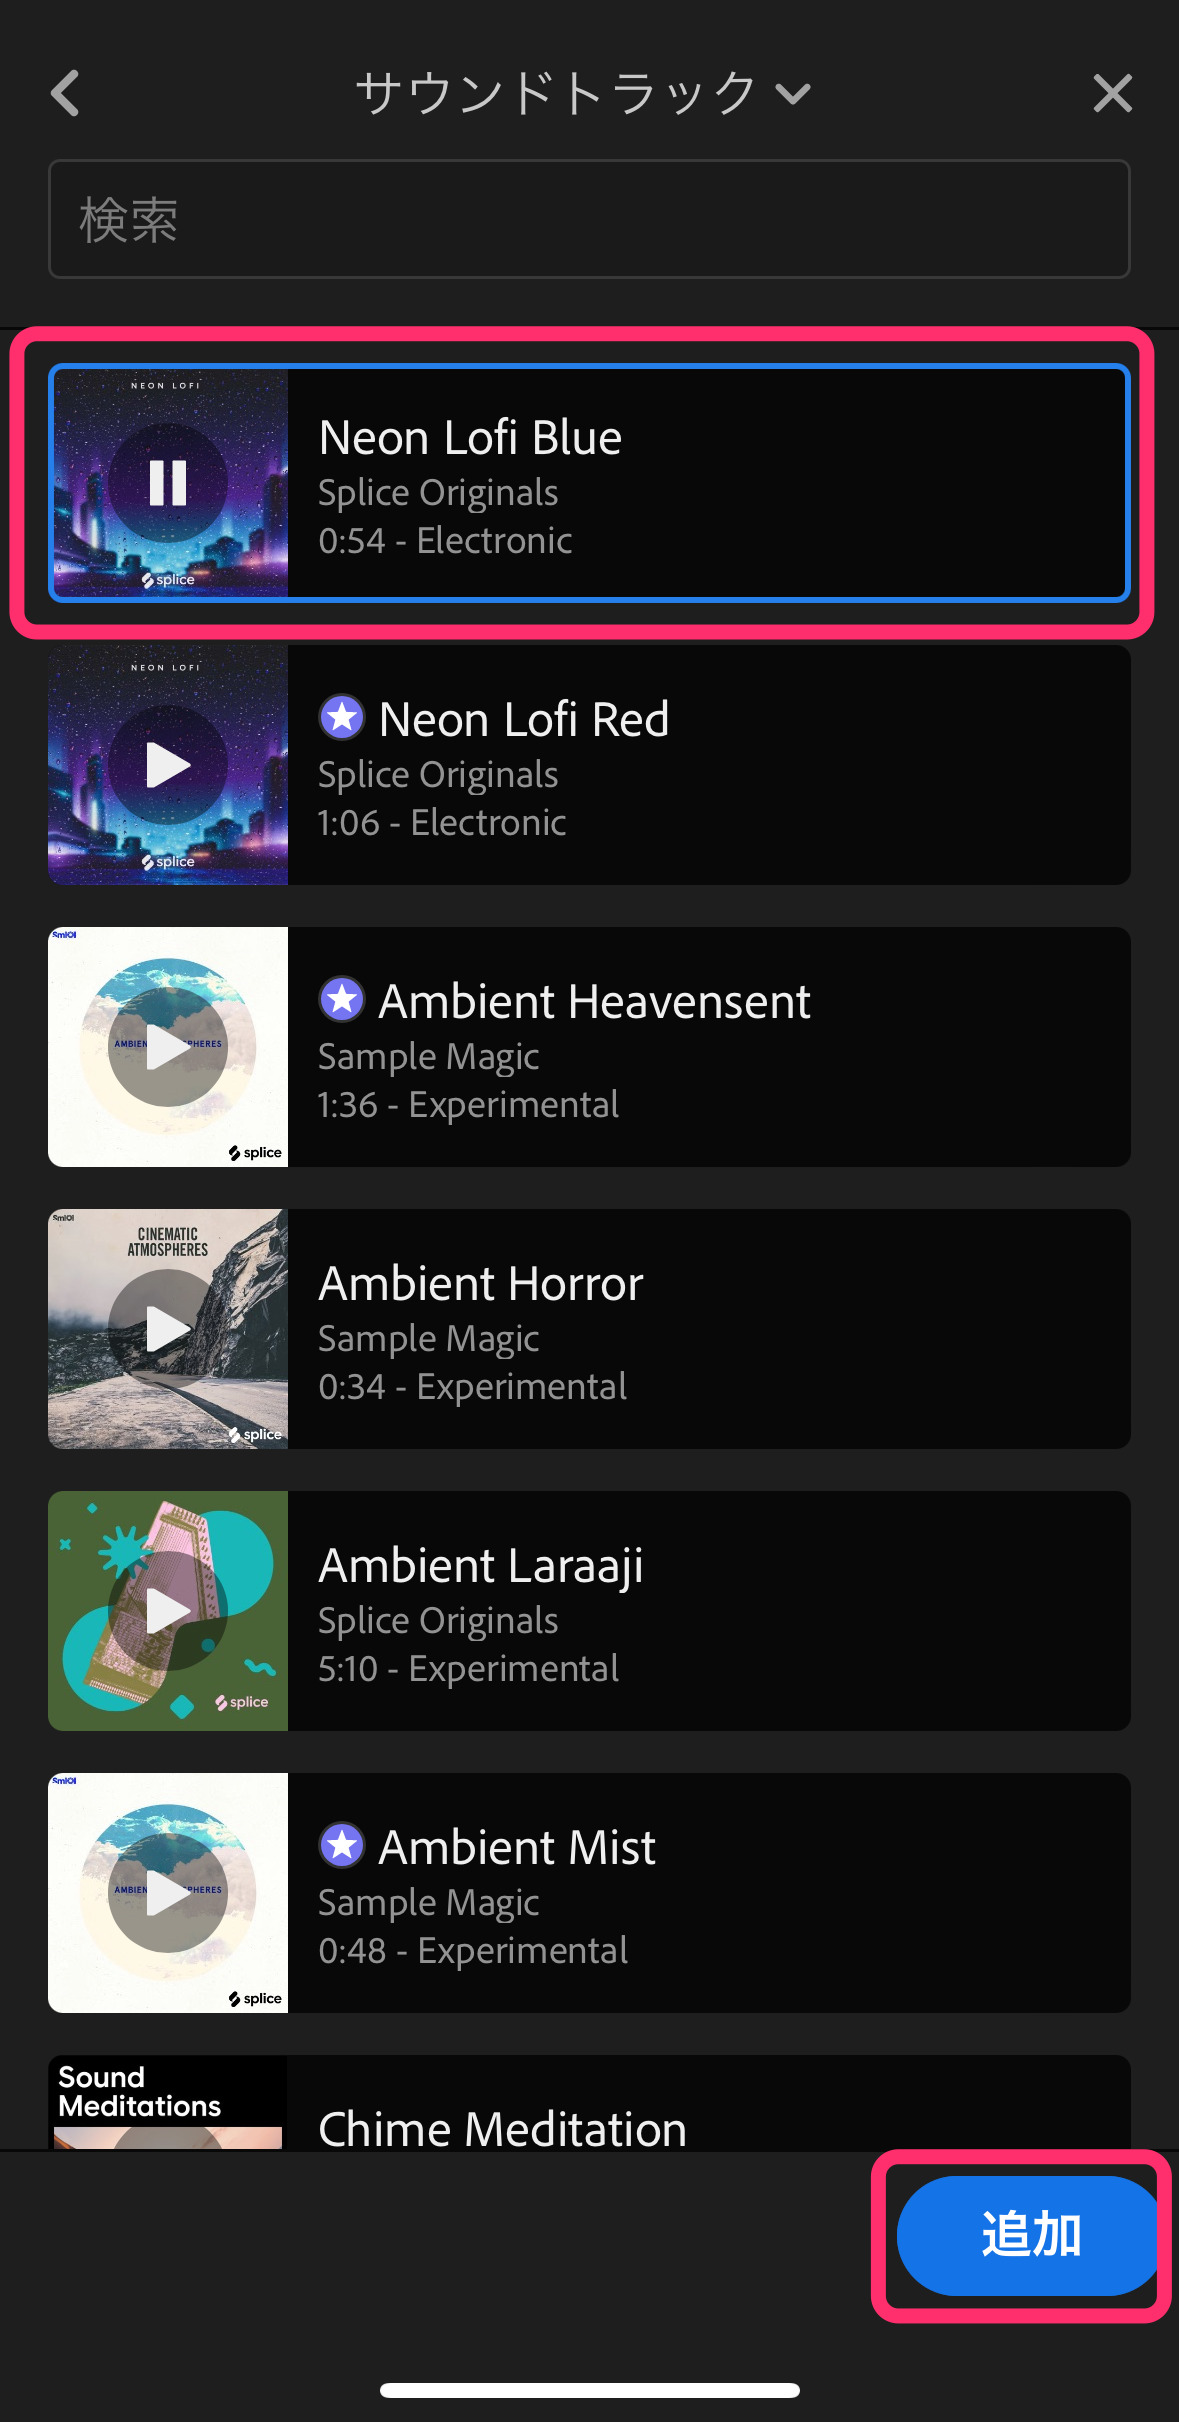
ここで注意しておきたいことは、「星マーク」のついた曲を使った場合、書き出し時に、有料契約しないと書き出しができません。
「他」で、星マーク無しの曲を探します。
サウンドエフェクト(効果音)もあります。
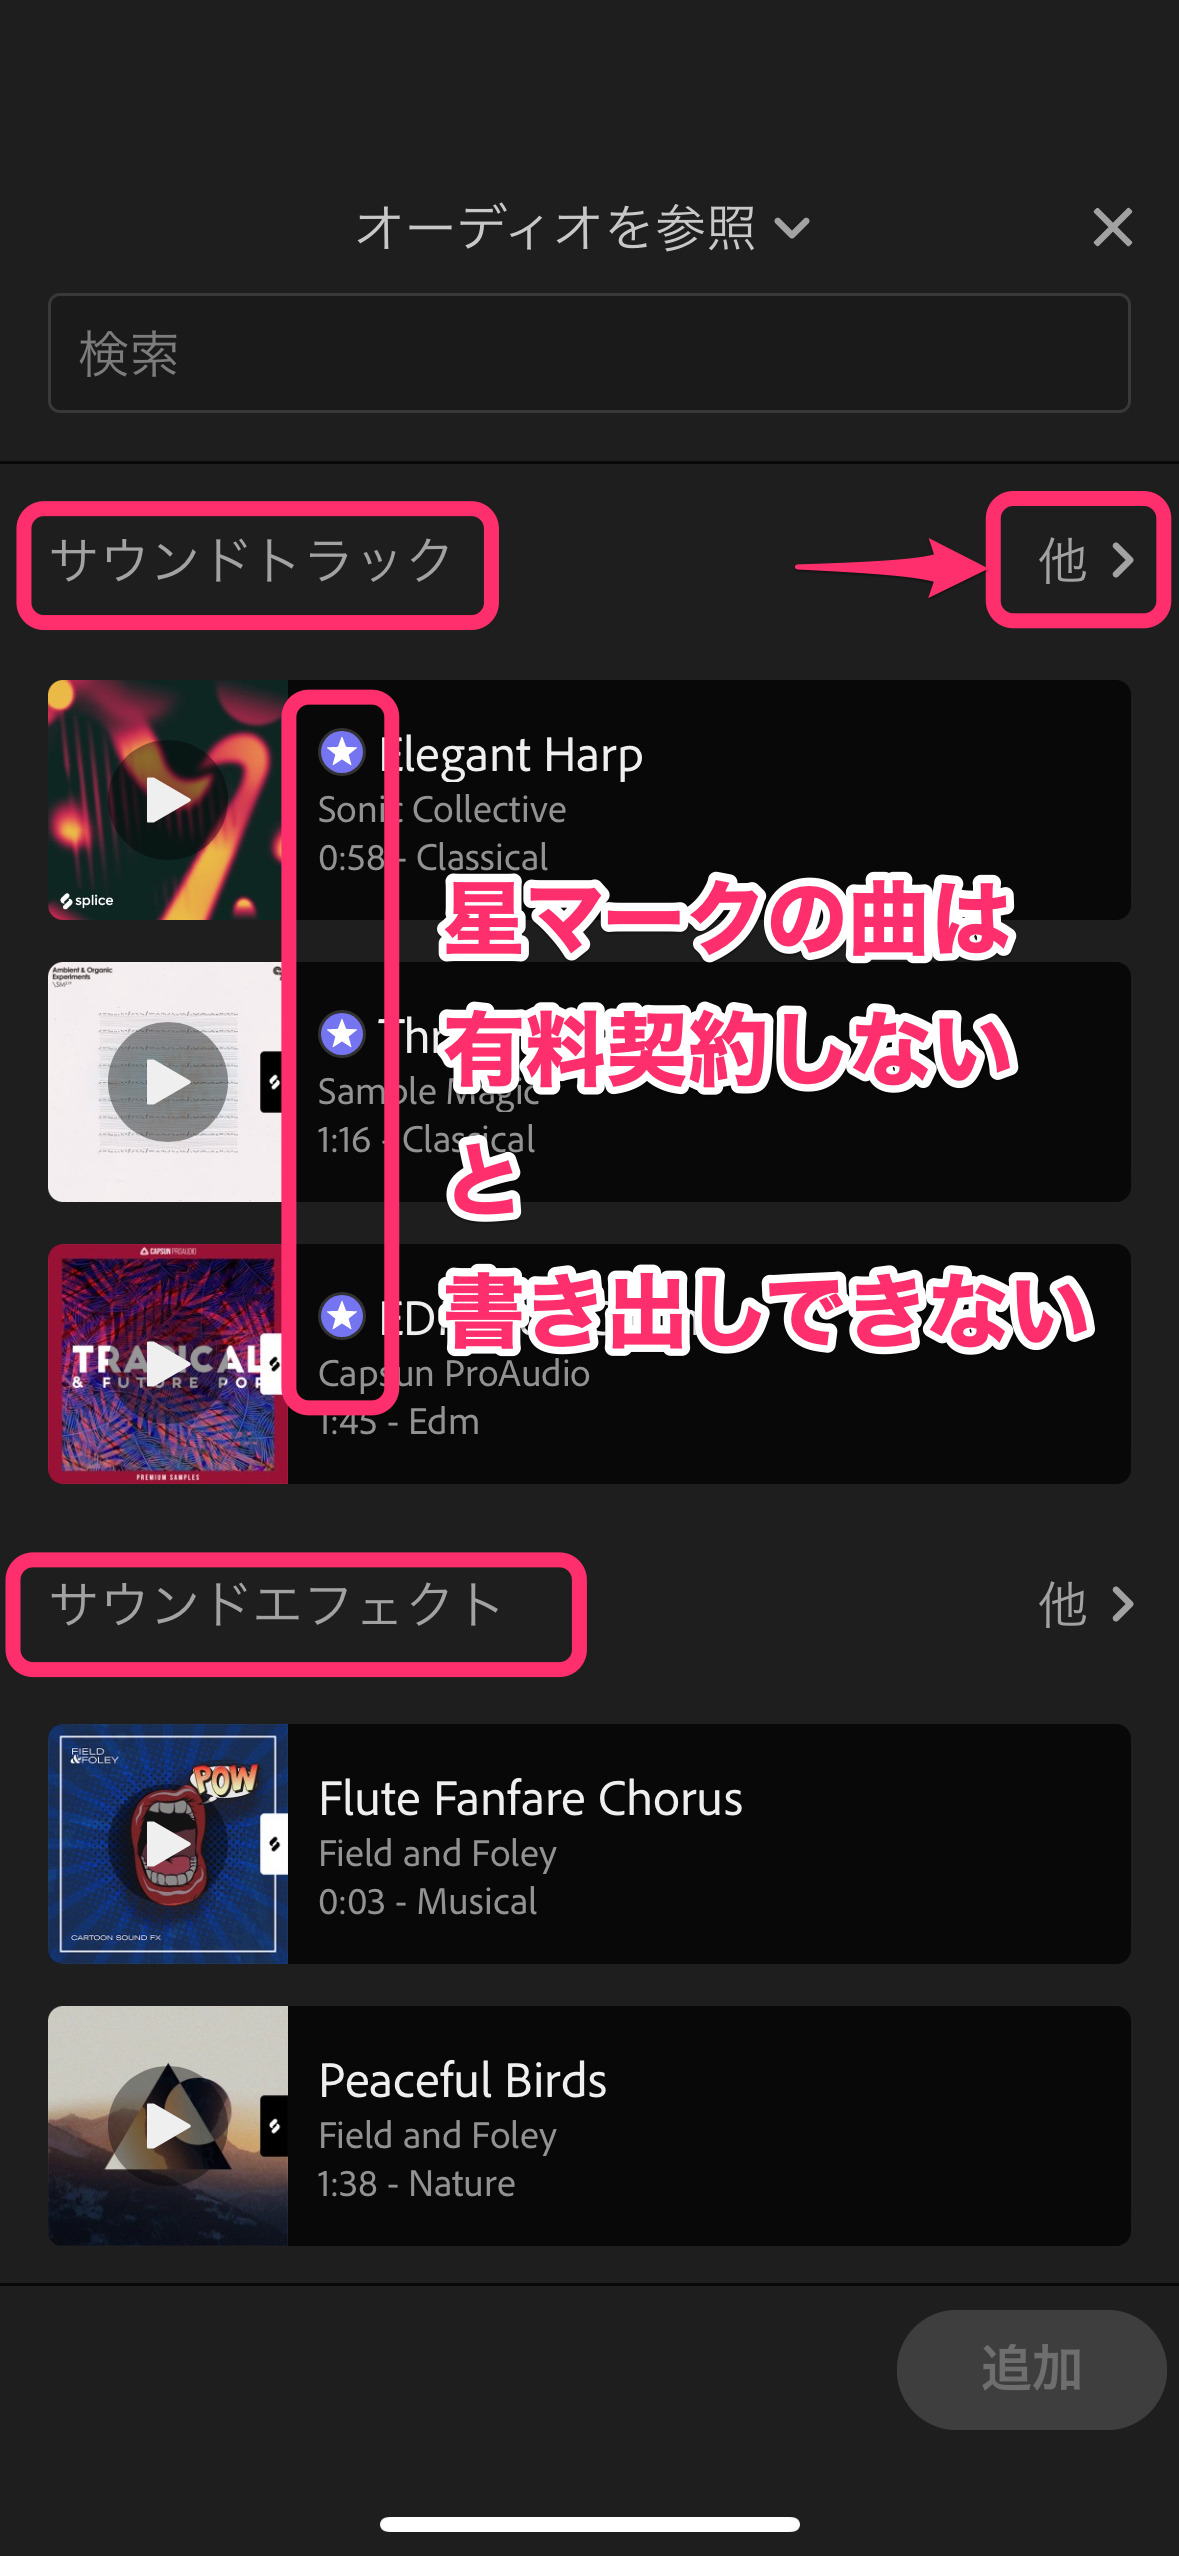
星マークのついていない曲を選択し、タイムラインに「追加」します。
BGM音楽がタイムラインに追加されました。再生してチェックしてみましょう。
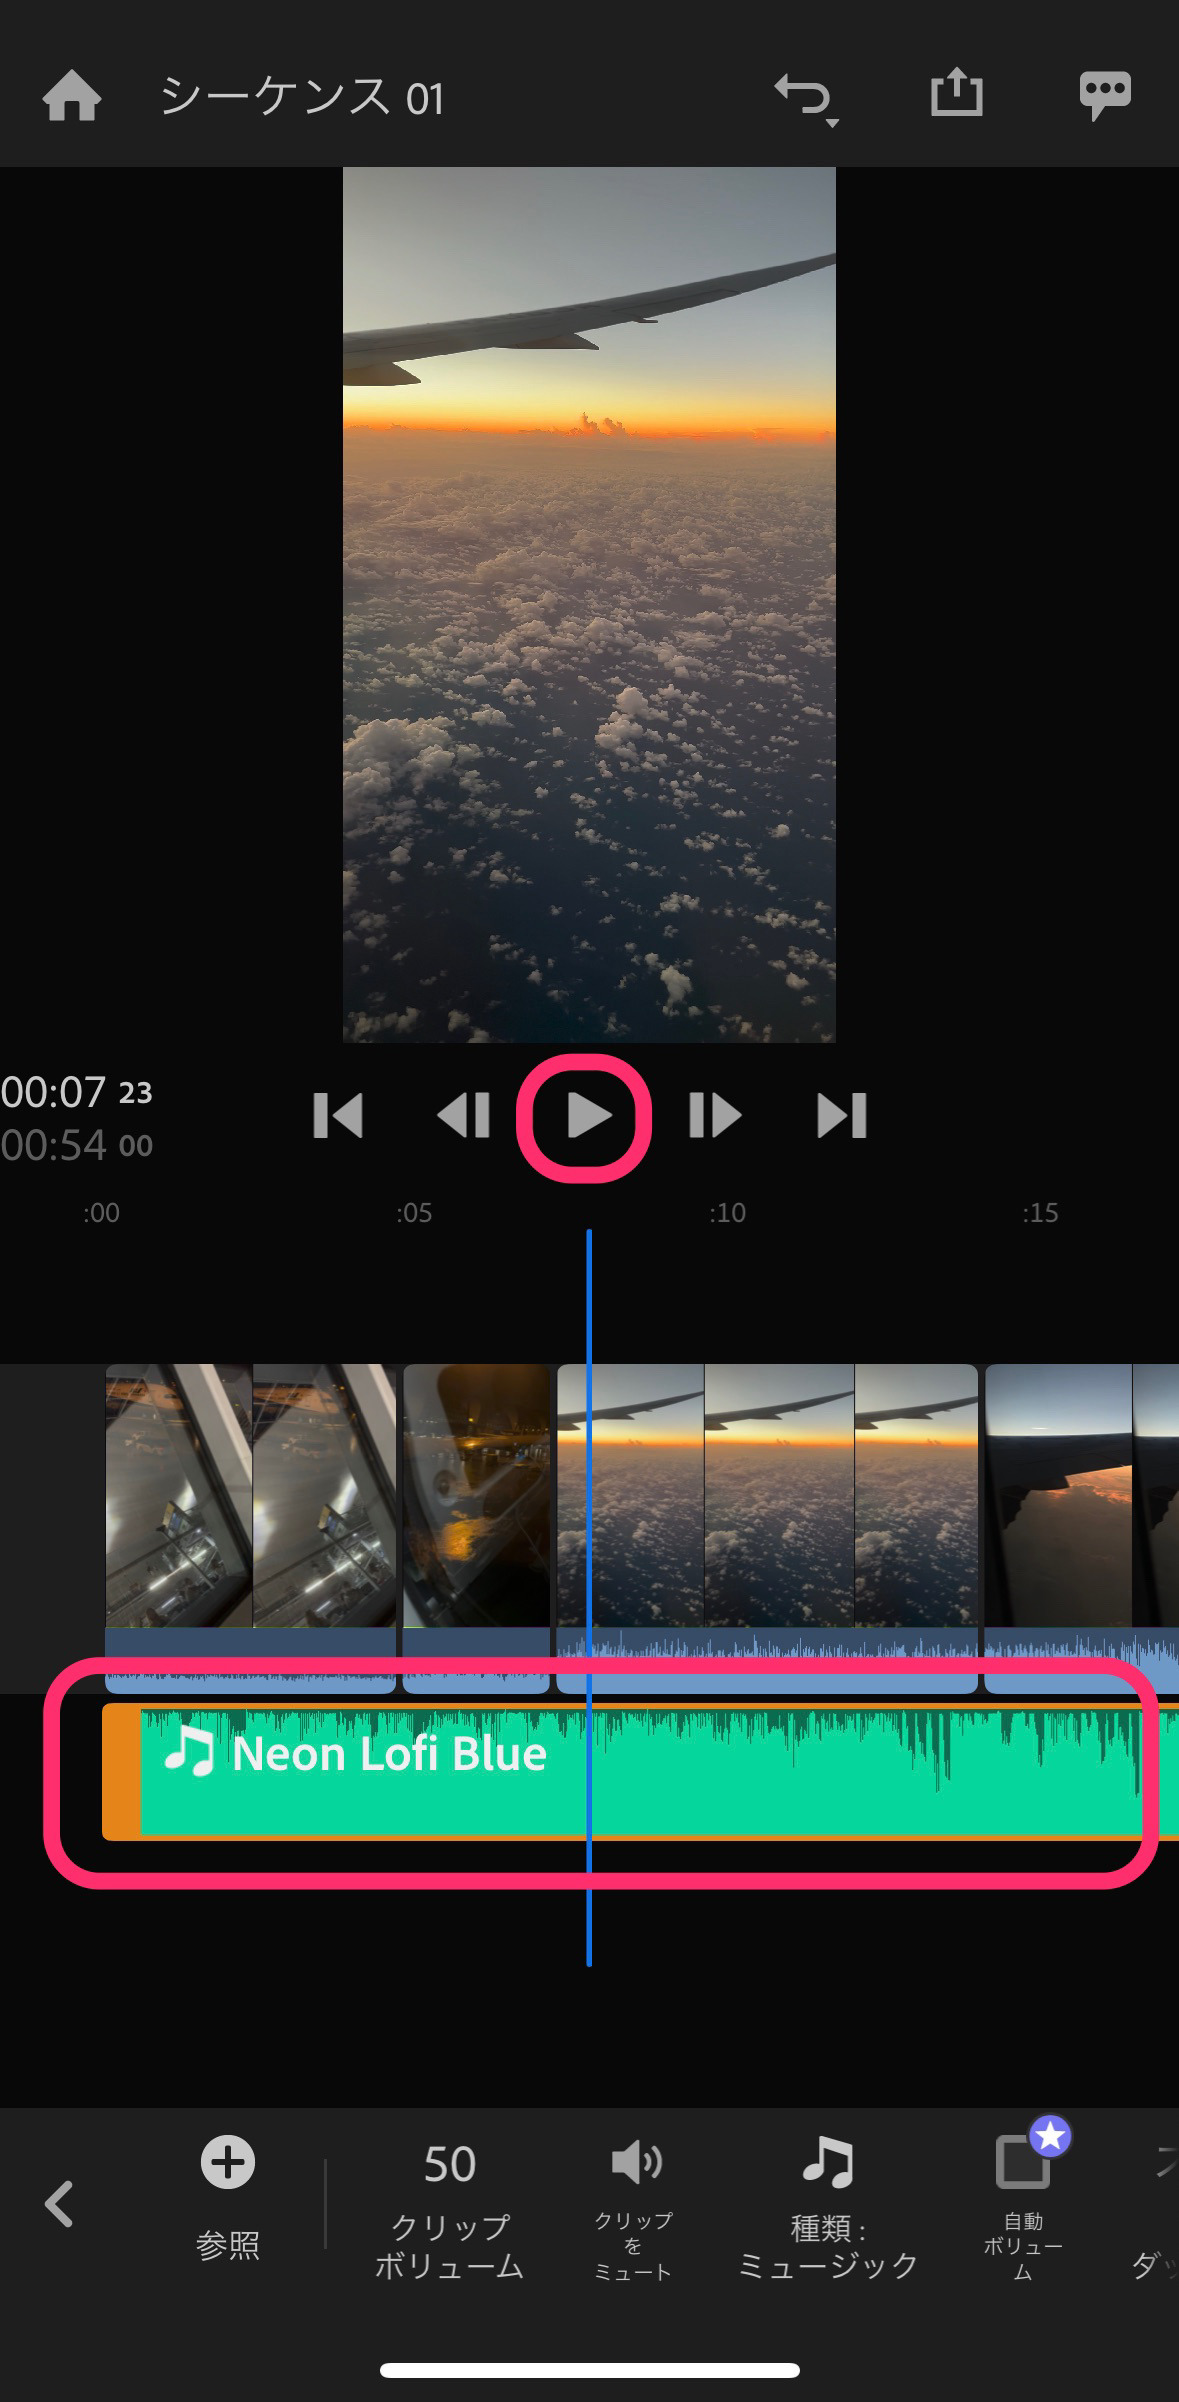
BGM音楽クリップを動画の長さに合わせて、カット編集しておきましょう。
音量を調節する方法
BGM音楽の音量を調節してみましょう。
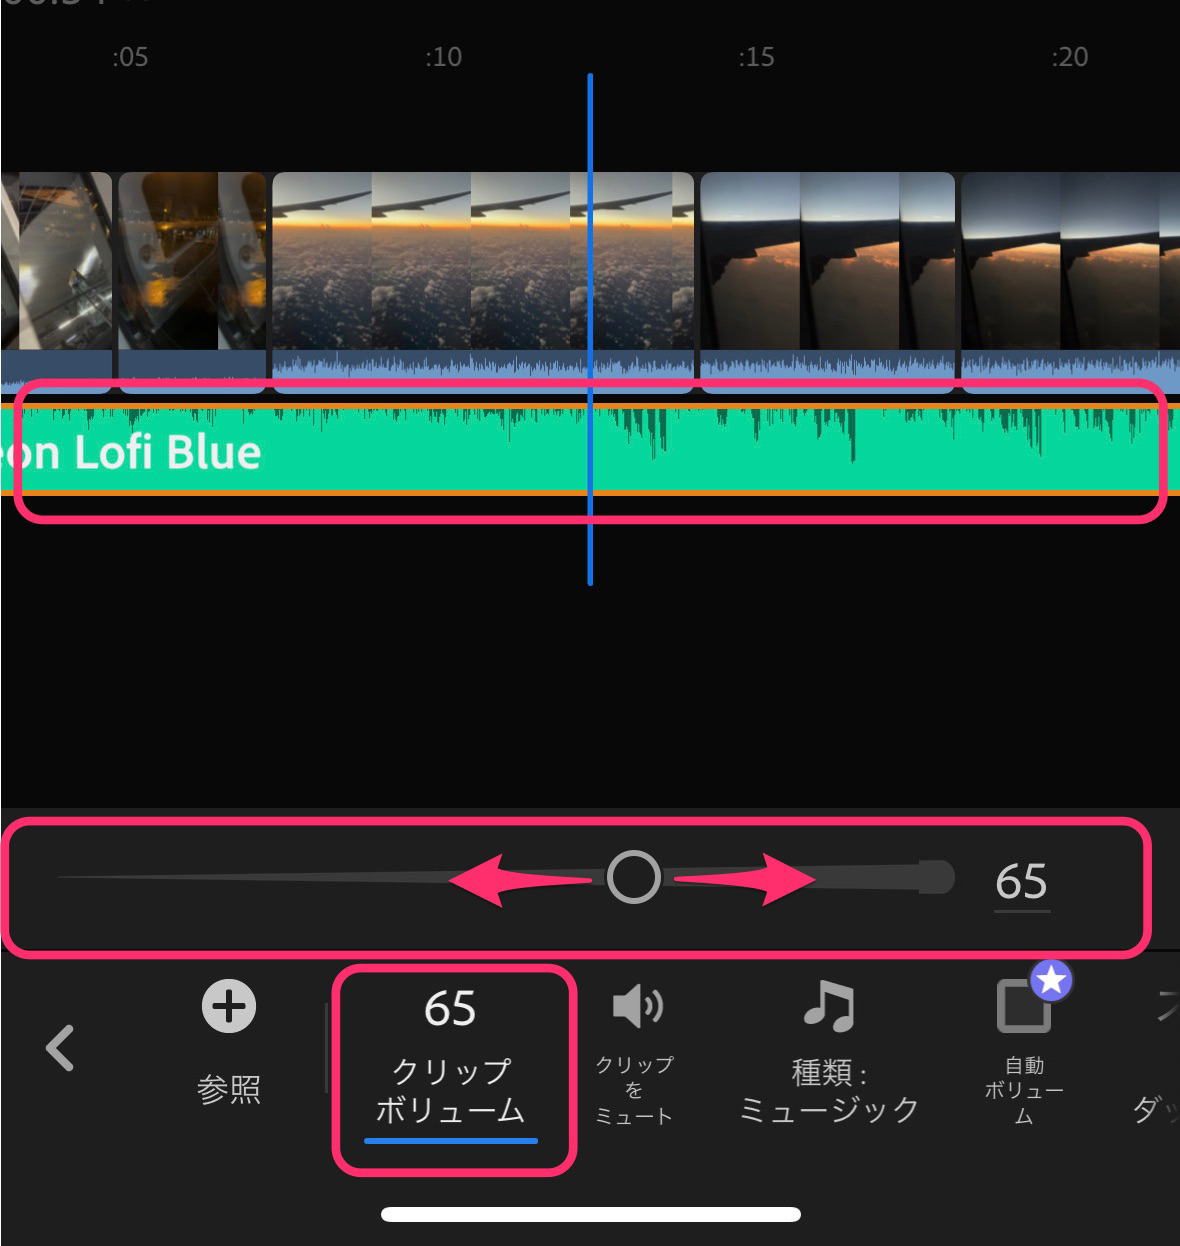
音楽クリップが選択されていることを確認して、「クリップボリューム」をタップし、音量調節スラーイダーを表示させます。
スライダーを動かし、音量を指定し、再生して確認してみましょう。
再生しながら音量調節ができます。
同様に動画クリップの音量も調節できます!
Premiere Rushでは、音量のフェードイン・フェードアウトができません。
テキストを入れる方法
Adobe Premiere Rushでは単純にテキストを入れることができません。
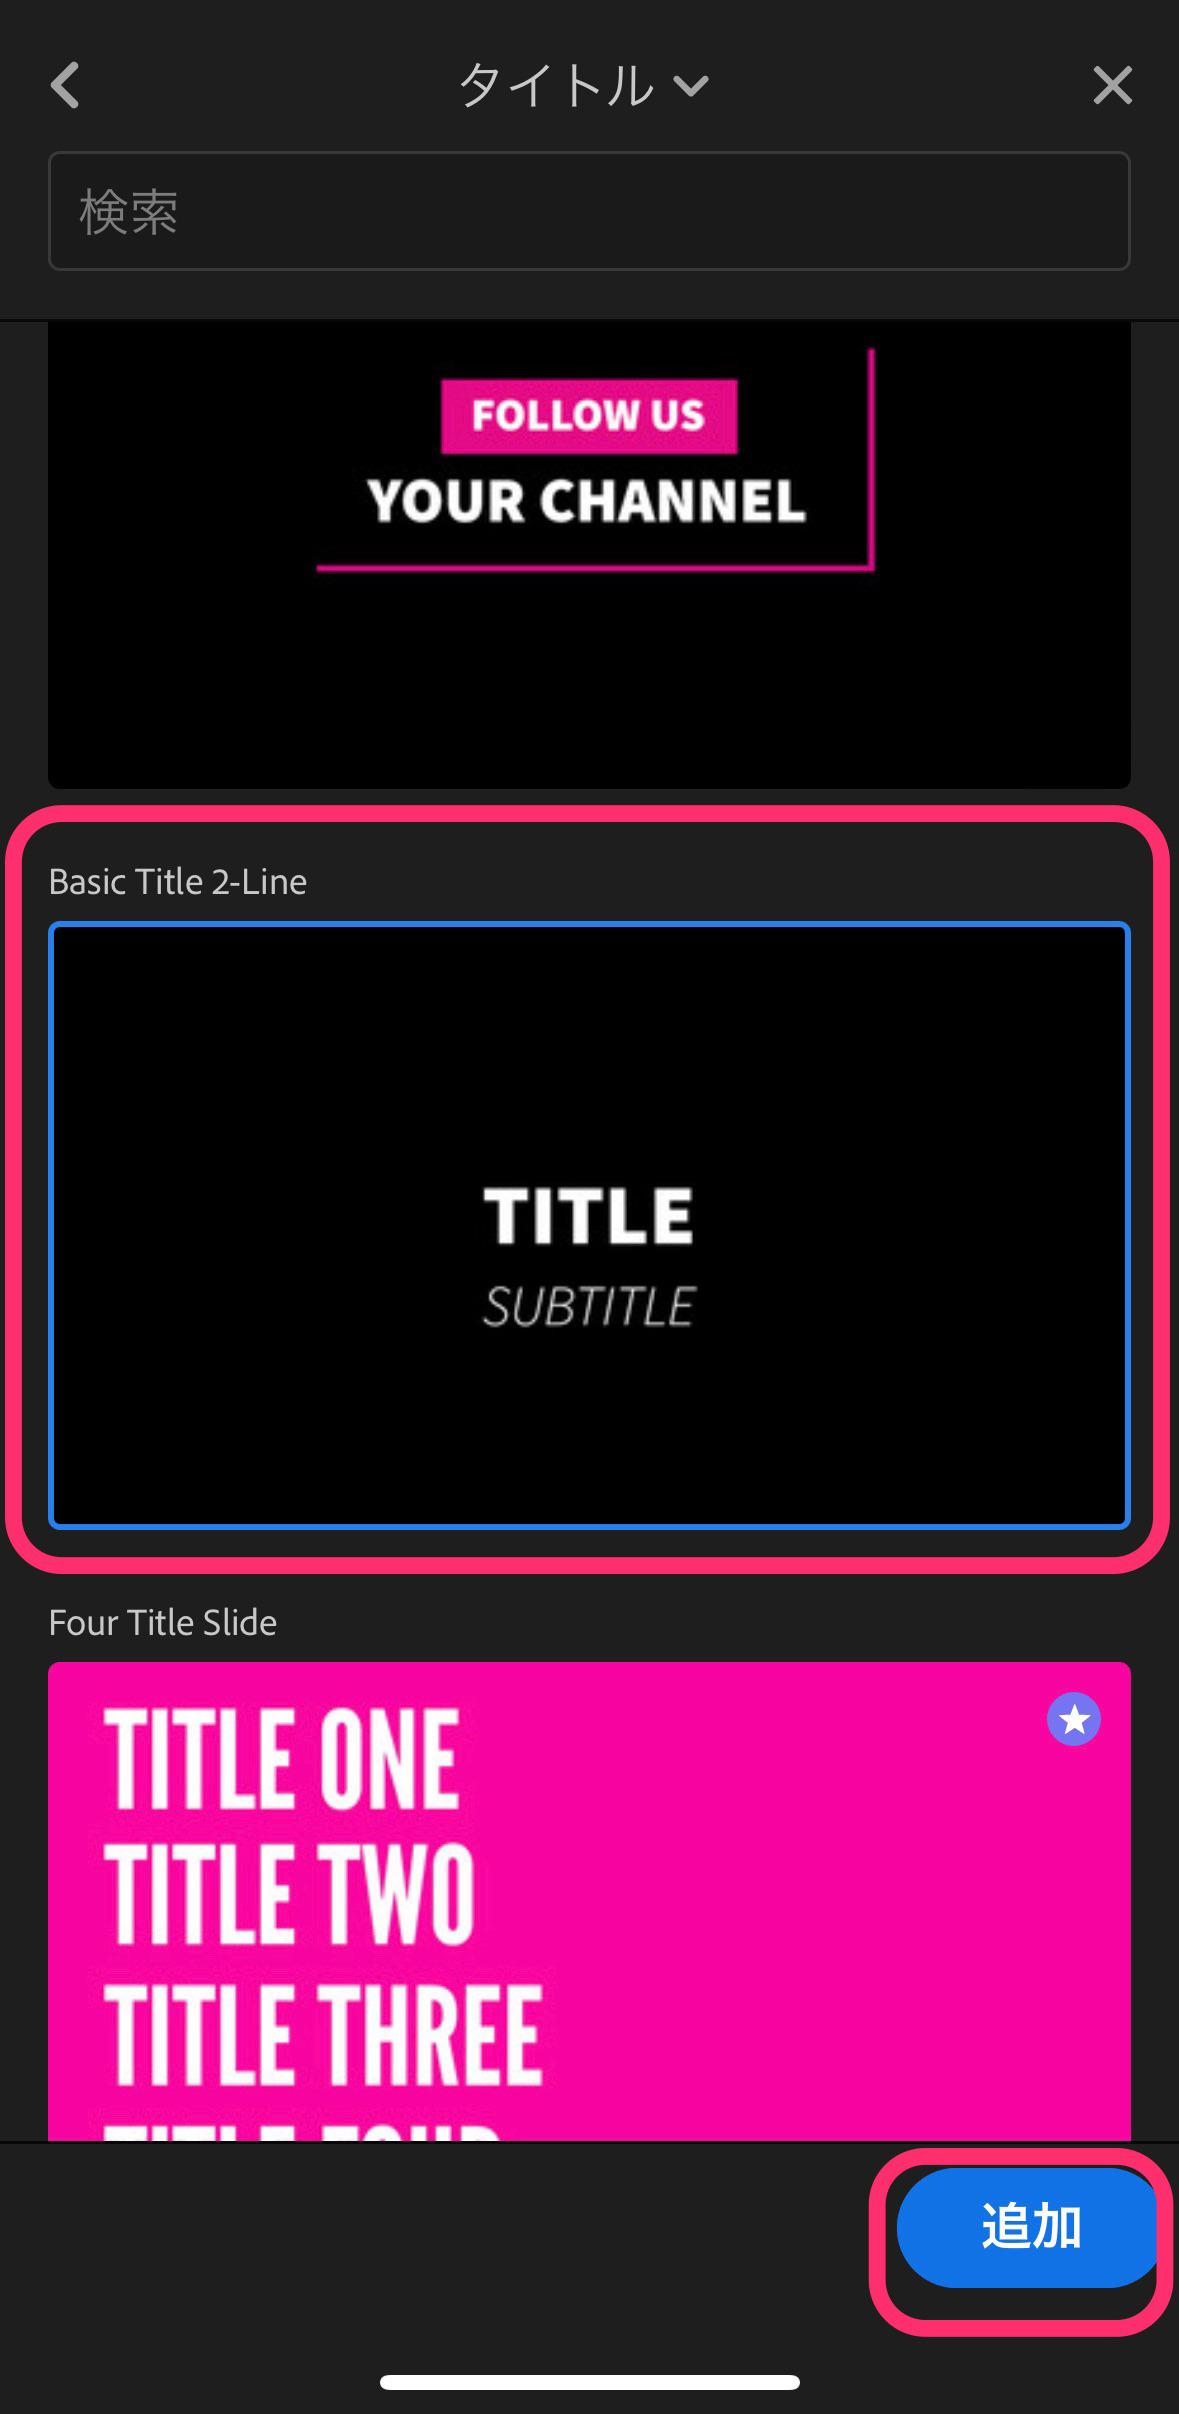
「タイトル」というスタイルや動きが加わったものに文字を入力して使います。
ここでは「Basic Title 2-Line」を選択して使ってみます。
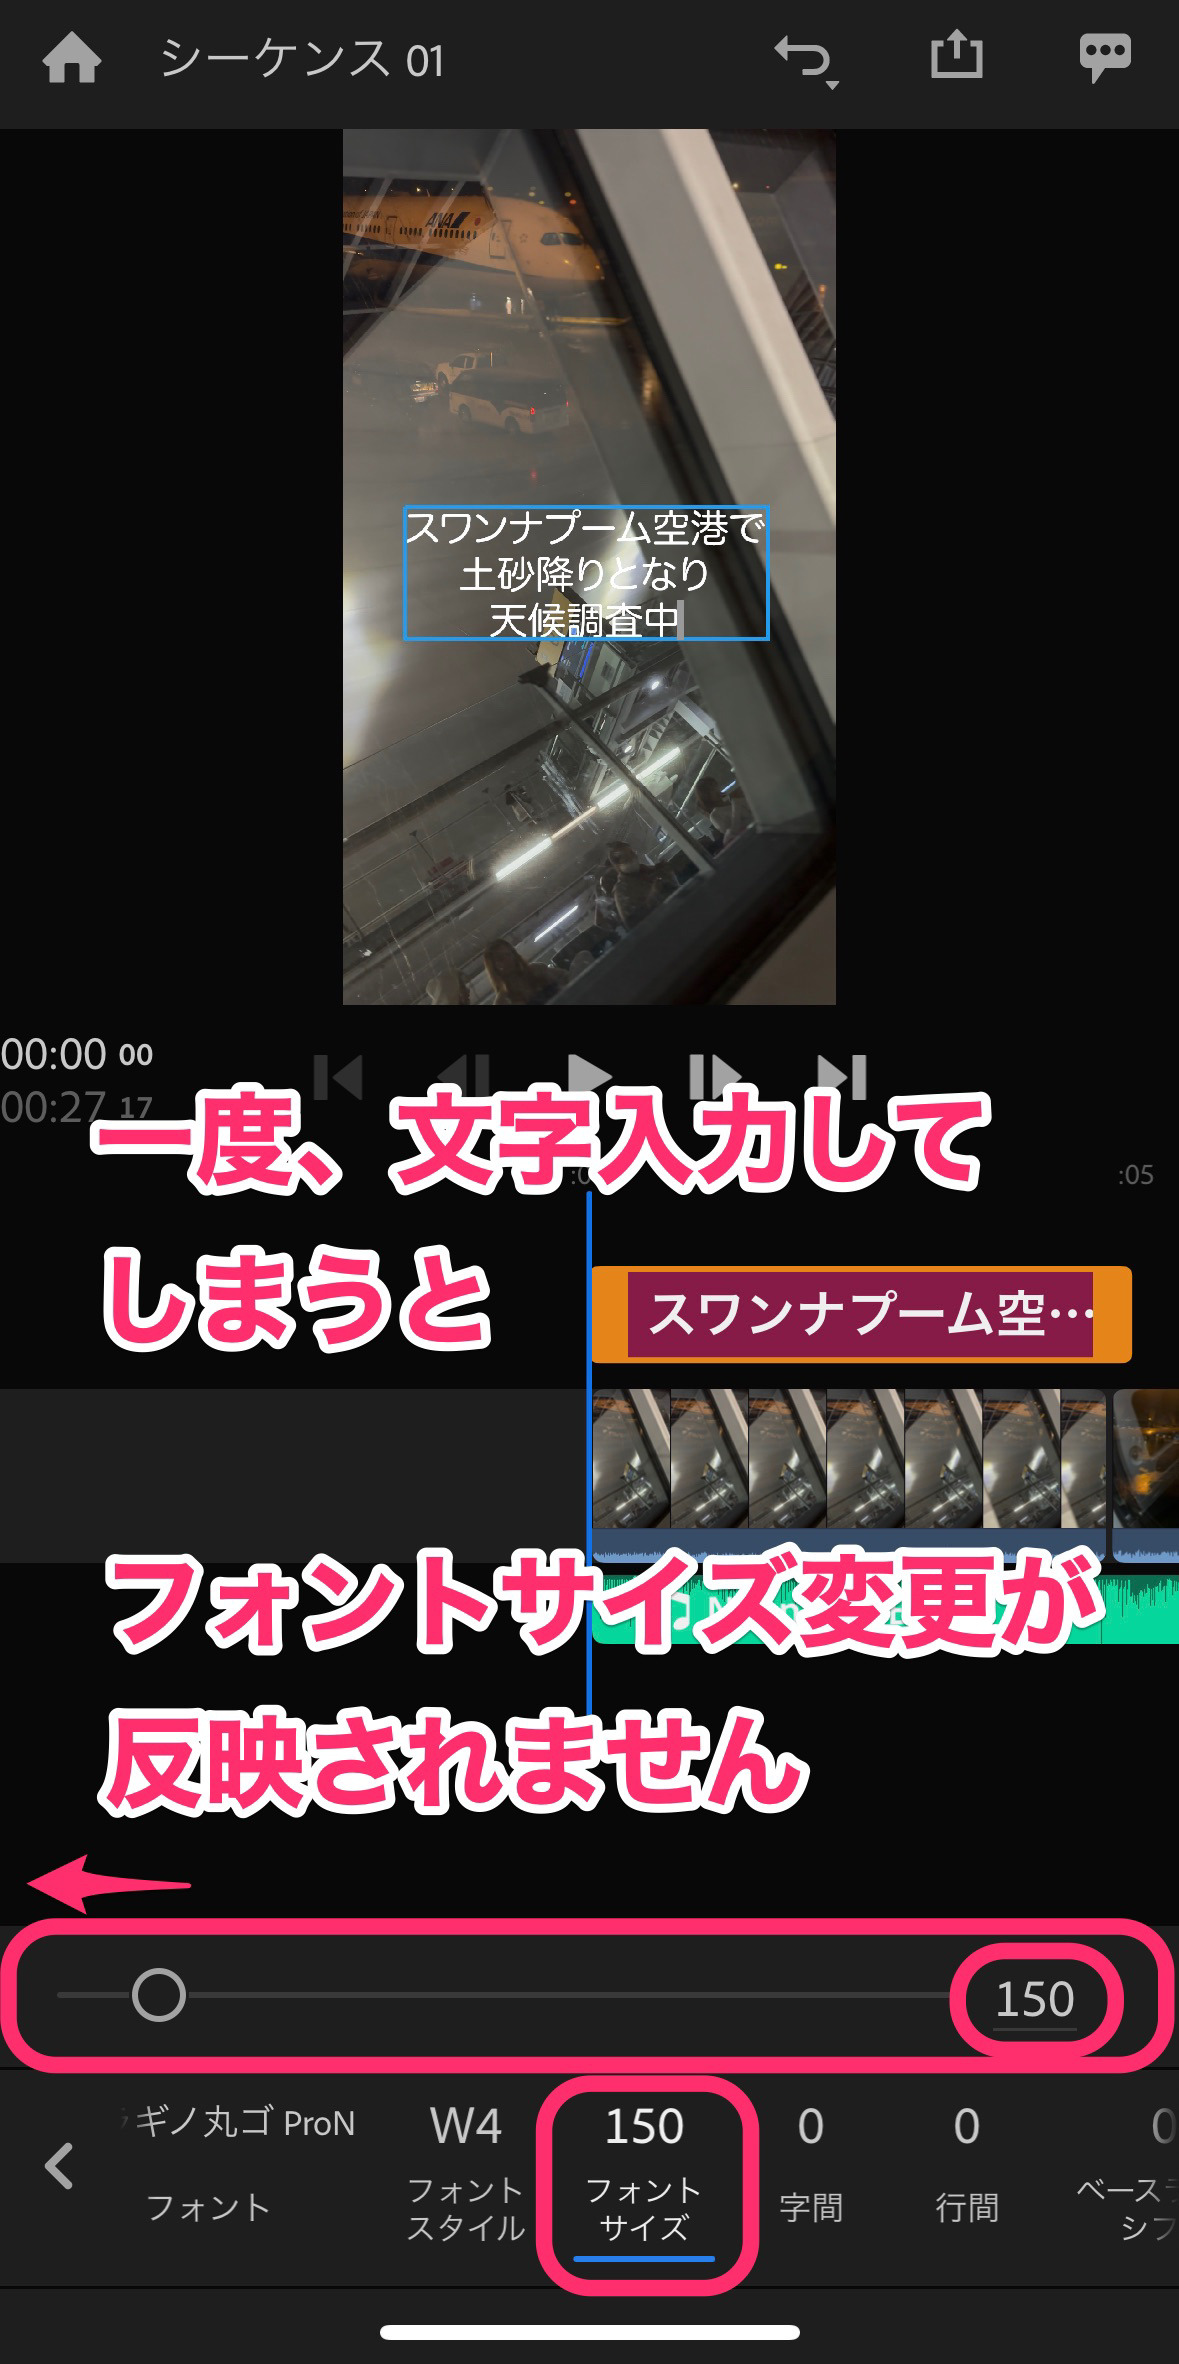
注意点は、文字を入力してしまったら、後でフォントやフォントサイズを変更できなくなることです。
(とてつもない不具合だと思います。。)
一番最初にやることは、フォントとフォントサイズ、そのたスタイルを決めることです。
なぜなら、一度、文字を入力してしまうと後から変更できないからです。;_;
 Hideki
Rushでの文字入れ、ものすごく使いづらいです。
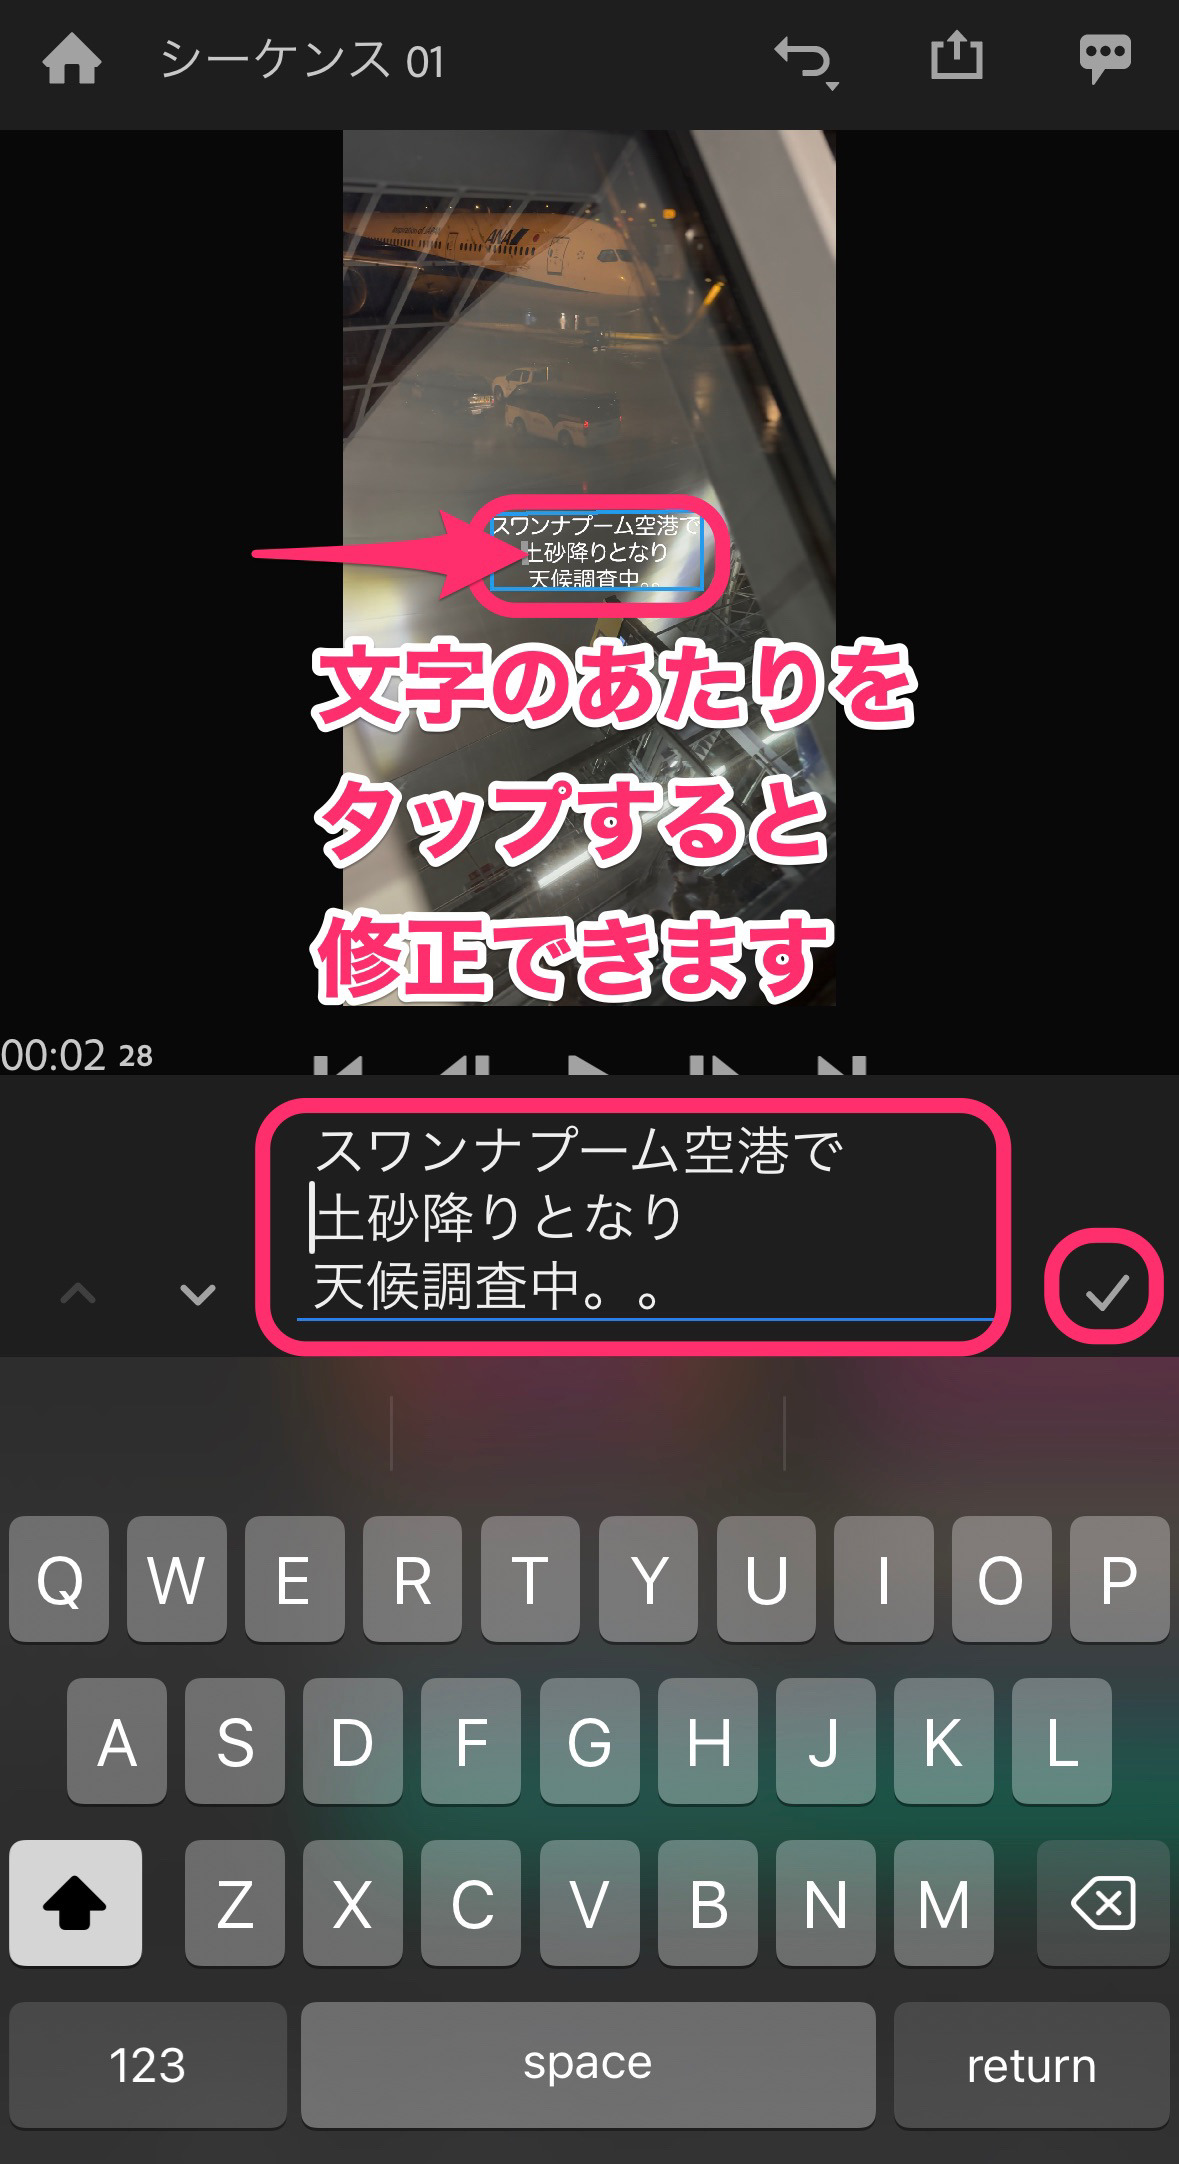
文字を後から修正する方法
タイムライン表示でタイトルクリップが選択状態であることを確認して、
プレビュー上の文字のあたりをタップすると、入力ボックスが開き文字の修正ができます。
同じスタイルのタイトルを作るには
タイトルクリップを複製して、同じフォント、フォントサイズ、装飾のタイトルを作ります。
複製したいタイトルクリップをタップします。
サブメニューが出るので「複製」を選択します。
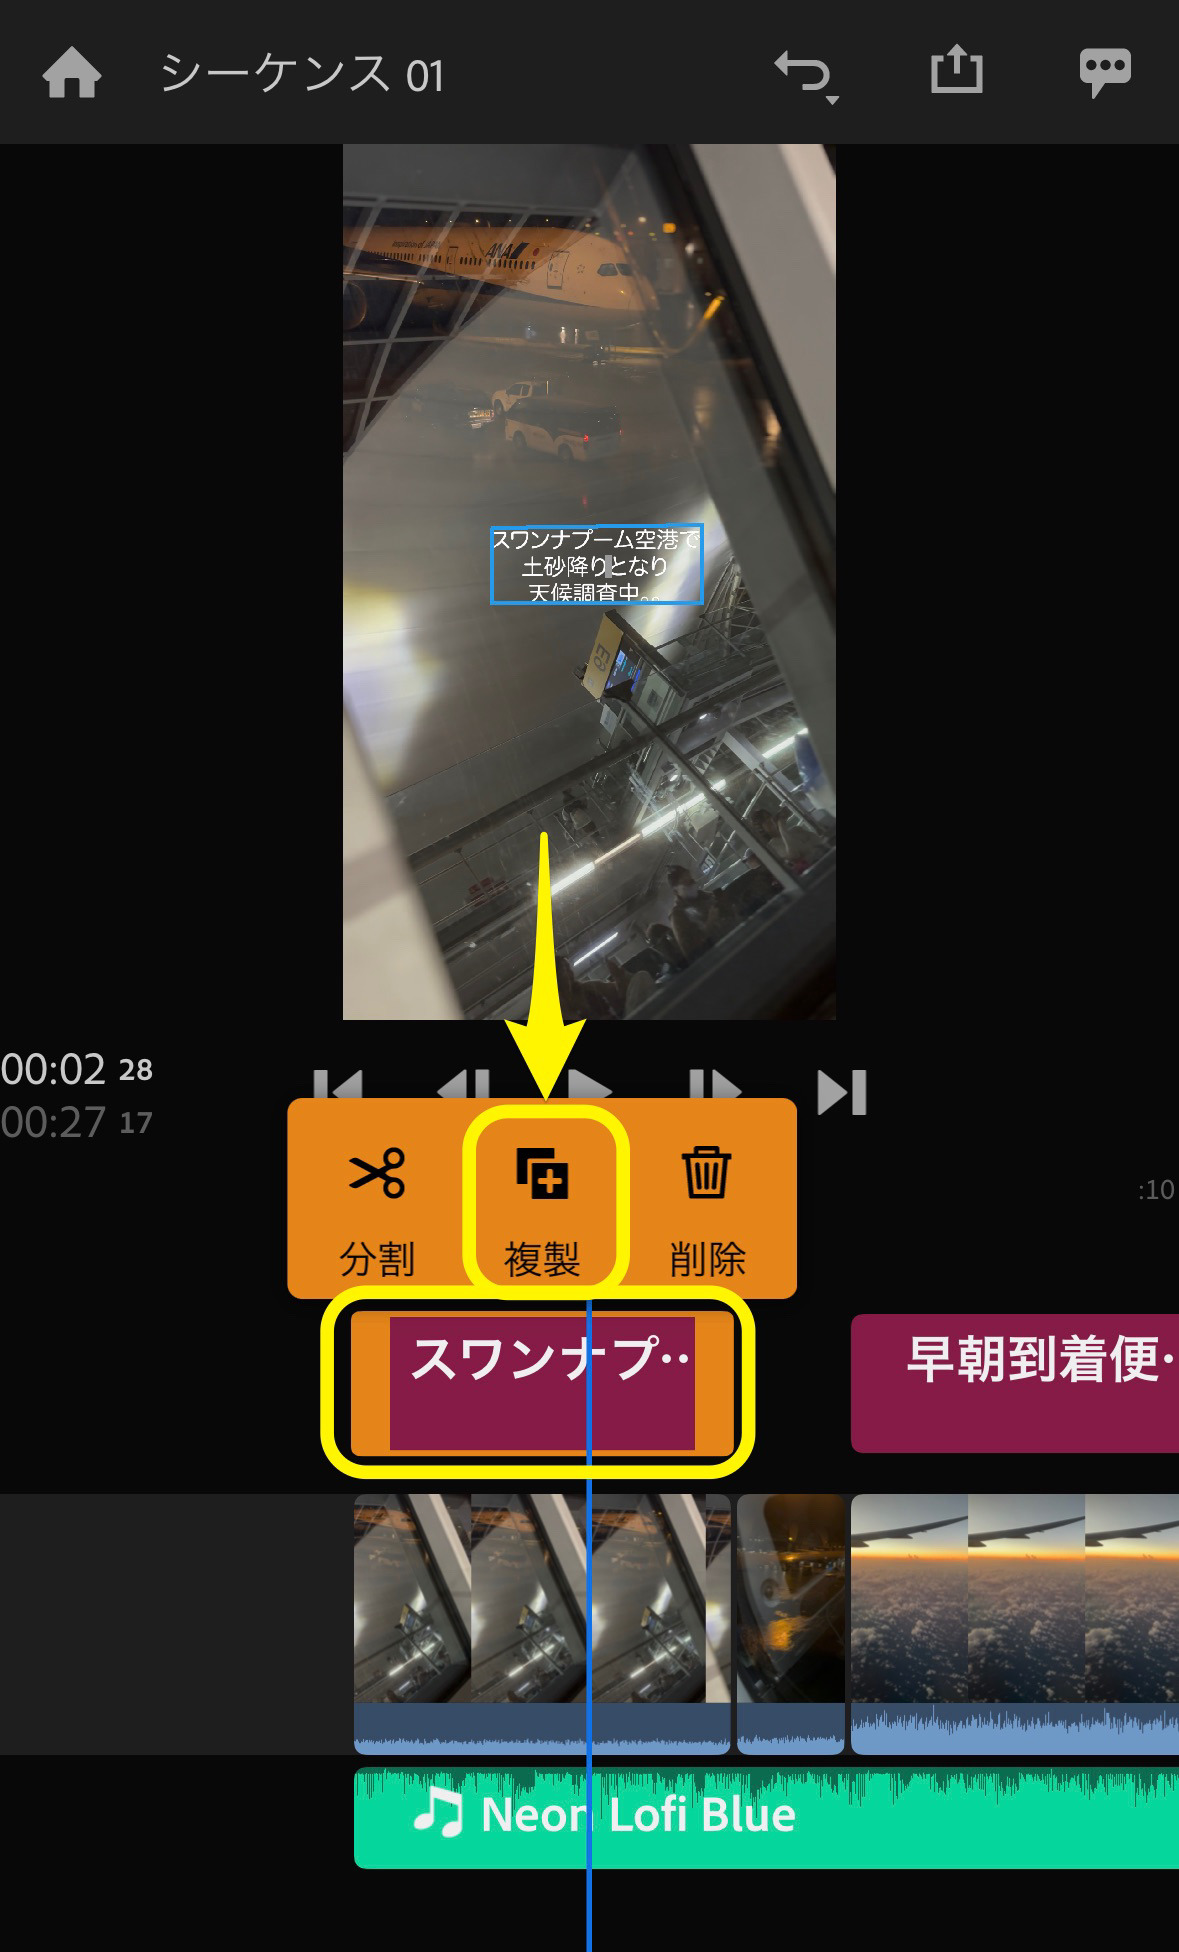
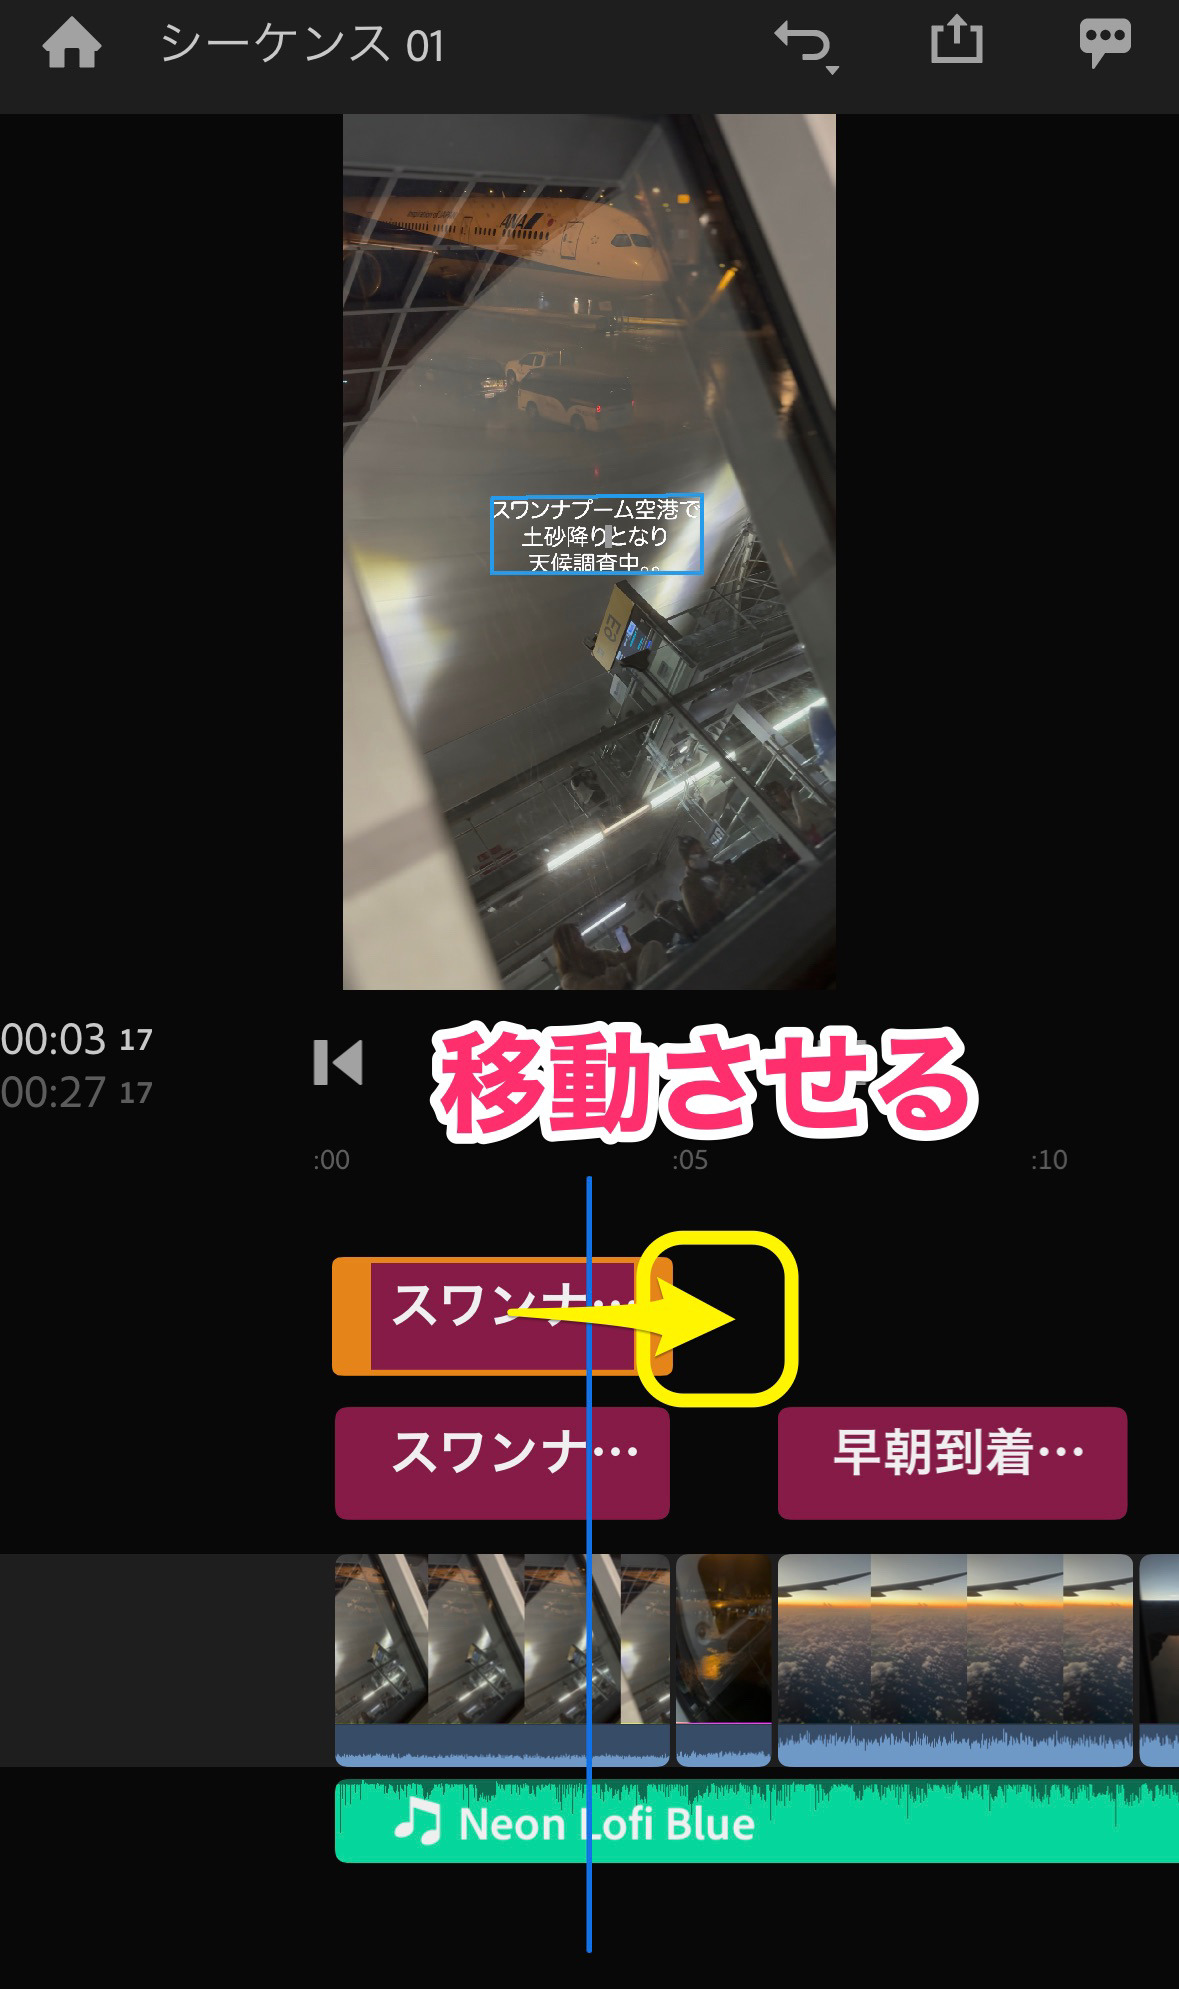
タイムライン上で好きな位置へ移動します。
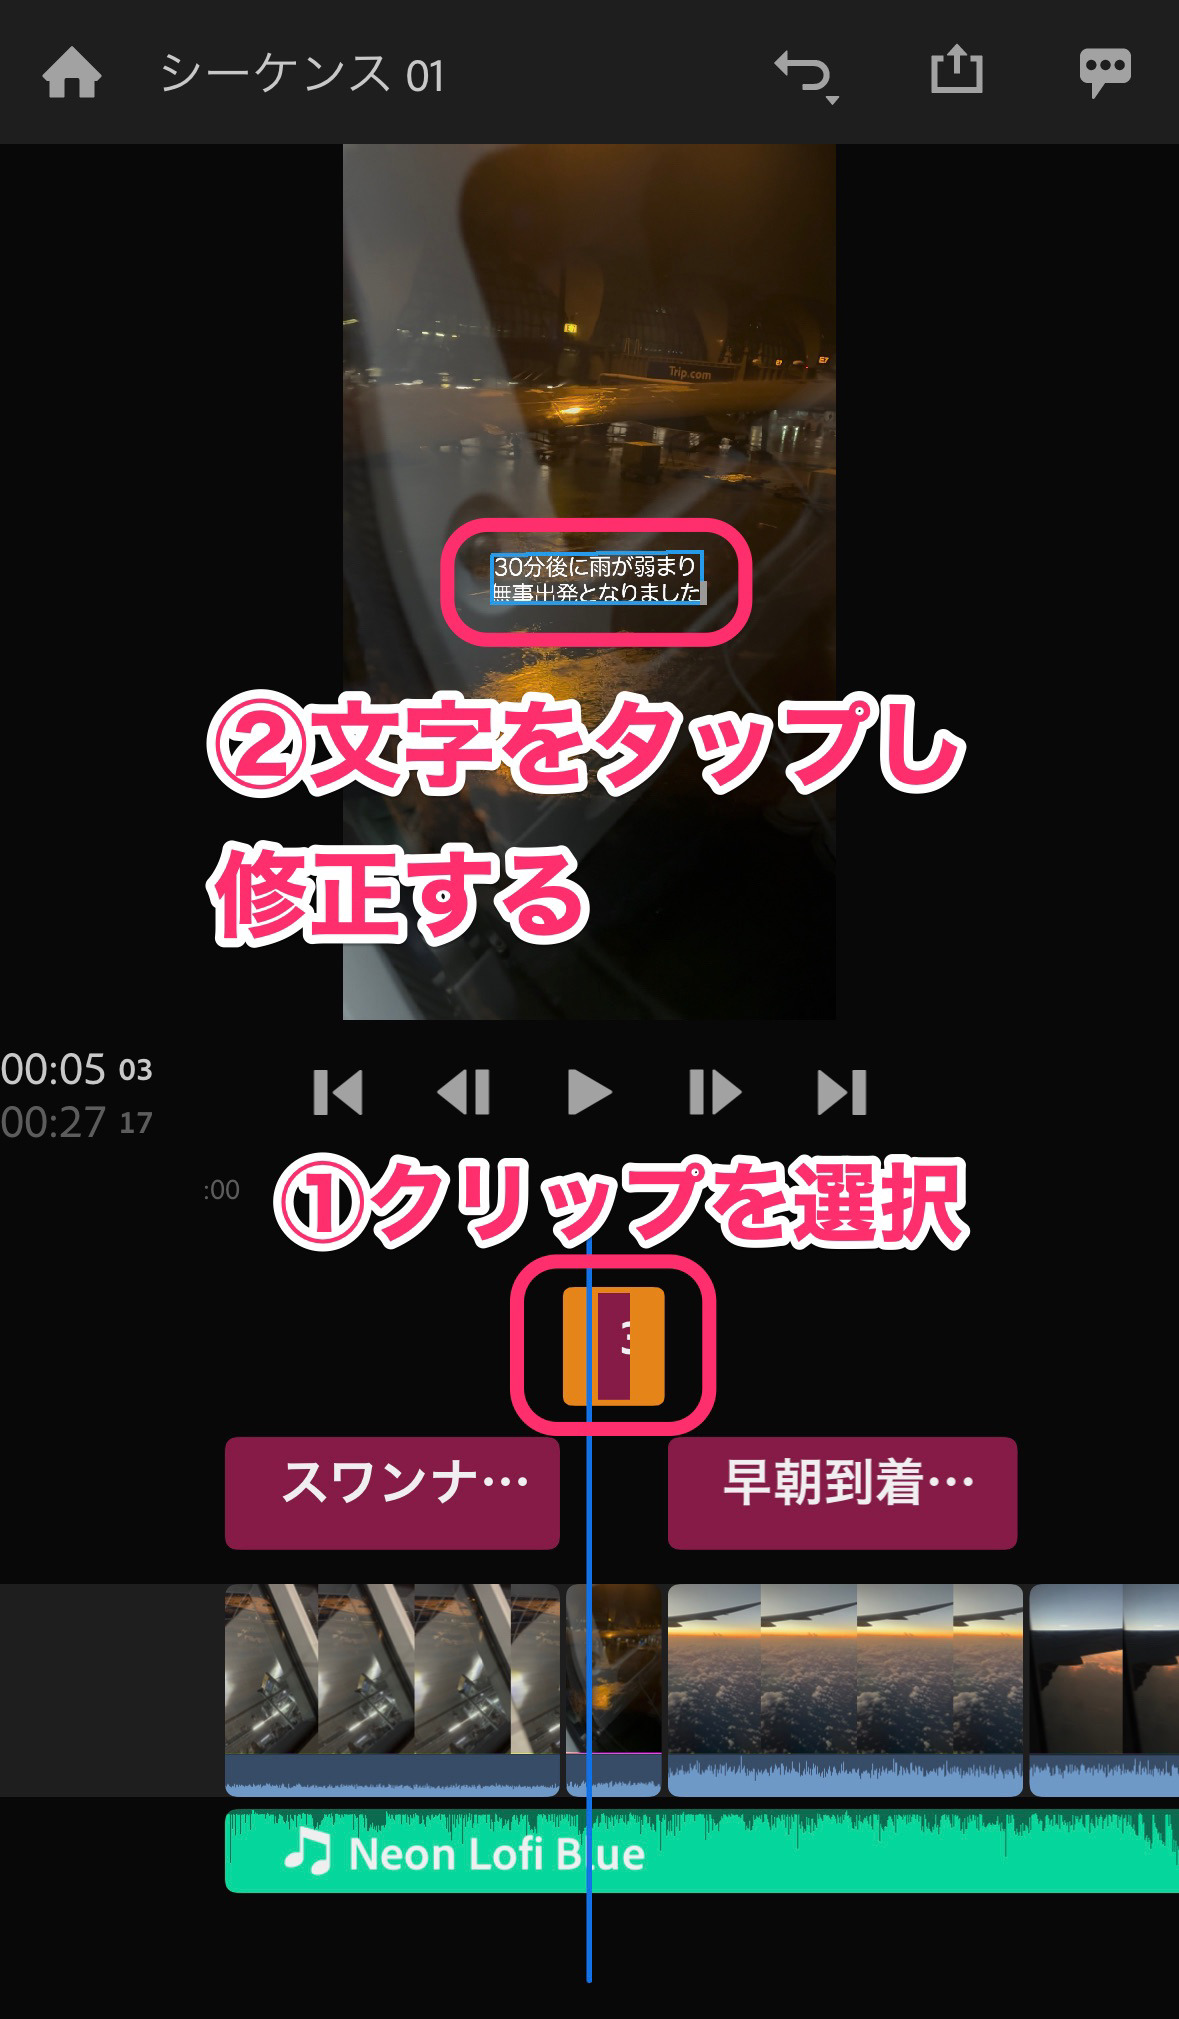
下図(1)テキストクリップをタップして選択状態にします。
(2)テキスト部分をタップして、文字を修正します。
救済策:文字サイズを後から変更する方法
これはタイトルの位置を修正する時に発見したことです。
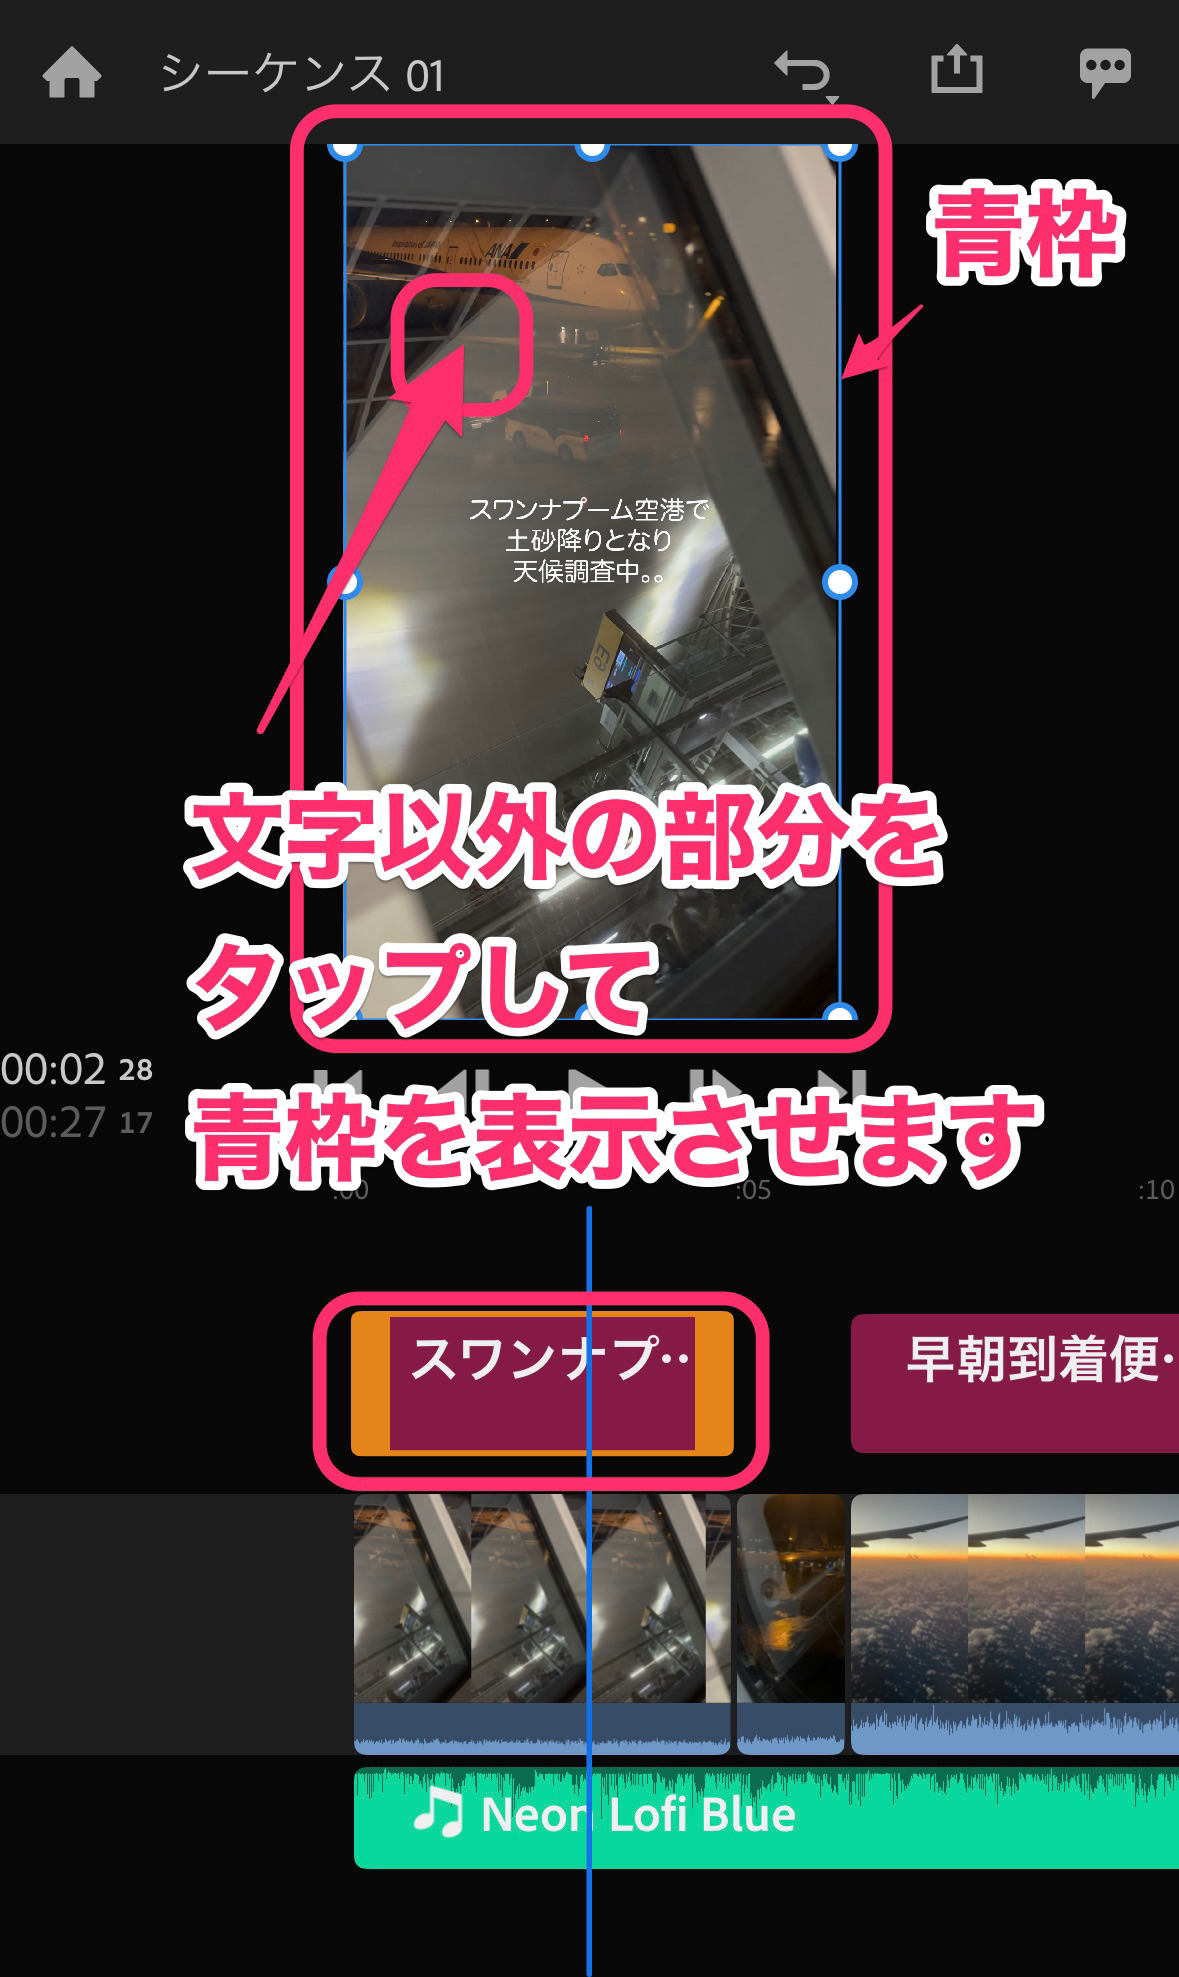
タイムライン表示で、タイトルクリップが選択状態であることを確認して、文字以外の場所をタップします。
するとプレビュー全体に青い枠が出ます。
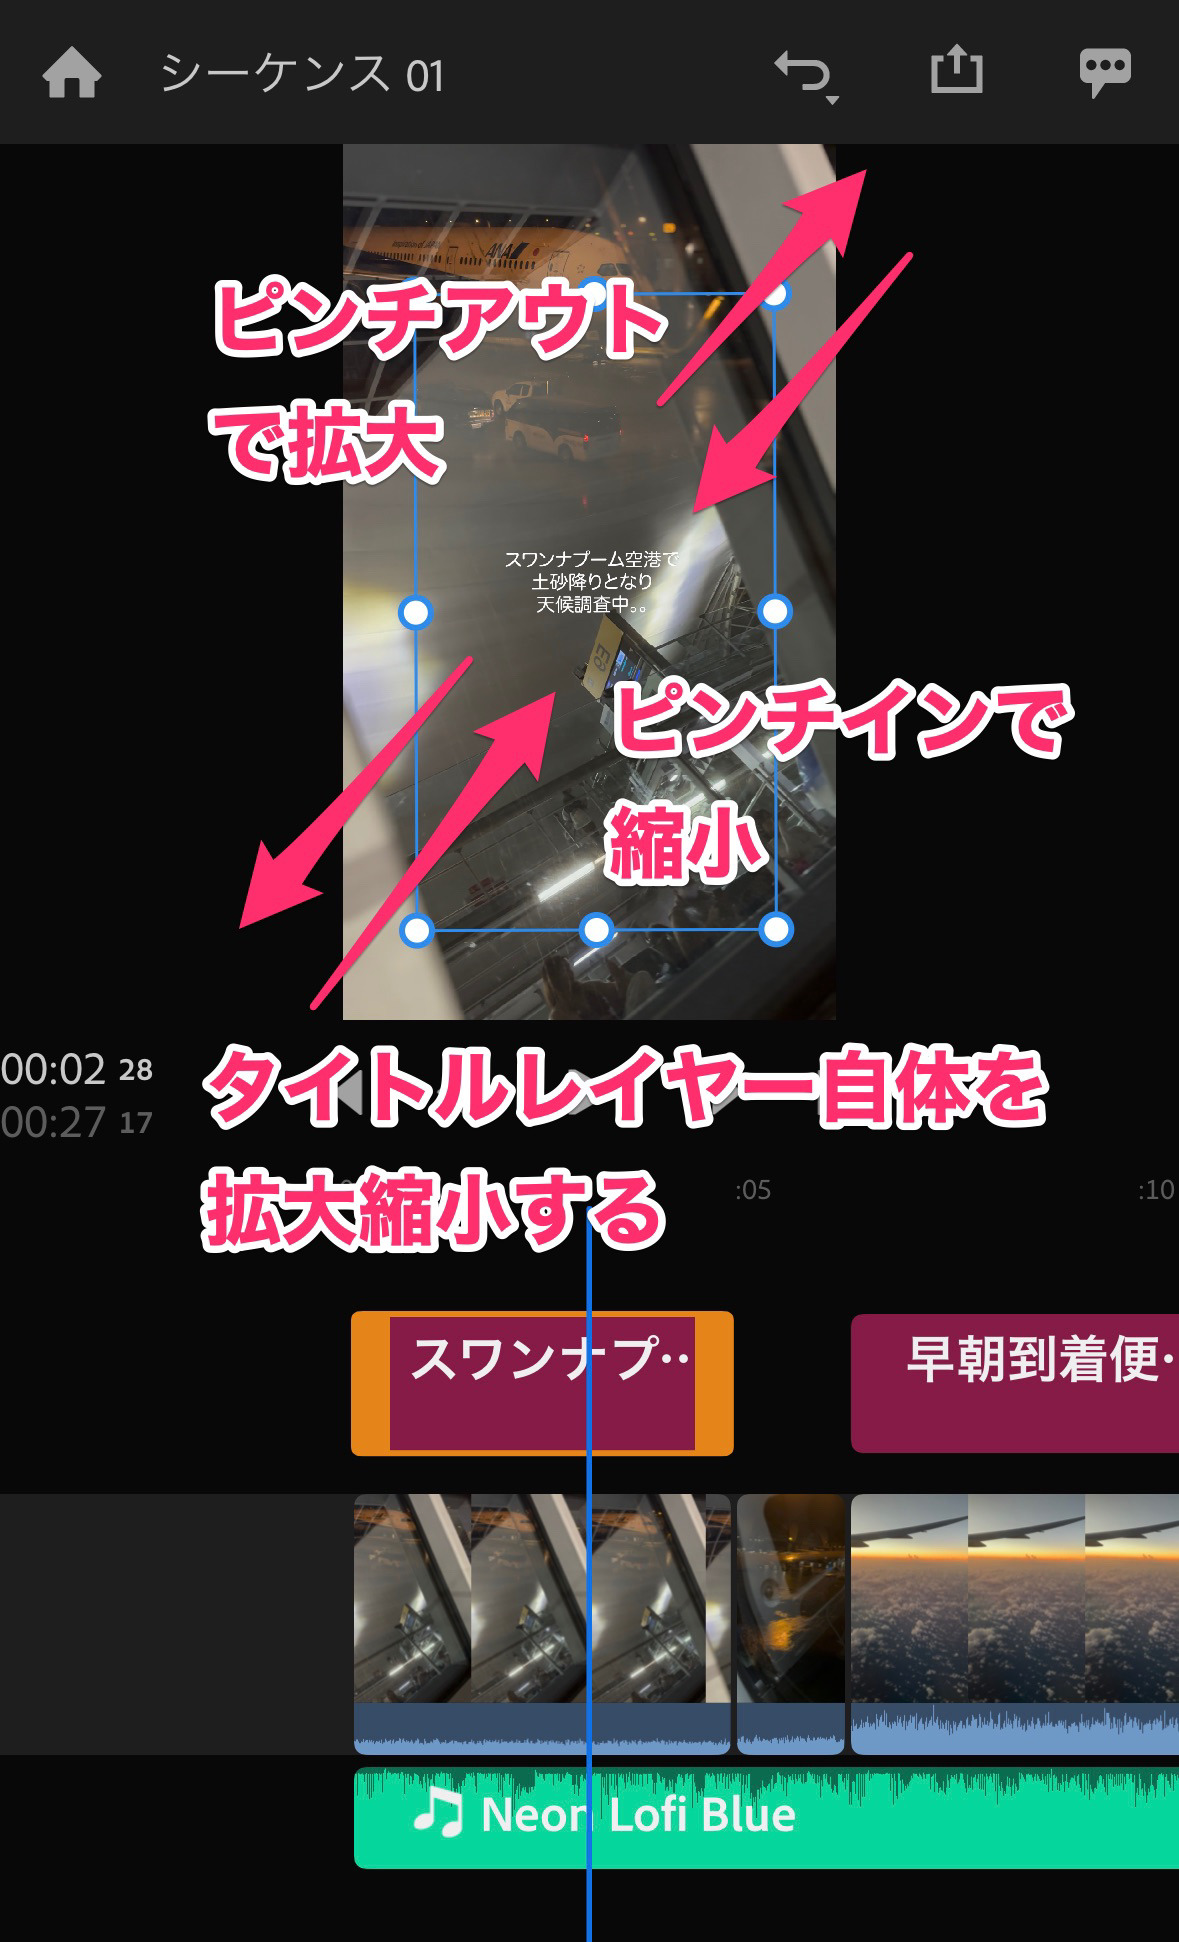
テキストサイズを縮小させたい場合は、ピンチインします。
テキストサイズを拡大させたい場合は、ピンチアウトします。
タイトルレイヤー全体を拡大縮小することにより、そこに乗っているテキストのサイズを変えることができます。
もちろん、この青枠を移動させることによりテキストの位置を調整することができます。
ただ、この方法では、残念ながらフォントの種類を変更することはできません。
トランジションを入れる方法
トランジションとは場面転換の時にかけるエフェクトのことです。
ここでは代表的なトランジションである「ディゾルブ」を入れるやり方を解説します。
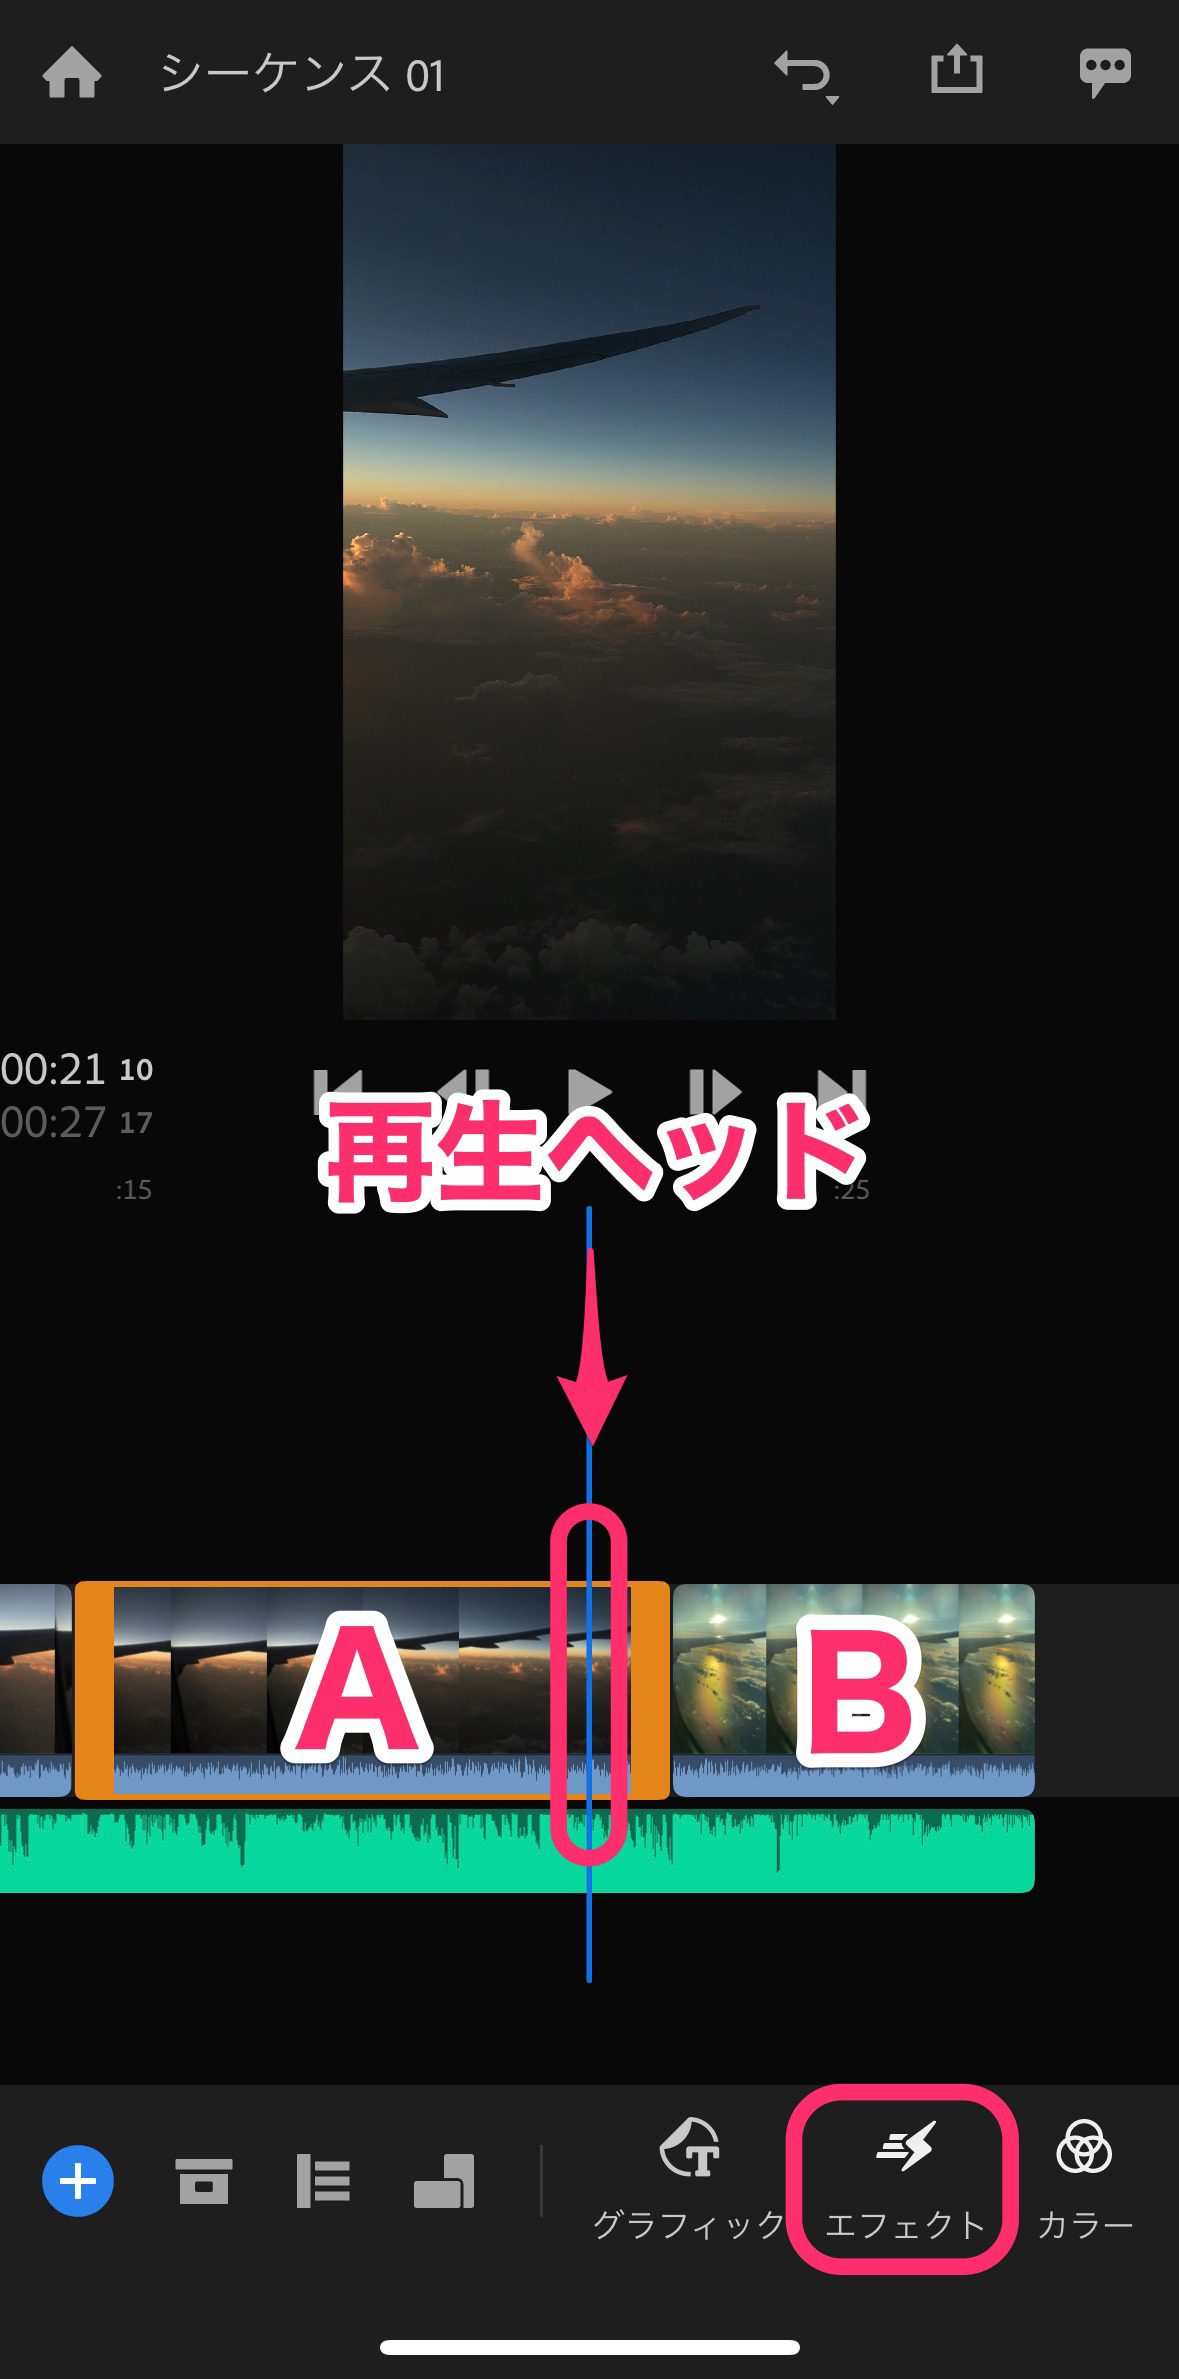
AクリップからBクリップへトランジションをかけたいとします。
まず再生ヘッドをAクリップの後ろのあたりに移動させます。
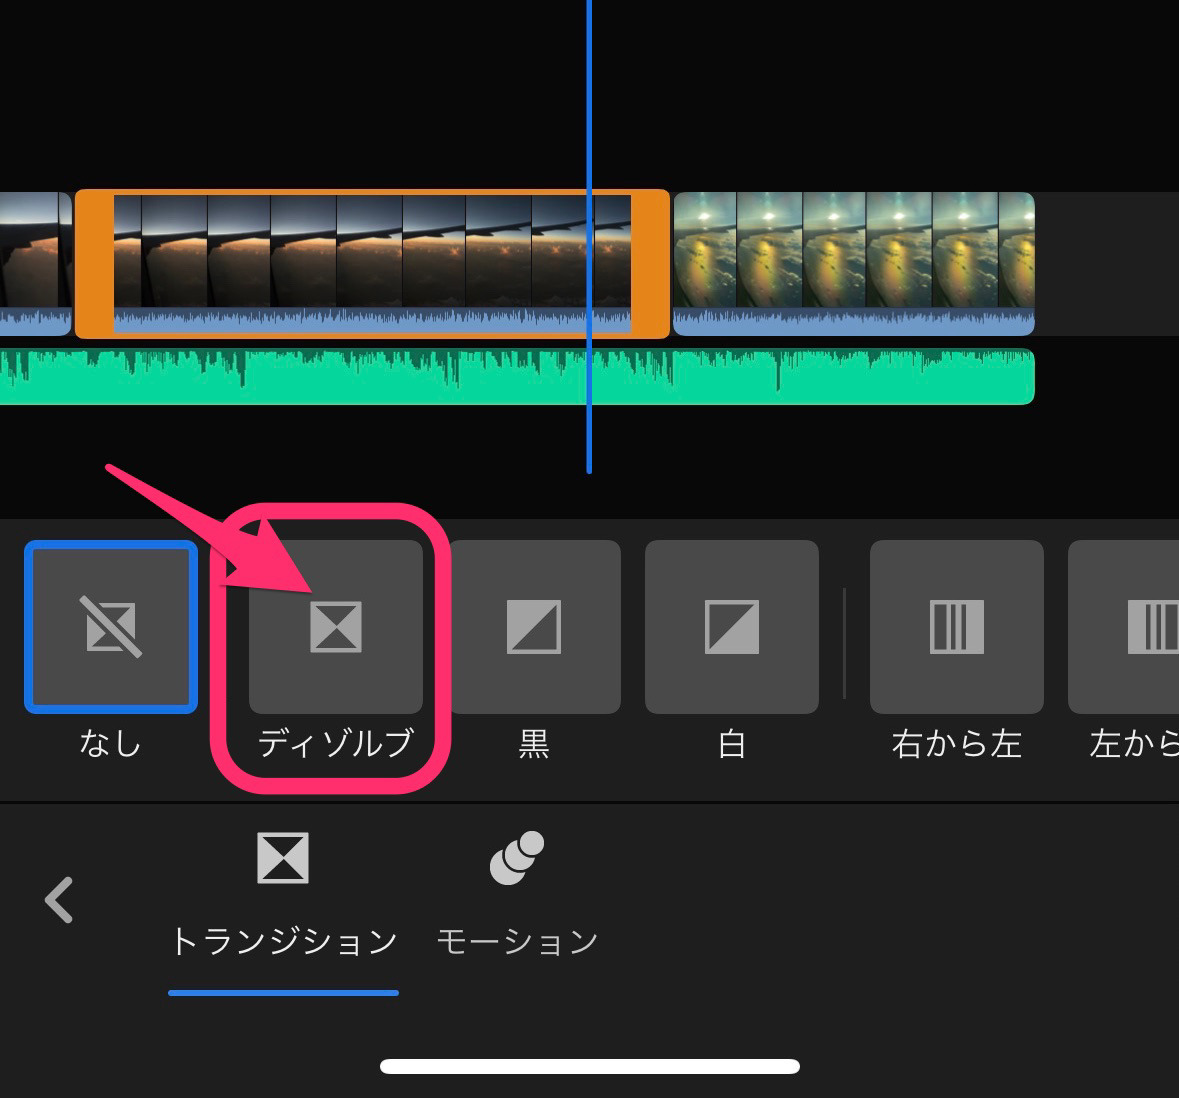
そして画面下の「エフェクト」をタップします。
トランジションのリストが出てくるので「ディゾルブ」をタップします。
残念なことに、クリップの両端にディゾルブが入ってしまいました。
(賢いソフトだと、再生ヘッドに近い方の端だけに入るのですが。。^^;)
前のディゾルブは必要ないと思う場合は、クリップの境目にある「小さなボックス」を選択して「なし」を選択します。
動画クリップ内の音声にもディゾルブがかかっています。下にある「さらに小さなボックス」も選択して「なし」にしておきましょう!
これでクリップ左端のディゾルブは消えます。
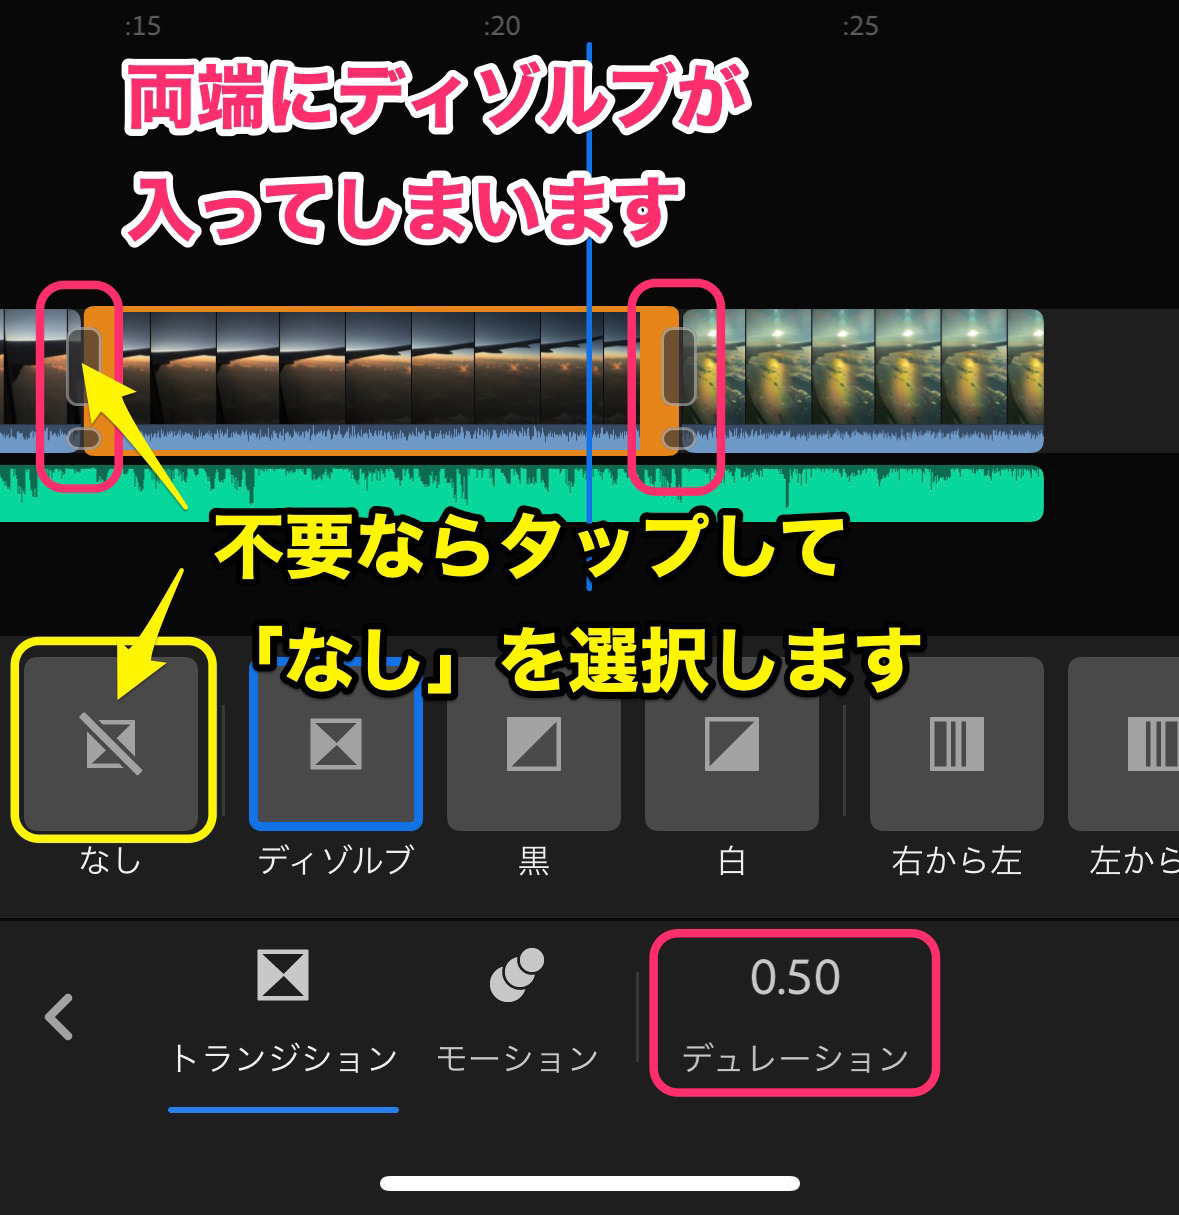
画面下の「デュレーション」は場面転換にかかる時間を示します。
「デュレーション」をタップしてスライダーを調節することで、時間を調節することができます。
エフェクト(カラーフィルター)を入れる方法
Adobe Premiere Rushのタブ表示は独特です。
「エフェクト」=「トランジション」となっています。
では、色を変えるフィルターはどこにあるかというと「カラー」の中にあります。
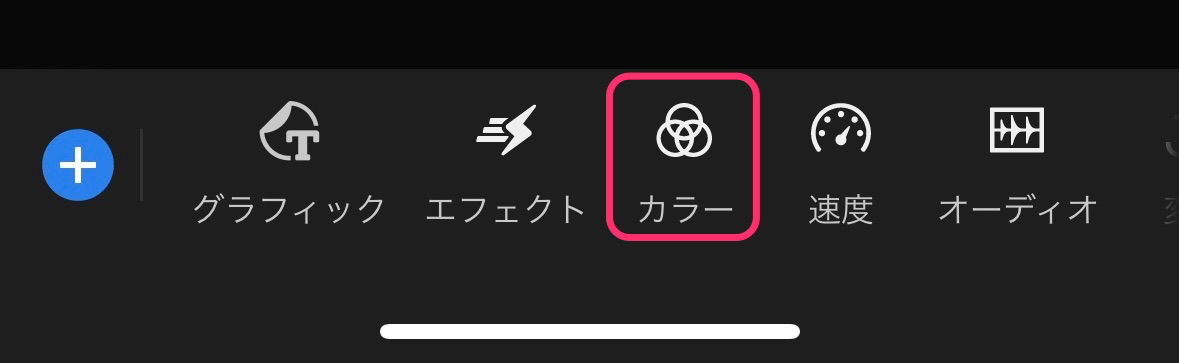
「カラー」と独立したタブなだけあって、プリセットの色フィルターだけでなく、ハイライトやシャドウ、彩度の調整など細かくできます。
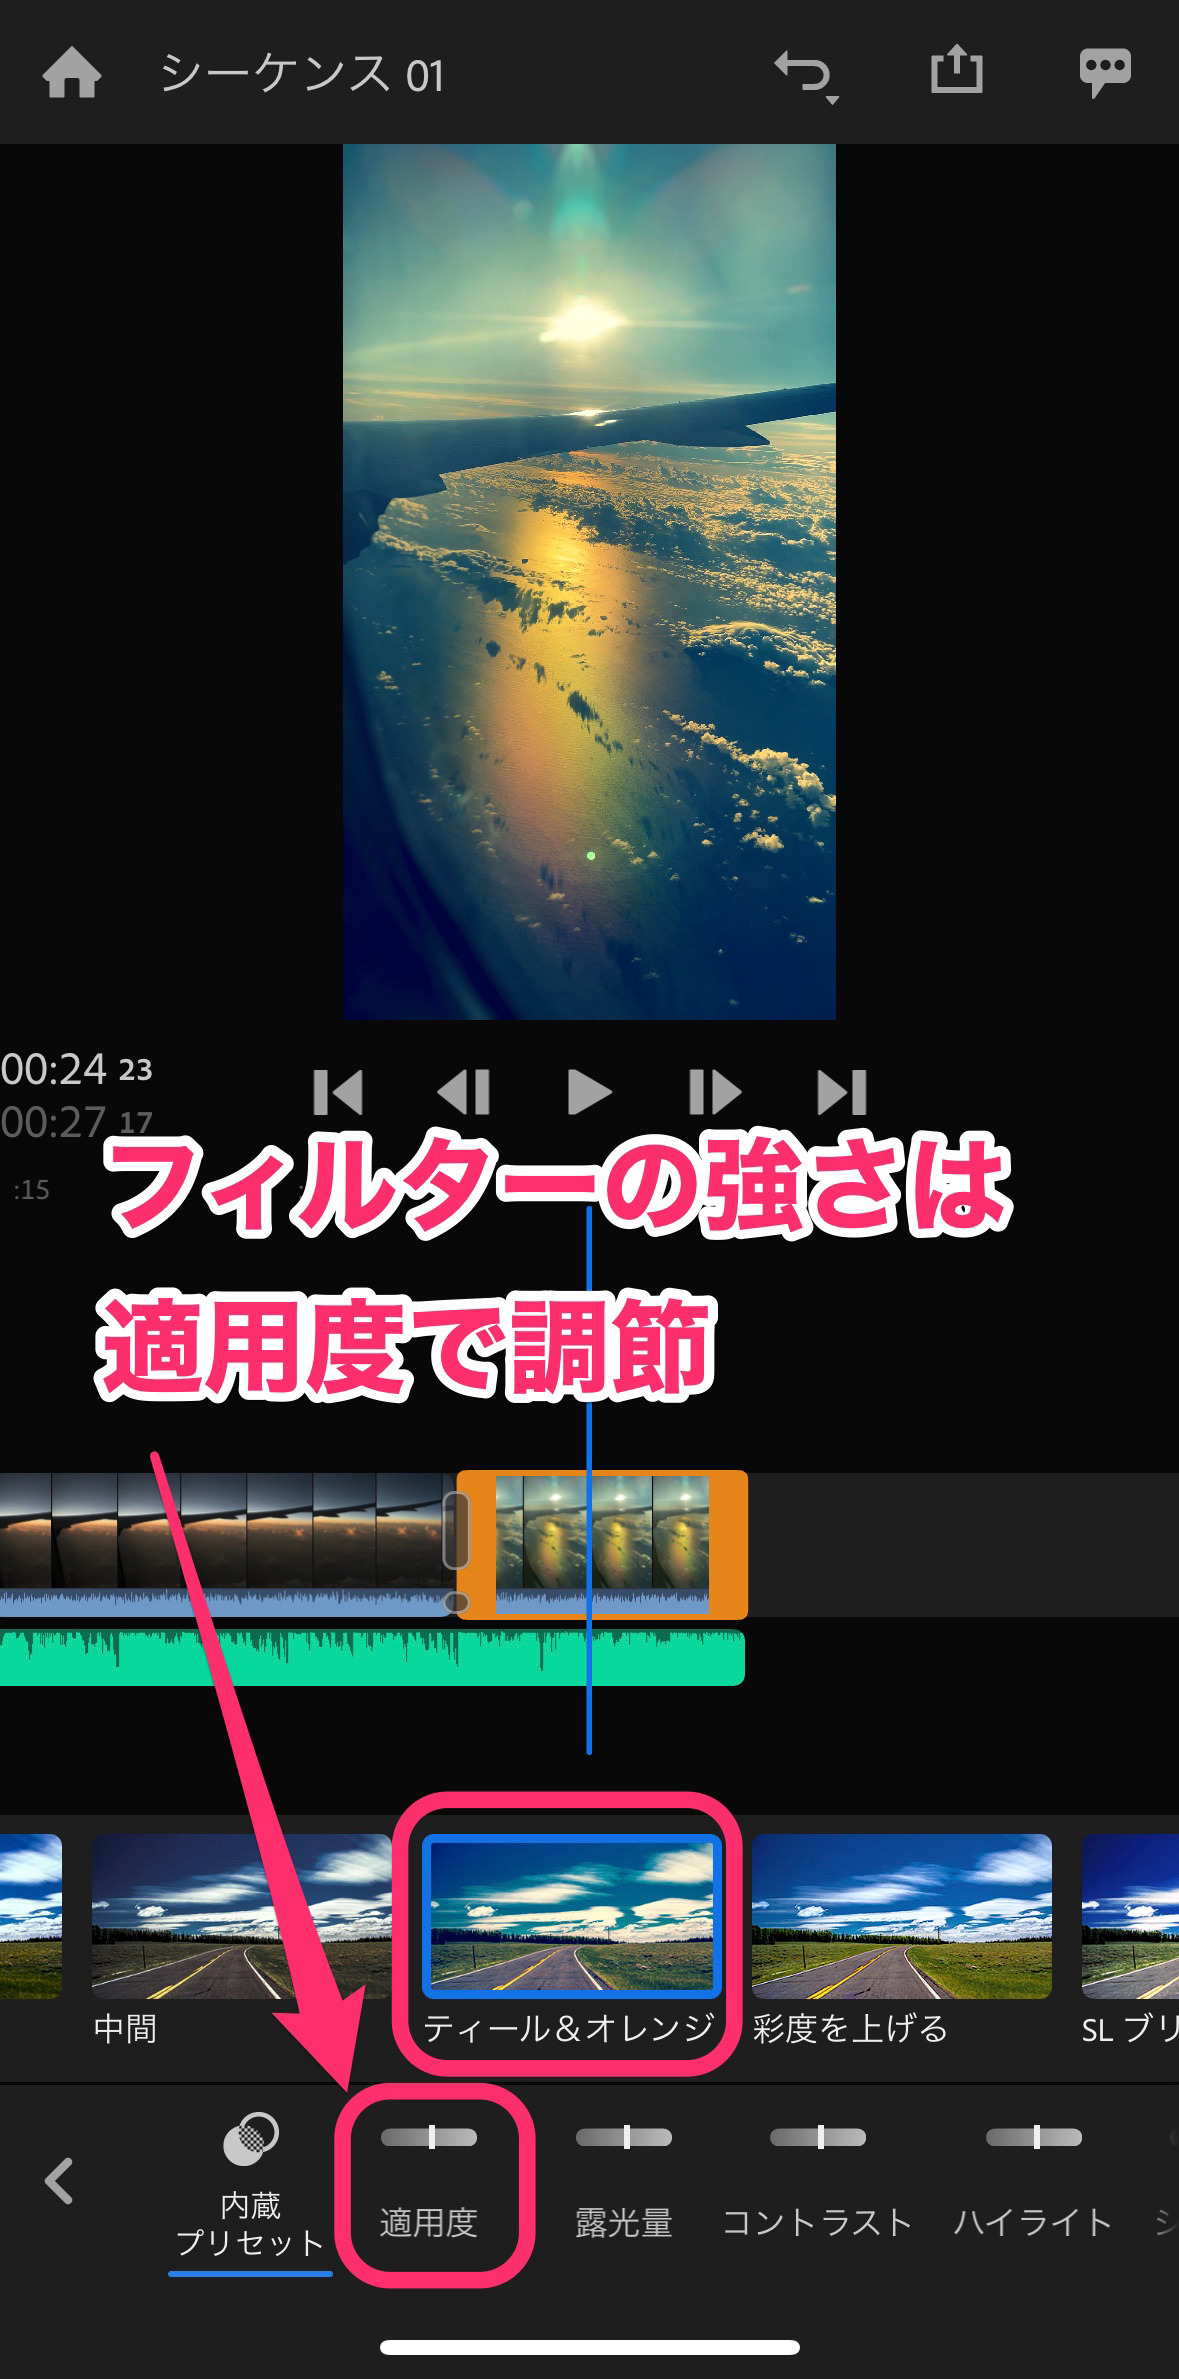
エフェクトをかけたいクリップを選択して、画面下の「カラー」タブをタップします。
すると、「内蔵プリセット」のカラーフィルターの一覧が出てきます。
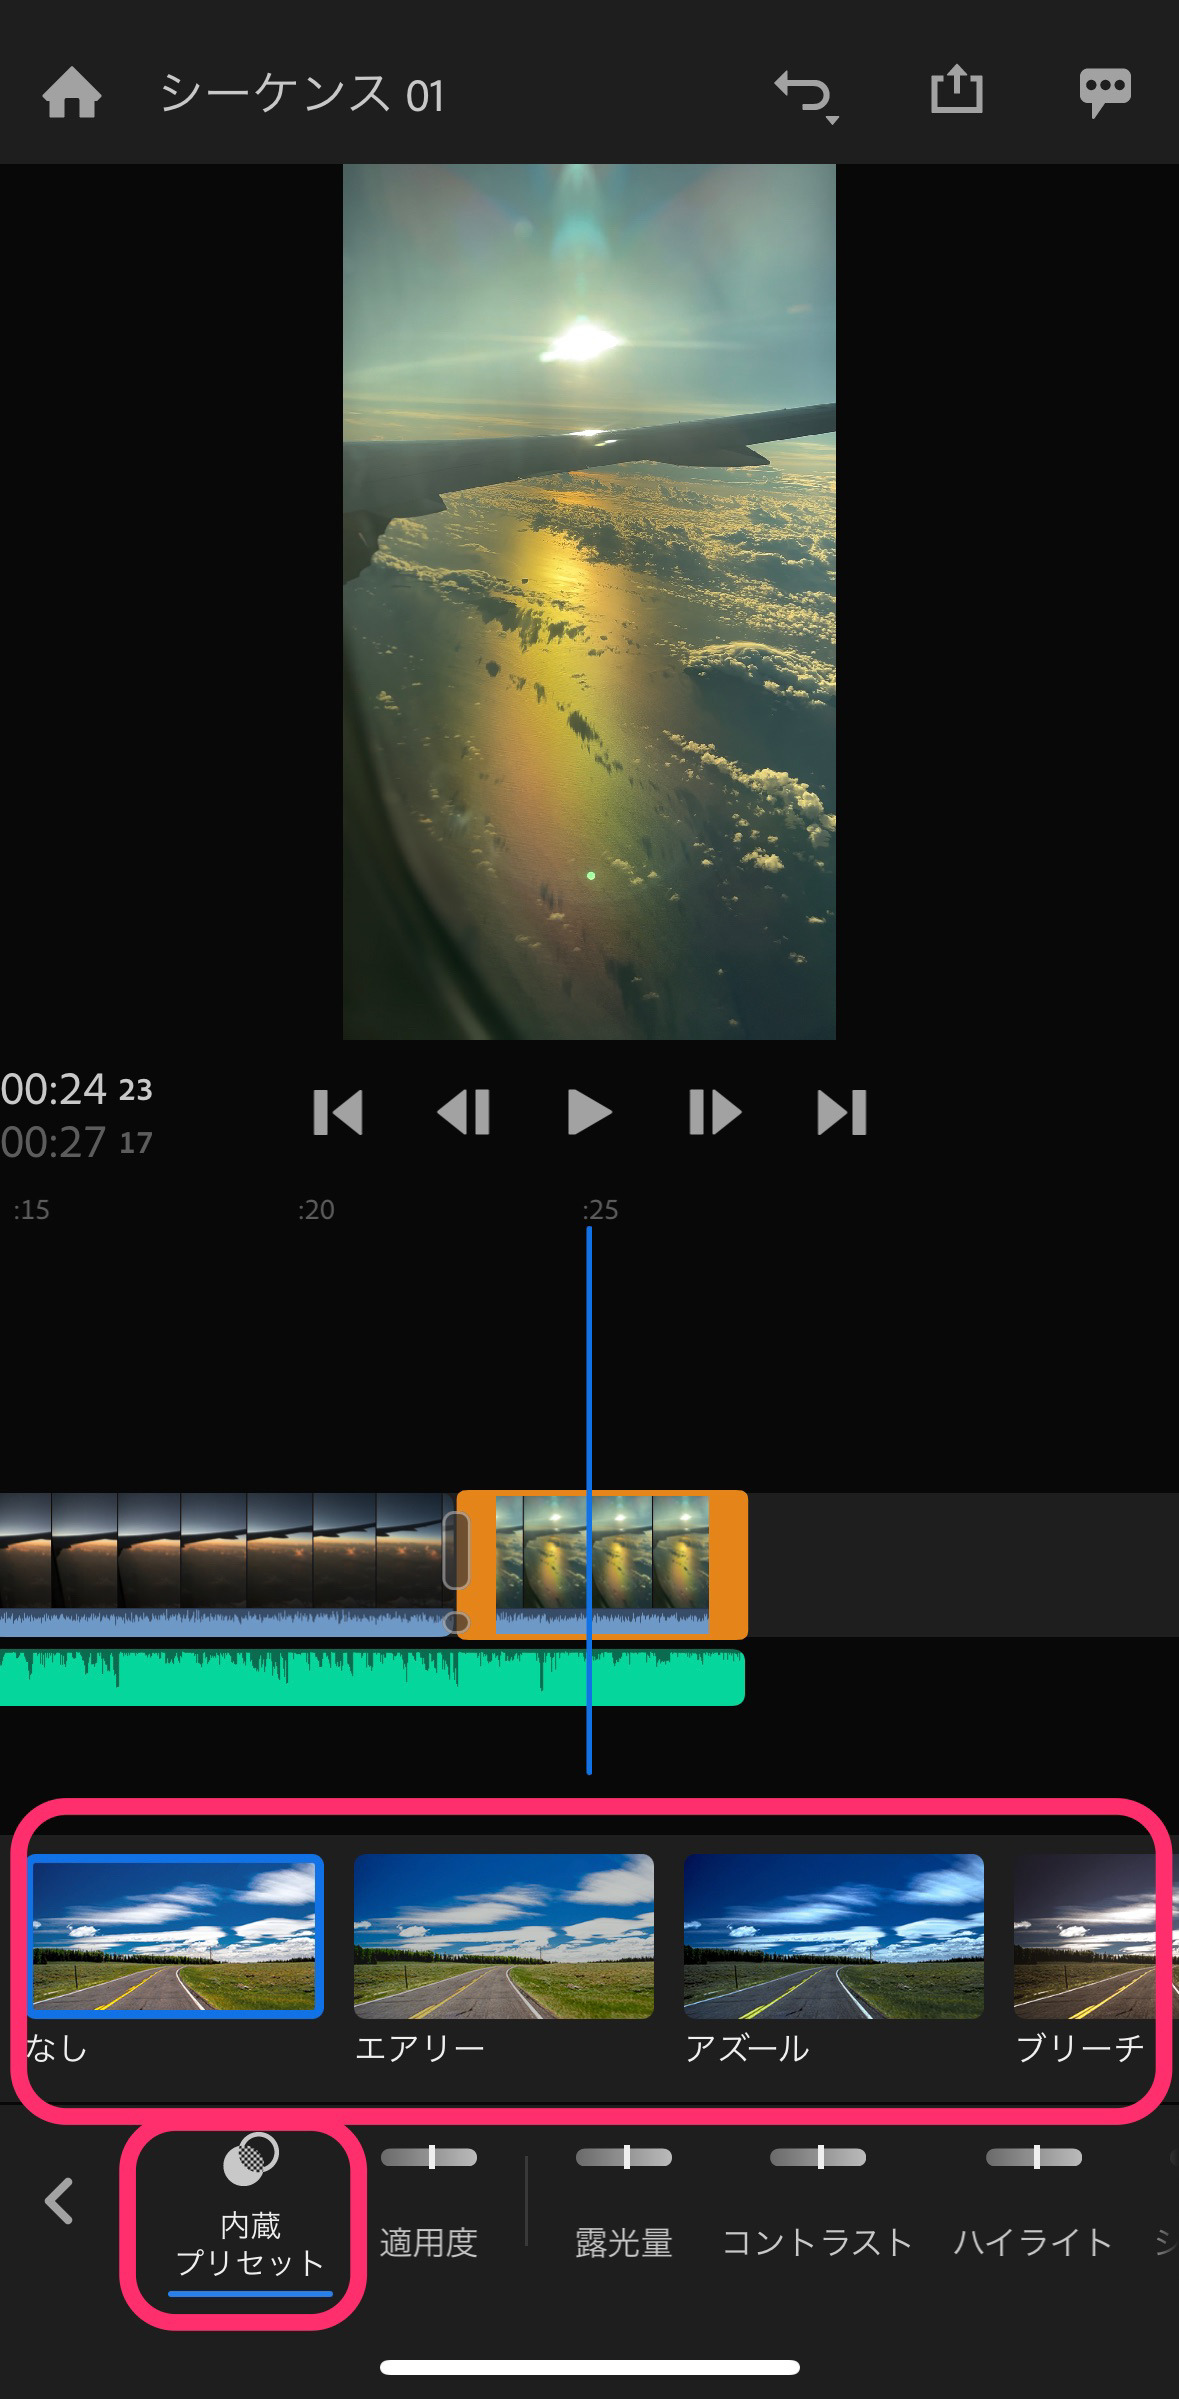
「ティール&オレンジ」がありました!適用します。
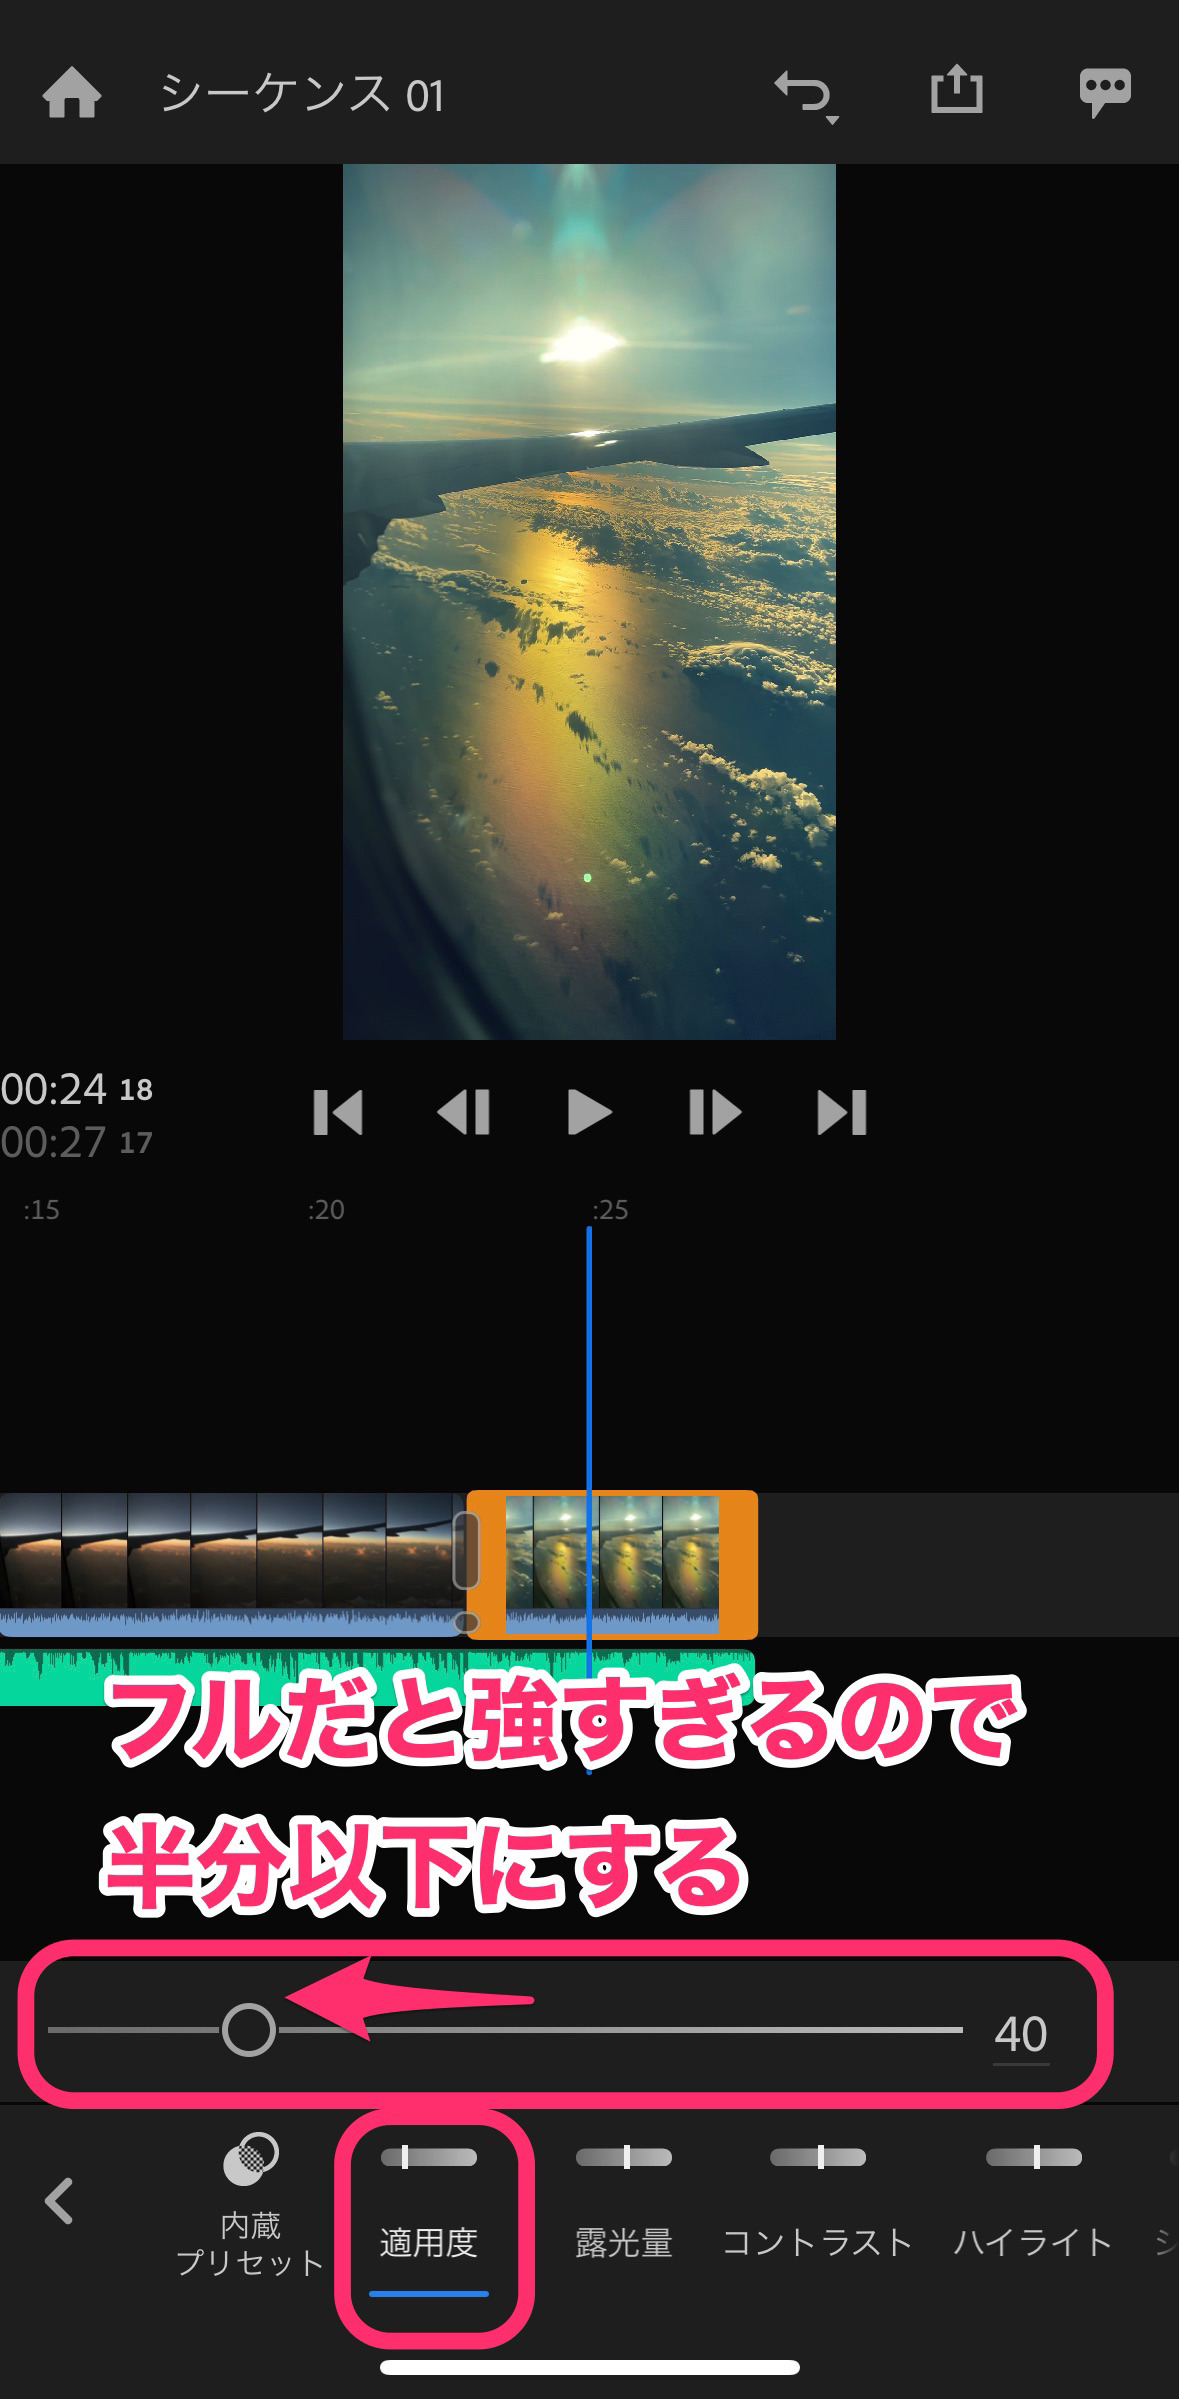
ただ、フルだと効きすぎている感じなので、「適用度」で弱めます。
適用度を40にします。
「カラー」ではプリセット以外に以下の項目を調整できます。
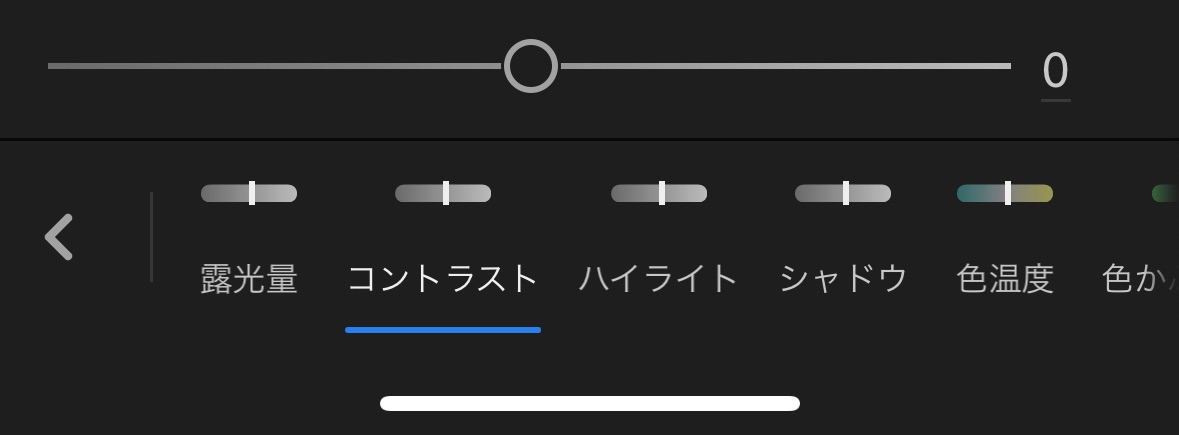
- 露光量
- コントラスト
- ハイライト
- シャドウ
- 色温度
- 色かぶり補正
- 自然な彩度
- 彩度
- 色あせたフィルム
- シャープ
- ビネット適用量
- ビネットぼかし
HidekiRushのカラーは、細かく色を調整できます!
書き出し方法
一通り編集が終わったら一つの動画ファイルとして書き出しをしましょう!
画面右上の「書き出し」をタップします。
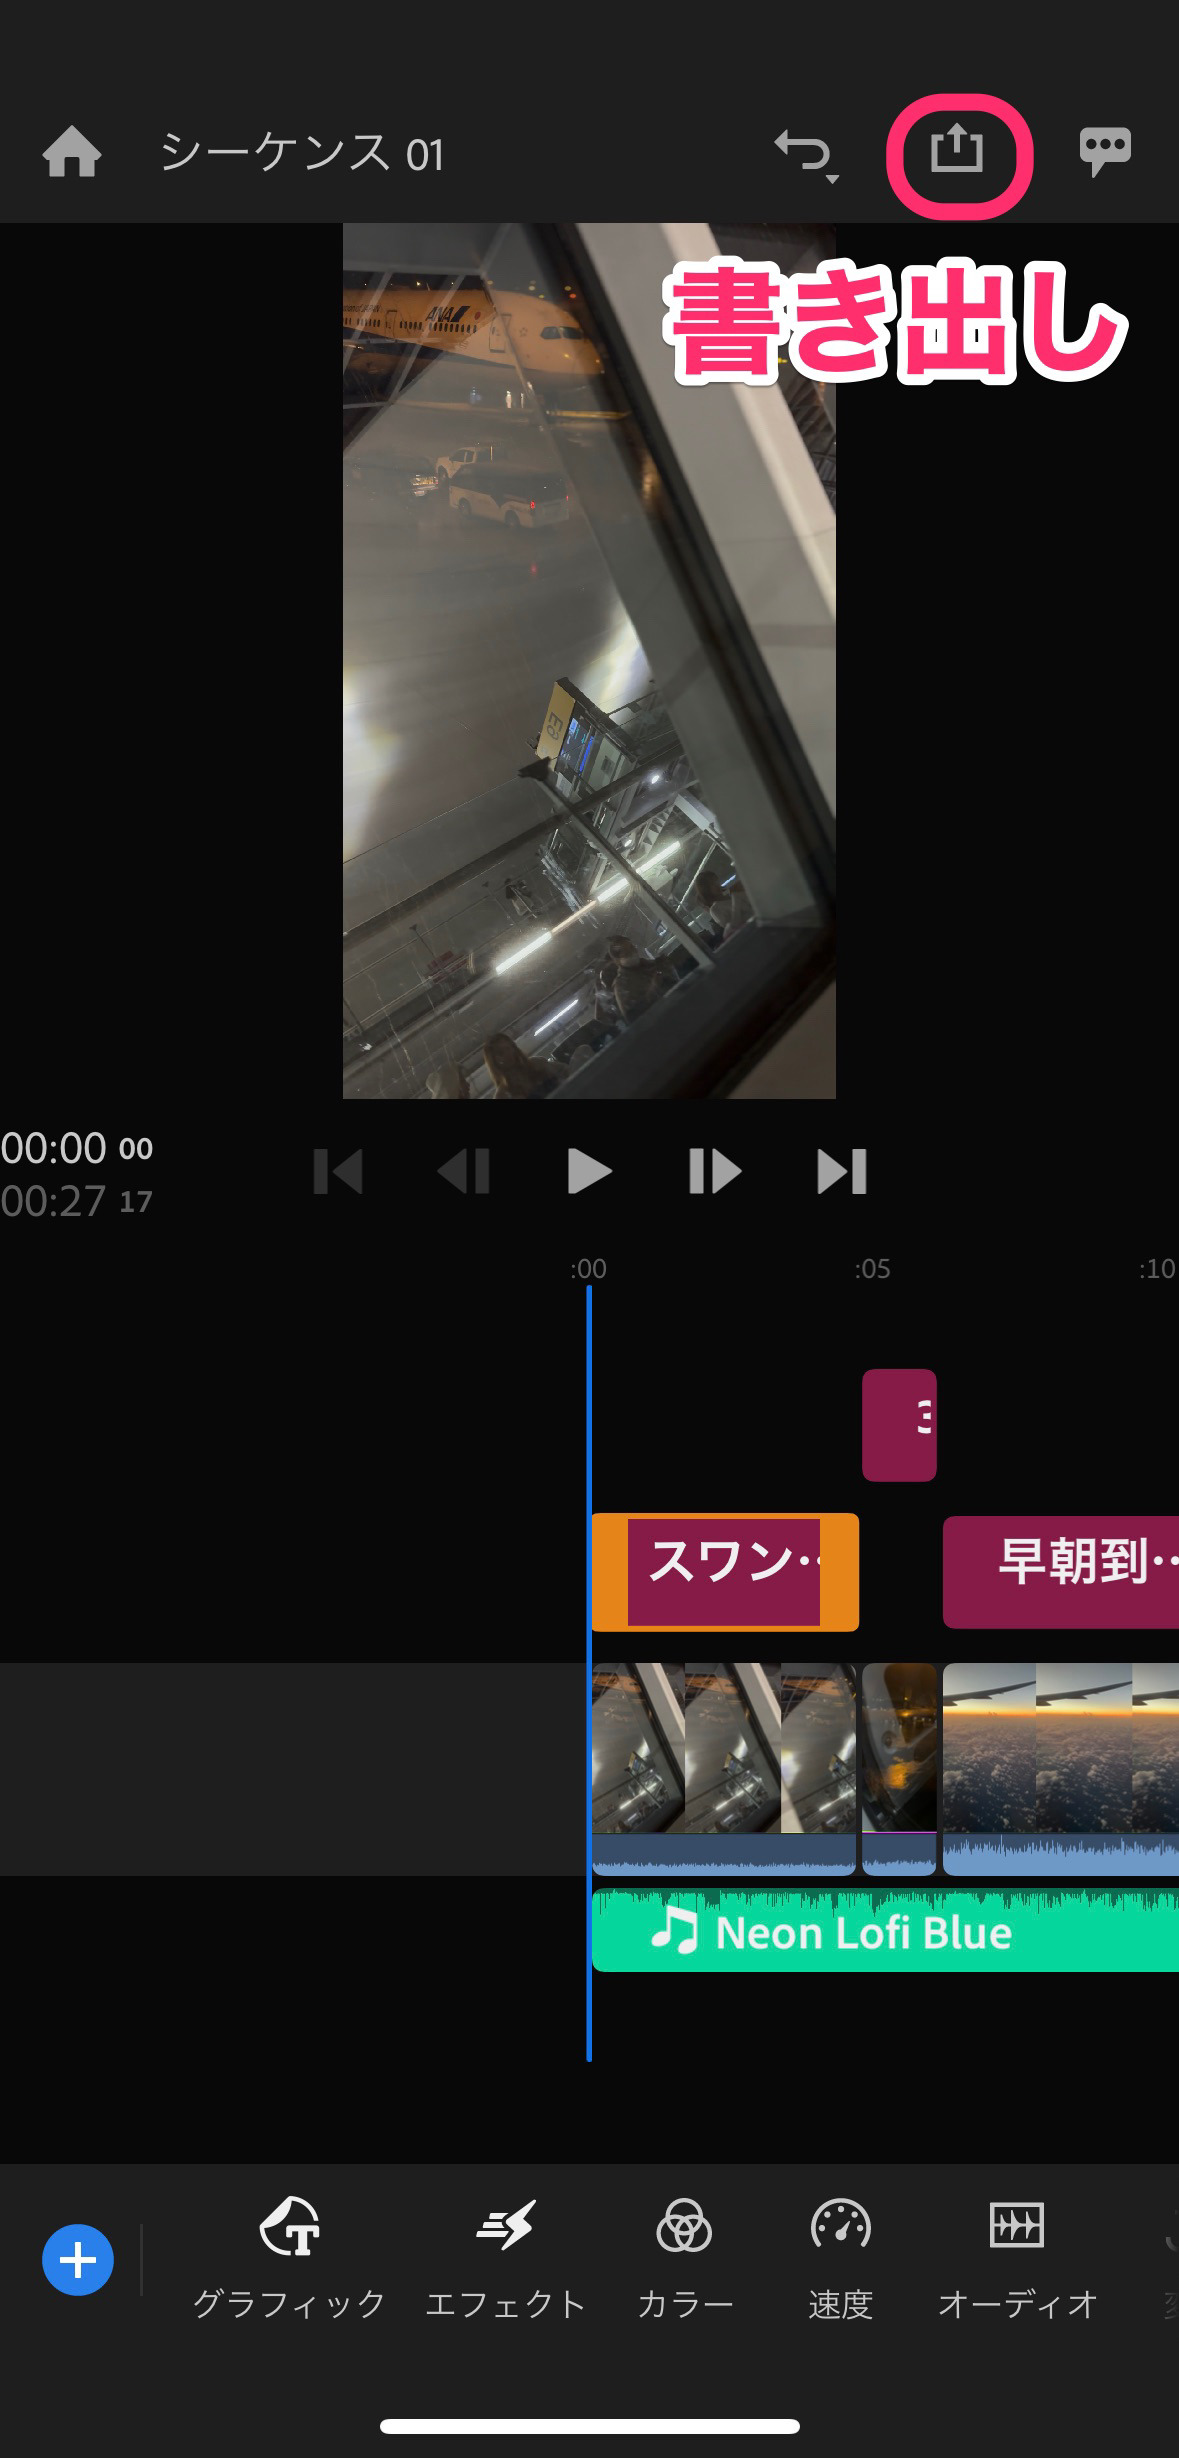
「1080pで書き出し」をタップします。
星マークが付いている「4Kで書き出し」を選択すると有料契約を促されてしまいます。
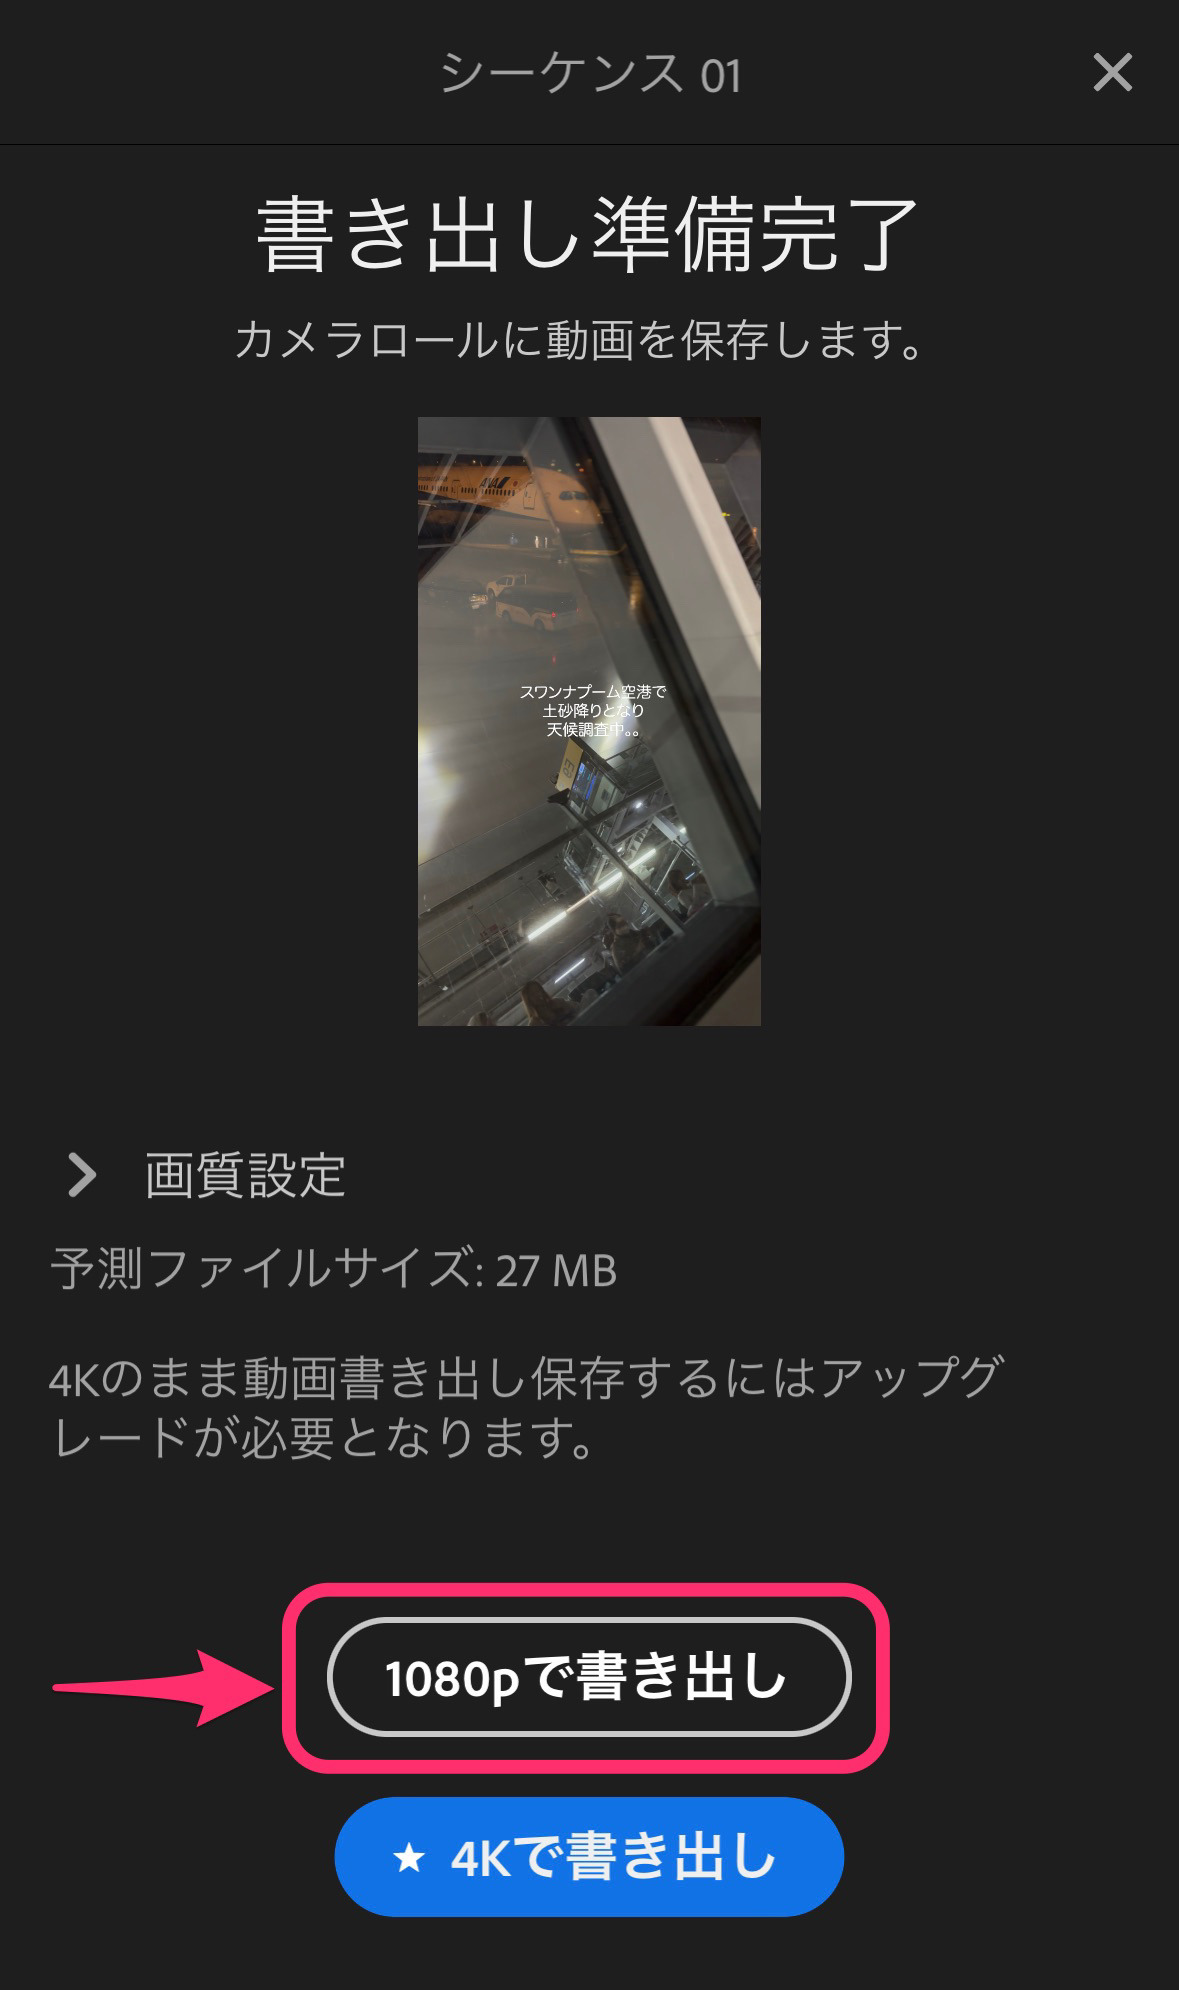
iPhone内の「写真」に書き出されているのでチェックしてみましょう!
書き出した動画をインスタに公開してみました。
どうぞご覧ください。
まとめ
いかがでしたでしょうか?
Adobeのアプリなのに、少し(かなり^^;)使いづらさがあります。
文字入れがタイトルでしか入れられません。
とても残念なのが、文字入力してからのフォント、フォントサイズの変更ができないことです。
また、片側のクロスディゾルブをやろうとしてもクリップの両端に入ってしまいます。
他の動画編集アプリでは、シンプルにクリップ間にボタンがあり、タップするだけで指定できます。
正直、Premiereの名が泣きます。。
有料契約に誘導したいのならもう少し完成度を高めて欲しいです。
これでは他の動画編集アプリをつかったほうがマシに感じてしまいます。
私のよく使うオススメはFilmora(フィモーラ)です。
PC版もスマホ版も使えるマルチプラット1年間プラン(7,980円/年)がありお得感が高いです!
→ Macで使う旅Vlog動画編集ソフトおすすめ6選!初心者から上級者まで
→ Windowsで使う旅Vlog動画編集ソフトおすすめ5選